DoAl.L INSTRUCTION MANUAL 15
-‘
-gun.’-u’-.1-.1.
l.:.—..—.,C:D‘
'
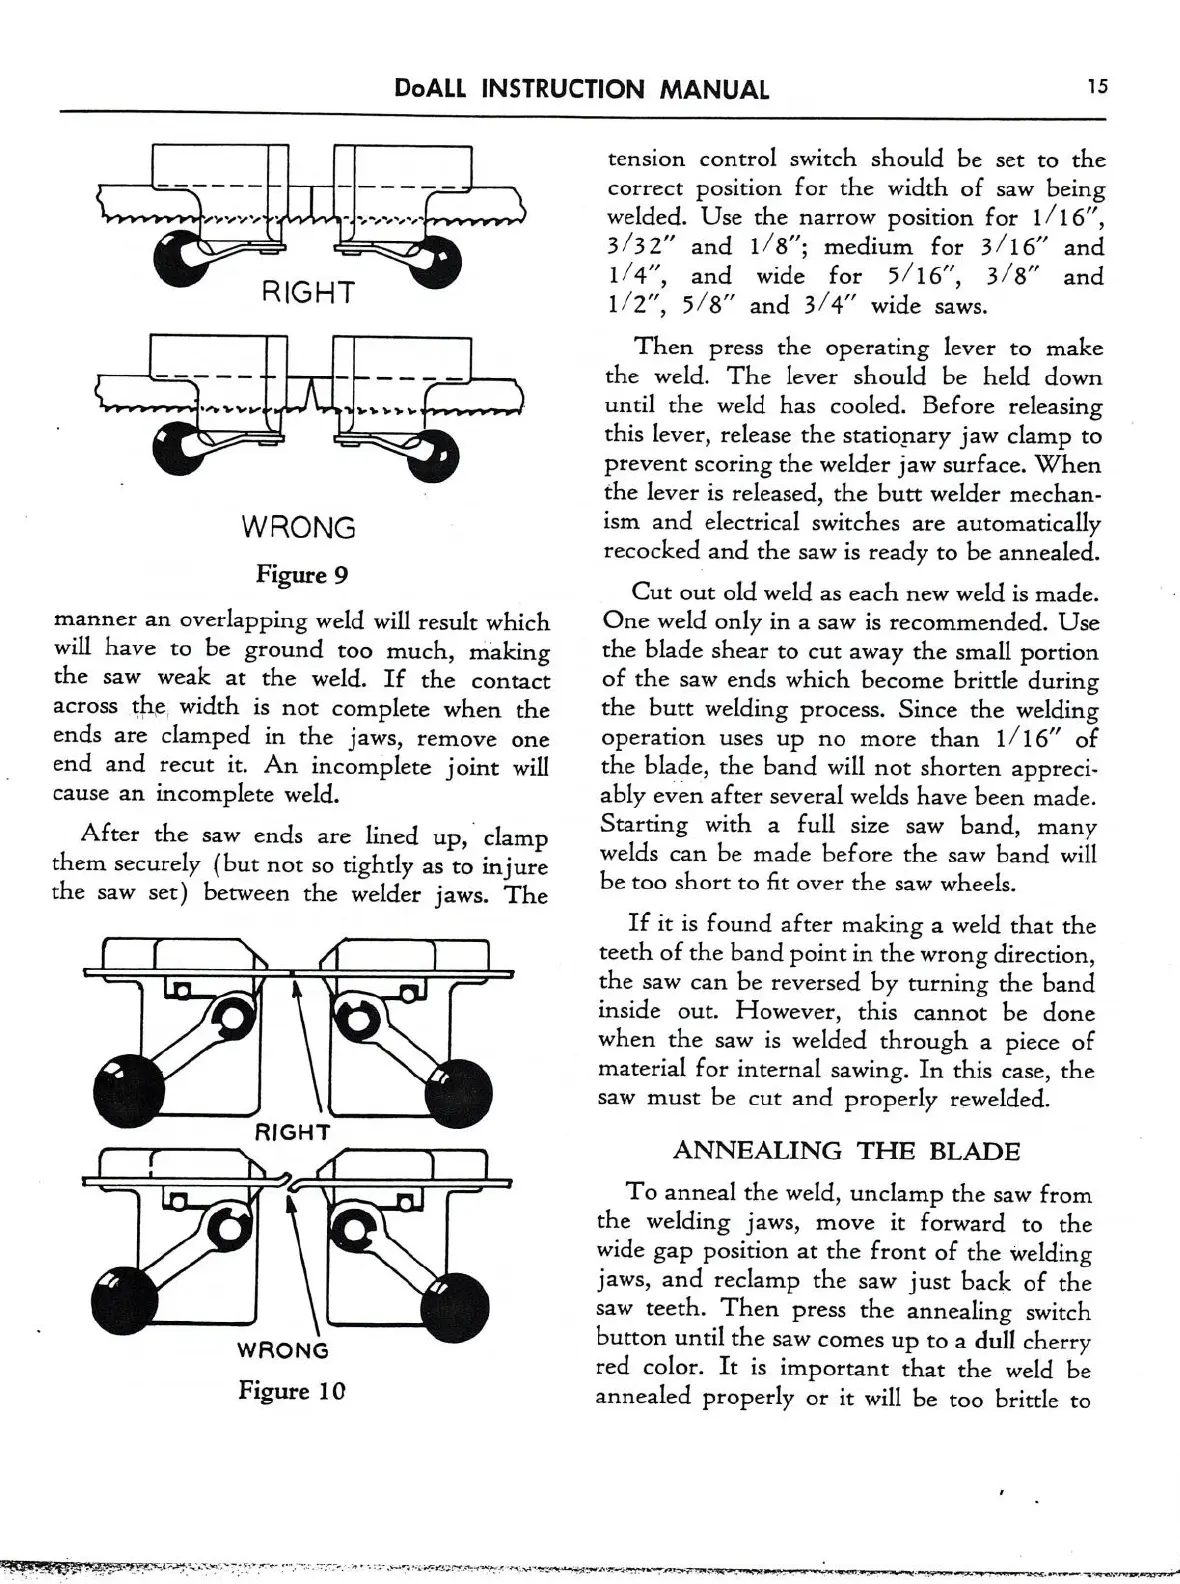
WRONG
Figure 9
manner
an
overlapping weld will result which
will have
to
be ground
too
much, making
the
saw
weak
at
the weld.
If
the
Contact
across
the width is
not
complete when the
ends
are
clamped in the jaws,
remove
one
end and
recut
it.
An
incomplete joint will
cause
an
incomplete weld.
After the
saw
ends
are
lined up,‘ clamp
them securely (but
not
so
tightly
as
to
injure
the
saw
set) between the welder jaws. The
WRONG
Figure 10
tension control switch should be
set
to
the
correct
position for the width of
saw
being
welded. Use the
narrow
position for 1/16",
3/32" and 1/8"; medium for 3/16" and
1/4", and wide for 5/16", 3/8" and
1/2", 5/8" and 3/4" wide
saws.
Then press the operating lever
to
make
the weld. The lever should be held down
until the weld has cooled. Before releasing
this lever, release the stationary jaw clamp
to
prevent scoring the welder jaw surface. When
the lever is released, the butt welder mechan-
ism and electrical switches
are
automatically
recocked and the
saw
is ready
to
be annealed.
Cut
out
old weld
as
each
new
weld is made.
One weld only in
a
saw
is recommended. Use
the blade shear
to
cut
away the small portion
of the
saw
ends which become brittle during
the butt welding process. Since the welding
operation
uses
up
no
more
than 1/16" of
the blade, the band will
not
shorten appreci-
ably even after several welds have been made.
Starting with
a
full
size
saw
band, many
welds
can
be made before the
saw
band will
be
too
short
to
fit
over
the
saw
wheels.
If
it
is found after making
a
weld that the
teeth of the band point in the wrong direction,
the
saw
can
be reversed by turning the band
inside
out.
However, this
cannot
be done
when the
saw
is welded through
a
piece of
material for internal sawing.
In
this case, the
saw
must
be
cut
and properly rewelded.
ANNEALING
THE
BLADE
To anneal the weld, unclamp the
saw
from
the welding jaws,
move
it
forward
to
the
wide gap position
at
the front of the welding
jaws, and reclamp the
saw
just back of the
saw
teeth. Then press the annealing switch
button until the
saw
comes
up
to a
dull cherry
red color.
It
is important that the weld be
annealed properly
or
it
will be
too
brittle
to
v-1
.-I“e--
'7-3-._
-4-
-. .:-_....-—,
.._
-_._:,p,;_—-.« .-...,-w_._.
_.
4.,
_
4
V
~..a-.+—>
..
-.
-m