64 Dolby
®
Digital Cinema System Manual Issue 0.92 (Preliminary)
Installing a Dolby Digital Cinema System
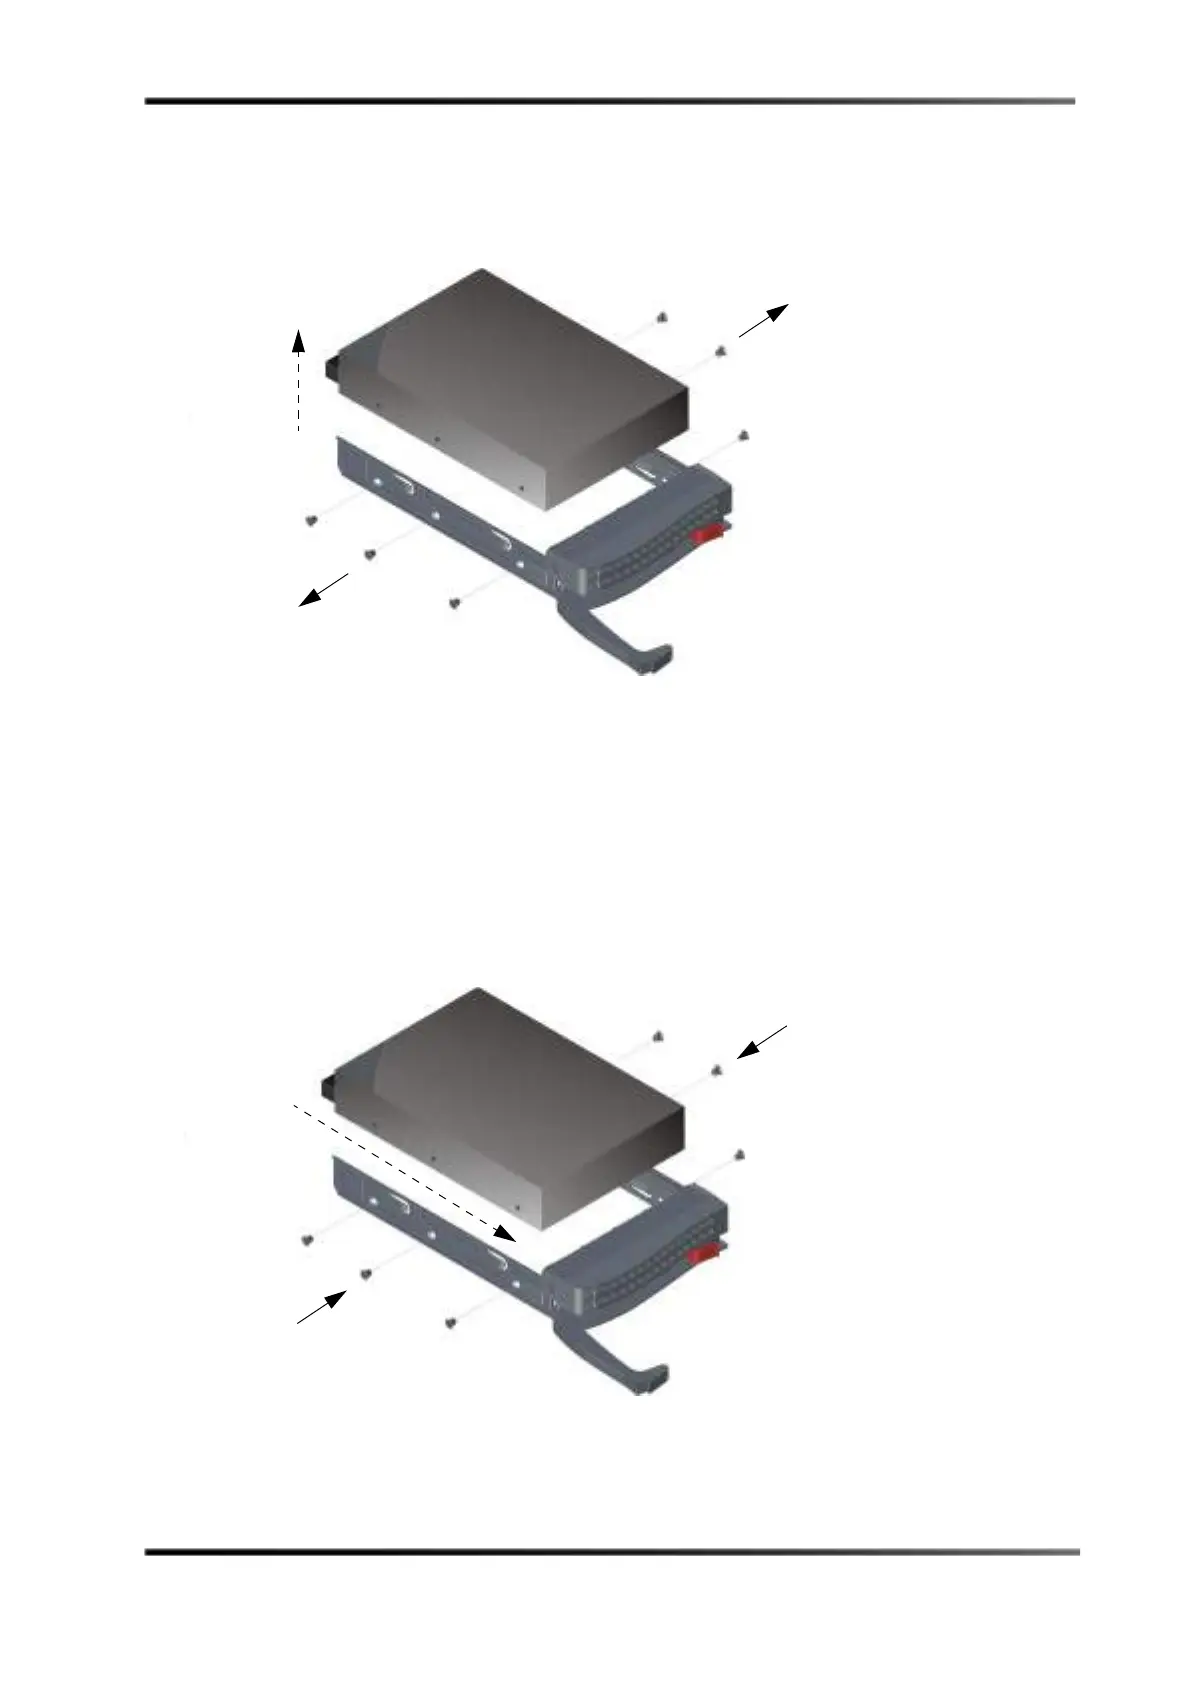
4. Place the drive tray on a flat, stable surface such as a desk, table, or work bench.
5. Use a Phillips screwdriver to remove the six screws securing the failed drive to the
drive tray, then lift the drive out of the tray, as shown in Figure 3-74.
Figure 3- 74
Figure 3-74 Removing the Failed Drive from the DSS220 Drive Tray
6. Slide the replacement drive into the tray with the printed circuit board facing down,
as shown in Figure 3-75.
You can replace a drive with a higher-capacity unit, but not with a lower-capacity unit.
7. Carefully align the mounting holes on the drive and the tray.
Make sure the bottom of the drive and the bottom of the tray are flush.
8. Use a Phillips screwdriver to secure the drive to the drive tray using all six screws you
removed in step 5.
Figure 3- 75
Figure 3-75 Installing the Replacement Drive in the DSS220 Drive Tray
 Loading...