2
TABLE OF CONTENTS
INTRODUCTION ....................................................................................................................................................................2
DOCUMENT SYMBOLS ........................................................................................................................................................2
IMPORTANT SAFETY INSTRUCTIONS ................................................................................................................................ 3
A. Recognize Safety Information ...................................................................................................................................3
B. Understand Signal Words ..........................................................................................................................................3
C. Supplemental Directives ............................................................................................................................................ 3
D. General Safety Messages .........................................................................................................................................3
GENERAL INFORMATION .....................................................................................................................................................3
A. Included Hardware ....................................................................................................................................................3
B. Optional Components & Kits .....................................................................................................................................3
SPECIFICATIONS .................................................................................................................................................................. 4
A. Hardware Dimensions (Back Channel) .....................................................................................................................4
B. Door Clearance .........................................................................................................................................................4
C. Measuring Tips ..........................................................................................................................................................4
PREPARE FOR INSTALLATION ............................................................................................................................................5
A. Door Roller And Edge Guard (Optional) .................................................................................................................... 5
B. Prepare Awning Rail And Insert Fabric ...................................................................................................................... 5
C. Prepare Awning For Installation .................................................................................................................................5
D. Determine Awning Location ....................................................................................................................................... 7
INSTALL ELECTRICAL KITS .................................................................................................................................................8
A. Install (Fixed / Wired) Awning Switch ........................................................................................................................8
B. Install Track And Light Switches (If Applicable) .........................................................................................................8
C. Install Ignition / Safety Interlock System .................................................................................................................... 8
D. Install LED Light Switch (If Applicable) ...................................................................................................................... 8
INSTALL AWNING ..................................................................................................................................................................9
A. Insert Awning Fabric Into Awning Rail .......................................................................................................................9
B. Attach Top Mounting Brackets ................................................................................................................................. 10
C. Attach Back Channels ............................................................................................................................................. 11
D. Electrical Connections To Awning ............................................................................................................................ 12
E. Complete Back Channel Installation ........................................................................................................................13
F. Secure Awning Fabric To Awning Rail .....................................................................................................................14
VERIFY INSTALLATION.......................................................................................................................................................14
A. Test Operation .........................................................................................................................................................14
B. Secure Awning For Travel .......................................................................................................................................14
C. Keep Literature ........................................................................................................................................................14
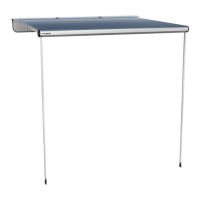
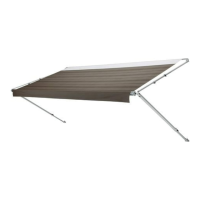
INTRODUCTION
This awning (hereinafter referred to as “awning,” or “product”) is designed and intended for use on RVs with straight sides.
For curved sides, please see the separate Hardware List in the Dealer Service Manual for the appropriate model. This
product can be installed by one person with brief help from additional personnel. Use these instructions to ensure correct
installation and function of product.
Dometic Corporation reserves the right to modify appearances and specications without notice.
DOCUMENT SYMBOLS
Indicates additional information that is NOT related
to physical injury.
Indicates step-by-step instructions.
 Loading...