“More information https://www.caravansplus.com.au"
DC CONNECTION
12 Volts DC
Supplies
The connections
are
made to the termina! blocks marked
12 volts DC house
battery,
and 12 volt vehicle
battery
battery
connection.
To avoid a
voltage drop,
the cross sectional area of the con-
necting
wires between
the vehicle
battery
and
the
refrigerator
must be as those
given
in the table below.
To ensure safe
operation,
the
positive
lead must be fitted with
a fuse
rated as those
given
in the table below.
The cross section of the 12 volt
DC
wires
between the
continuous
12 volt
DC house
battery
terminal
and
the
battery
can be 1.5 mm
The
positive
lead must be fitted with a fuse
rated at 15
amps.
Correct
polarity
must be observed when
connecting
to the
12 V DC
supply.
Note! Do not use the
body
or chassis of the vehicle as a
sub
stitute for either of the two conductors. Electrical leads must
be routed and secured so
that
they
cannot come into contact
with hot or
sharp parts
of the
refrigerator.
Do not connect
any
other electrical
equipment
or
lighting
to
the
refrigerator
circuit.
CHANGING
DOOR SWING TO
OPPOSITE
SIDE
(Requires opposite
hinge
kit)
Hinge
conversion kits are included with each
refrigerator,
follow
the instructions included with the conversion kit.
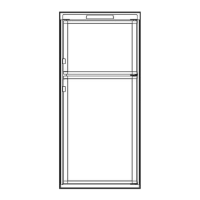
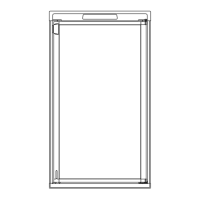
INSTRUCTIONS FOR MOUNTING THE
DOOR
PANEL
RM2356
The
refrigerator
is
normally
delivered without door
panel.
Before
starting
the
mounting
work,
check that the
panel
dimensions are in
compliance
with those
given
in the
Table and the instructions are read
thoroughly.
We recommend to mount the
panel!
on the door before
the
refrigerator
is installed in the enclosure.
When
mounting
the
panel,
proceed
as follows:
e
Remove
the
screws from
the
top
door
cover
strip
and remove the cover
strip by pulling straight upwards.
*
Slide
the
panel
from the
top
of the door into the
grooves
on the vertical
edges
of the door
sliding
down
wards until the
panel
fits into the lower door
edge.
*
Replace
the
top
decoration
strip
and
fasten
with
the 3 screws.
RM2356
PANEL
DIMENSIONS
MAX.
THICKNESS
(4 mm)
REFR.
MODEL HEIGHT
WIDTH
TYPE MAX. MIN. MAX. MIN.
RM2356
710
708
498
496
RM2356
Fuse 20
amp
wire size 6 mm
RM2456 & RM2556
Fuse 20
amp
wire size 6 mm
RM4606
&
RM4806
Fuse 30
amp
wire size 10 mm
mm
REFRIGERATOR REMOVAL
| . Before
working
on
the
refrigerator,
make
sure the
230- 240
V
AC
voltage
and !2
V
DC
voltage
leads
are disconnected.
2.
Shut off
the
gas supply
at the
ULP
gas
bottle
Disconnect the
gas supply
line.
Always use a back
up
wrench when
loosening
and
tightening
connections.
wo
4.
Cap
the
gas supply
line,
loosen the screws anchor-
ing
the
refrigerator
to the enclosure and slide the
refrigerator
out of the
compartment.
5. When
replacing
the
refrigerator
make sure that the
sealing strips
are
properly positioned.
6.
Replacement
is the reverse of removal. Check all
connections for
gas
leaks.
8