10
E. Slide Out Room Flange Edge Protectors
ALWAYS install edge protectors on
slide out room ange. Otherwise, damage to aw-
ning fabric could occur.
Starting at 1/4″ to 1/2″ beyond edge of slide out
room ange, press edge protector onto top edge
(of slide out room ange) until it is fully engaged
and secured in place. Repeat for other end. See
(FIG. 20).
See “B. Optional Components & Kits” on
page (4) to order Dometic edge protec-
tors.
A Dometic edge protector may NOT be com-
patible with all applications. If a Dometic
edge protector cannot be used, a similar
type (compatible) edge protector MUST be
installed.
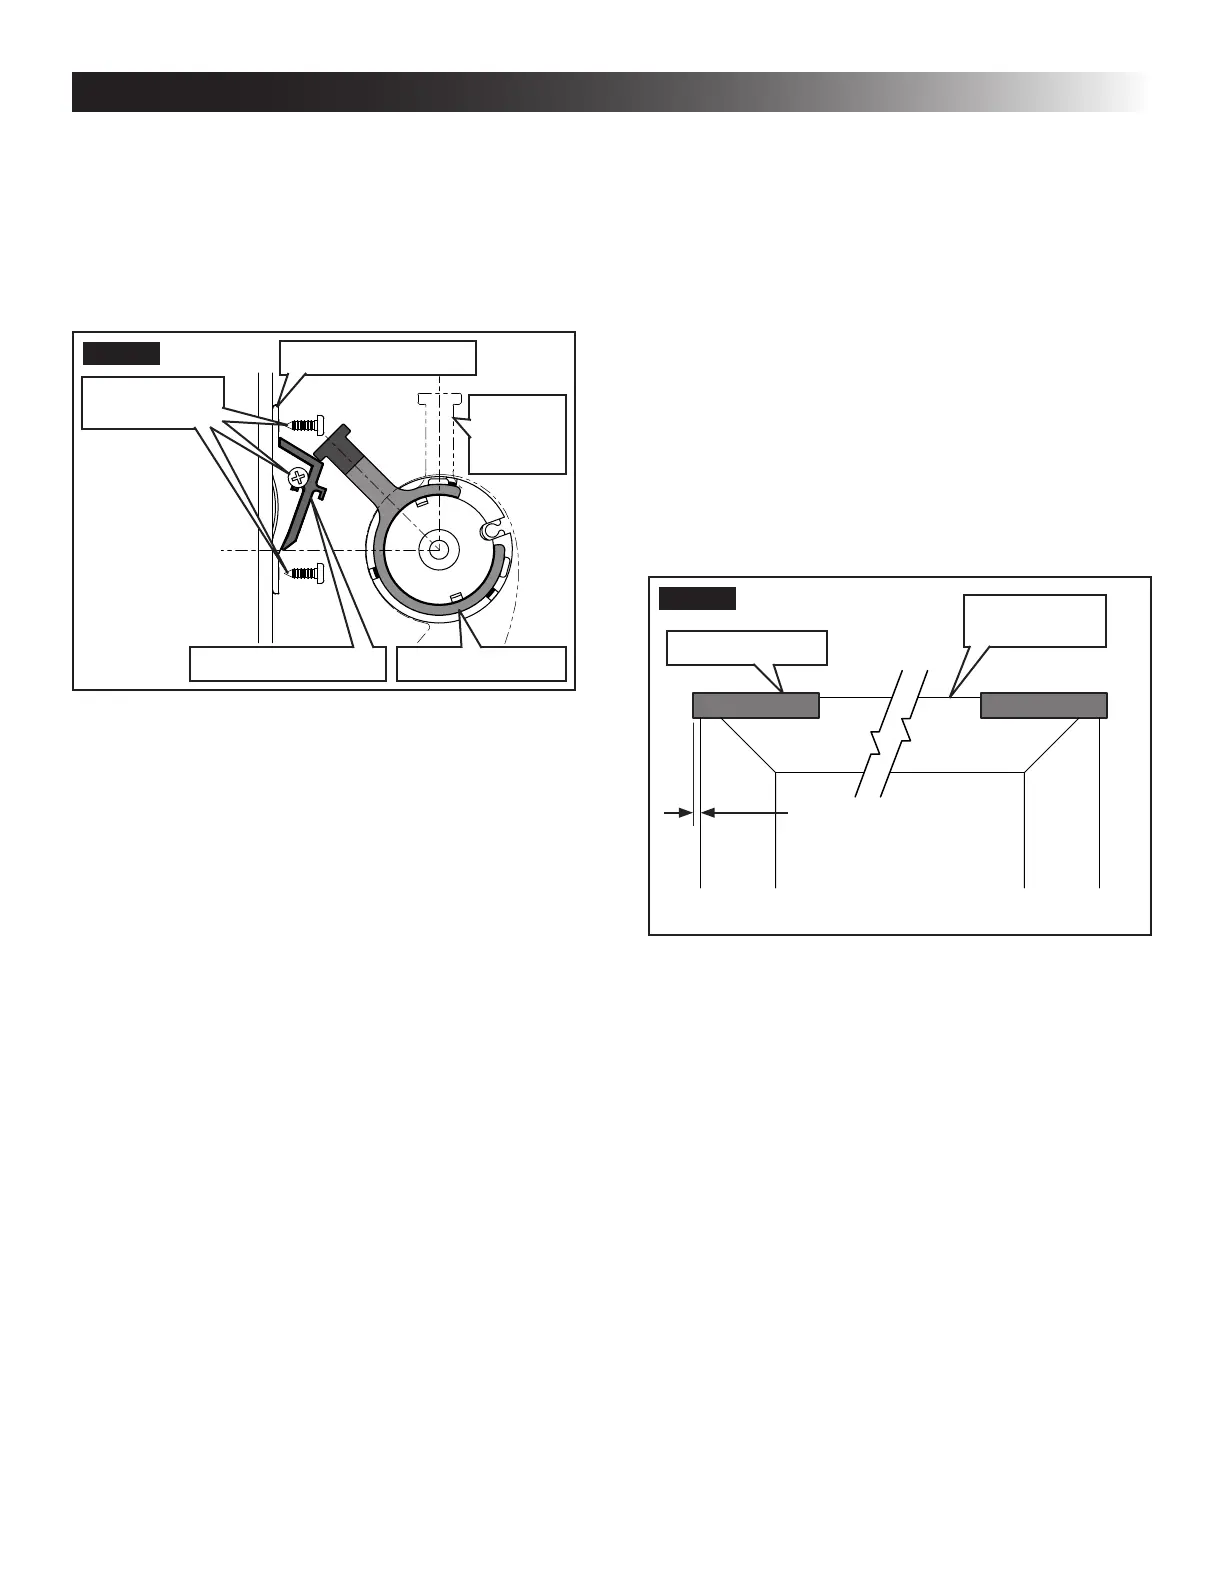
FIG. 20
Slide Out
Room Flange
Edge Protector
1/4″ - 1/2″
(Typical)
3. Using the correct conguration for spacing, posi-
tion anti-billow bracket (with anti-billow spacer if
applicable) on RV wall, then tape in place. See
(FIG. 18).
4. Verify anti-billow stop will clear anti-billow brack-
et (with anti-billow spacer if applicable) as slide
out room opens. Make adjustments as neces-
sary. See (FIG. 19).
FIG. 19
Anti-Billow Spacer
Anti-Billow Bracket
#10-12 X 3/4″
Screw
Up (Ideal
Resting
Position)
Anti-Billow Stop
5. Place and tighten #10 self drilling screws (pro-
vided) through anti-billow stop and into end cap.
See (FIG. 16) & (FIG. 17).
Use care NOT to move anti-billow stop or
scratch end cap while installing screws.
6. Place and tighten #10-12 X 3/4″ screws (pro-
vided) through anti-billow bracket and into solid
structure of RV. See (FIG. 19).
If installing on a berglass wall, use ap-
propriately sized oscar rivets (installer
supplied) instead of screws. See “B. Op-
tional Components & Kits” on page (4)
to order oscar rivets.
7. Repeat steps (1) through (6) for second anti-bil-
low stop (if applicable) on other end cap.
8. Remove tape from anti-billow stop(s), end
cap(s), and anti-billow bracket(s).
INSTALLATION
 Loading...