6
SPECIFICATIONS
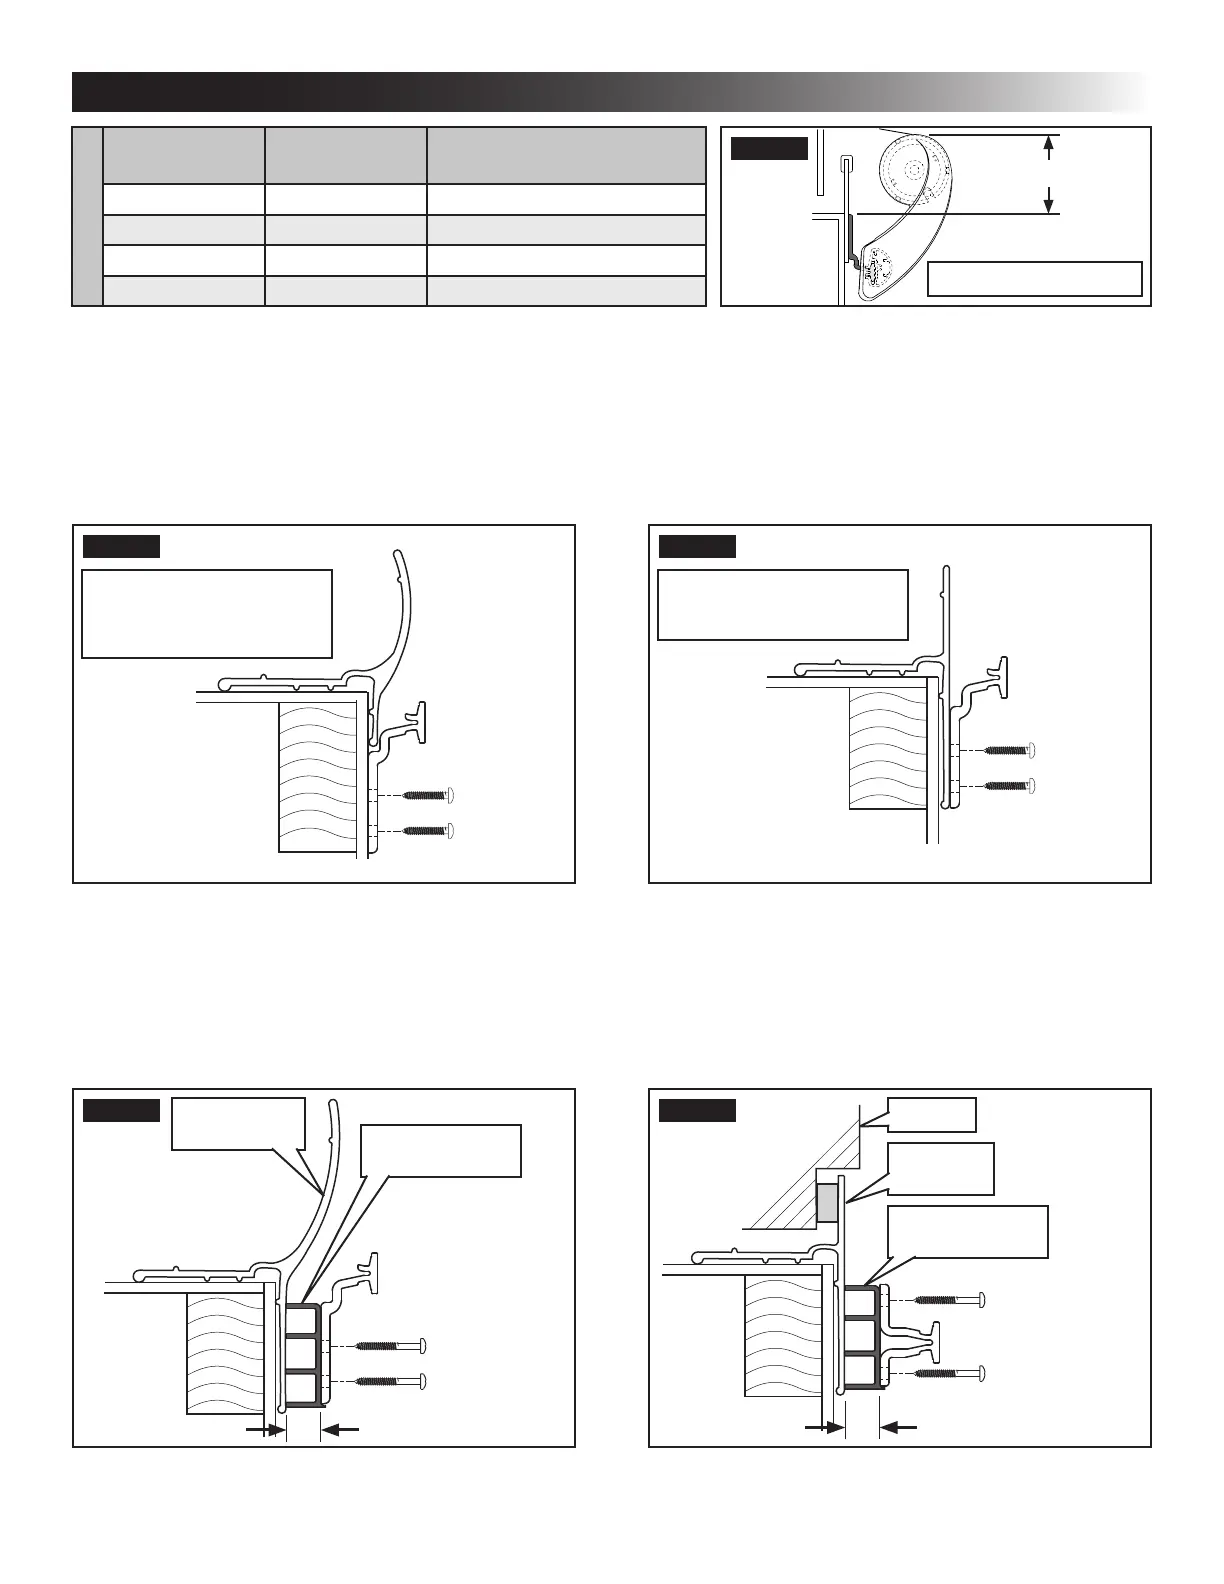
A
(Tall Bracket)
B
(Short Bracket)
Conguration
Table 1
6″ 4 1/2″ Standard (Shown)
2 1/2″ 4 1/4″ Inverted Bracket Only
5 5/8″ 4 1/8″ Inverted Extension Only
2 1/8″ 3 7/8″ Inverted Bracket & Extension
FIG. 5
A
Inverted Tall Bracket
2. Determine mounting bracket location relating to awning rail and slide out room ange. See (FIG. 3), (FIG. 4),
(FIG. 5), (FIG. 6), & (FIG. 7).
If slide out room has extra large anges, it may be necessary to install mounting brackets directly on ange,
but ONLY if it provides solid structural support.
To help accommodate water and debris runoff, awning fabric should have as steep a pitch (slope) as feasible
without exceeding the maximum distance shown between awning rail and mounting bracket. Exceeding the
maximum distance will expose awning fabric to catch the wind (causing fabric to billow or tear).
FIG. 6
Mounting Bracket Shown
In Typical Position
(Below Flange)
FIG. 7
Mounting Bracket Shown
Directly On Flange
C. Mounting Bracket Spacer (Optional)
If slide out room ange has special features (large curve, recessed into RV wall, etc.) that will interfere with normal
operation of Slide Topper, a mounting bracket spacer (NOT INCLUDED) must be installed. See (FIG. 8) & (FIG. 9).
See “B. Optional Components & Kits” on page (4) to order.
FIG. 8
Mounting
Bracket Spacer
Large Curve
In Flange
3/4″
FIG. 9
Mounting
Bracket Spacer
RV Wall
Recessed
Flange
3/4″
 Loading...