DORMA
WN 058022 45532
11/11
60
Montageanleitung
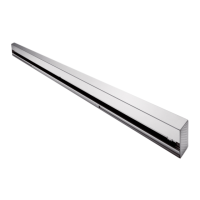
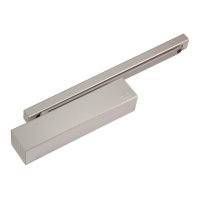
ES 410 / ES 420
Mounting instruction
Inbetriebnahme (Softwareversion V6.70)
Arbeiten an Elektroanlagen dürfen nur von
geschulten Fachkräften ausgeführt werden.
Vor dem Einbau vor Ort bitte elektrische
Anschlüsse verdrahten und prüfen.
Die Anlagen ES 410 und ES 420 dürfen nur im
Innenbereich eingesetzt werden.
Die Inbetriebnahme per Autoparametrierung
muss nach erfolgter Montage oder wenn eine
Änderung der Öffnungsweite erfolgt ist, ausge-
führt werden. Unter Umständen hilft eine
Autoparametrierung auch bei unerklärlichem
Verhalten der Anlage.
Ein PC mit Bediensoftware kann hilfreich sein,
um sich den Status anzeigen zu lassen, Parame-
ter einzustellen und die Autoparametrierung zu
starten.
1. Anlage auf Sauberkeit überprüfen.
Schließbereich der Tür freihalten.
Kontrollieren ob nötige Brücken eingesetzt sind,
z.B. Riegelkontakt und Lichtschranke.
Die restlichen Eingänge sollen nicht aktiv sein.
Tür in Offenposition schieben.
2. Versorgungsspannung anschließen.
3. Reset-Knopf für gut 10 Sekunden drücken bis
Relais klickt (Bild 13) oder am PC
„Autoparametrierung“ auswählen.
4. Die Tür führt nun die nötigen Bewegungen in der
folgenden Sequenz durch:
Tür fährt ca. 15 cm in Schliessrichtung und hält
an.
Tür öffnet in Schnellfahrt und fährt hart auf den
Stopper auf, danach wird die Strecke in
Zu-Richtung langsam abgefahren.
Nach kurzer Pause wird eine Öffnung mit starkem
Abbremsen (zur Gewichtsbestimmung) ausgelöst,
dann fährt die Tür langsam bis zum Anschlag
weiter.
Nach kurzer Pause wird eine Schließung mit
starkem Abbremsen (ebenfalls zur Gewichts-
bestimmung) ausgeführt, dann öffnet die Tür
langsam bis zum Anschlag.
Hier endet die Autoparametrierung und die
Referenzfahrten werden gestartet.
Es folgen zwei Bewegungen in Langsamfahrt als
Referenzfahrt. Nach erfolgreicher Referenzfahrt
schließt der Flügel und die Anlage ist bereit.
5. Die Offenhaltezeit der Türanlage kann problemlos
manuell eingestellt werden.
“Voll-Auf“-Taster drücken und gedrückt halten.
Während die Tür sich öffnet auch den Taster
„Teil-Auf“ drücken und beide gedrückt halten.
Nachdem die Tür ganz offen ist, müssen beide
Impulsgeber weiter solange aktiv gehalten
werden, wie die Tür offen bleiben soll.
Diese "Offenhaltezeit" ist ab jetzt eingestellt und
aktiv sobald die Tür ganz geöffnet wird.
23
Commissioning (Softwareversion V6.70)
Work on electrical equipment may only be
performed by properly qualified staff.
Please wire and check all electrical connections
before installing the system on site.
ES 410 and ES 420 are only suitable for
application on interior doors
The system has to be commissioned via the
automatic parameterisation after it has been
installed and whenever the setting of the opening
width has been changed. The automatic
parameterisation may also be useful whenever the
system behaves strangely.
With a PC and the respective user software, you
may have the system status indicated, adjust
parameters or start the automatic
parameterisation.
1. Check if the system is clean.
Make sure that there are no obstructions within
the door’s closing range.
Check if all required jumpers are properly
positioned (such as bolt contact and light
barrier).
The remaining inputs should not be activated.
Move the door to “open” position.
2. Connect the power supply.
3. Press and hold the reset key for at least 10
seconds until you hear the relay click (Picture 13)
or select the “Automatic parameterisation” via
the PC.
4. The door now performs the required movements
in the following order:
First the door closes by approx. 15 cm before it
stops.
Then it opens at high speed and crashes into the
stopper. After that the door slowly travels in
closing direction until it has reached its “closed”
position.
Following a short rest period, the door opens,
stops rapidly (in order to determine the door
weight) and then slowly moves on until it has
reached its full opening width.
After another short break, the door closes, stops
rapidly (in order to determine the door weight)
and then slowly opens to its full opening width.
Now the automatic parameterisation is completed
and the door performs two reference cycles at low
speed. After the reference cycles have been
performed, the door closes and the system is
ready for operation.
5. The hold-open time may easily be adjusted by
hand. Press the activators to open the door and
to adjust the PARTIAL OPEN function
simultaneously while the door performs an
opening cycle. As soon as the door has reached
its full opening width, press and hold both
activators for as long as you want the door to
remain open (hold-open time).