Standby mode. If you are not going
to use the heater for a long time,
press the POWER button to fully
shut down the heater. The power
LED will turn off.
4. SETTING THE THERMOSTAT
Press the MODE button, and set to
AUTO mode to engage the
automatic thermostat.
5. SETTING THE TEMPERATURE
To set the desired temperature:
Press the button once
until the numeric temperature starts
flashing.
Press the button again to
increase the temperature or the
button to decrease the
temperature.
After the desired temperature is set,
this will be your ideal setting. The
heater will run on HIGH until the room
temperature reaches the set
temperature. The heater will then
switch to run on LOW for 10 minutes.
The heater will turn off if the room
temperature is equal to or greater
than the set temperature. (The fan
will continue to run a minute until all
of the residual heat has been
expelled).
For example: If your ideal setting is
72°F, the heater will run on HIGH until
it reaches 72°F. The heater then will
switch to run on LOW for 10 minutes.
The unit will turn off if the room
temperature is equal to or greater
than the set temperature.
The default temperature setting is
preset from the factory at 68°F.
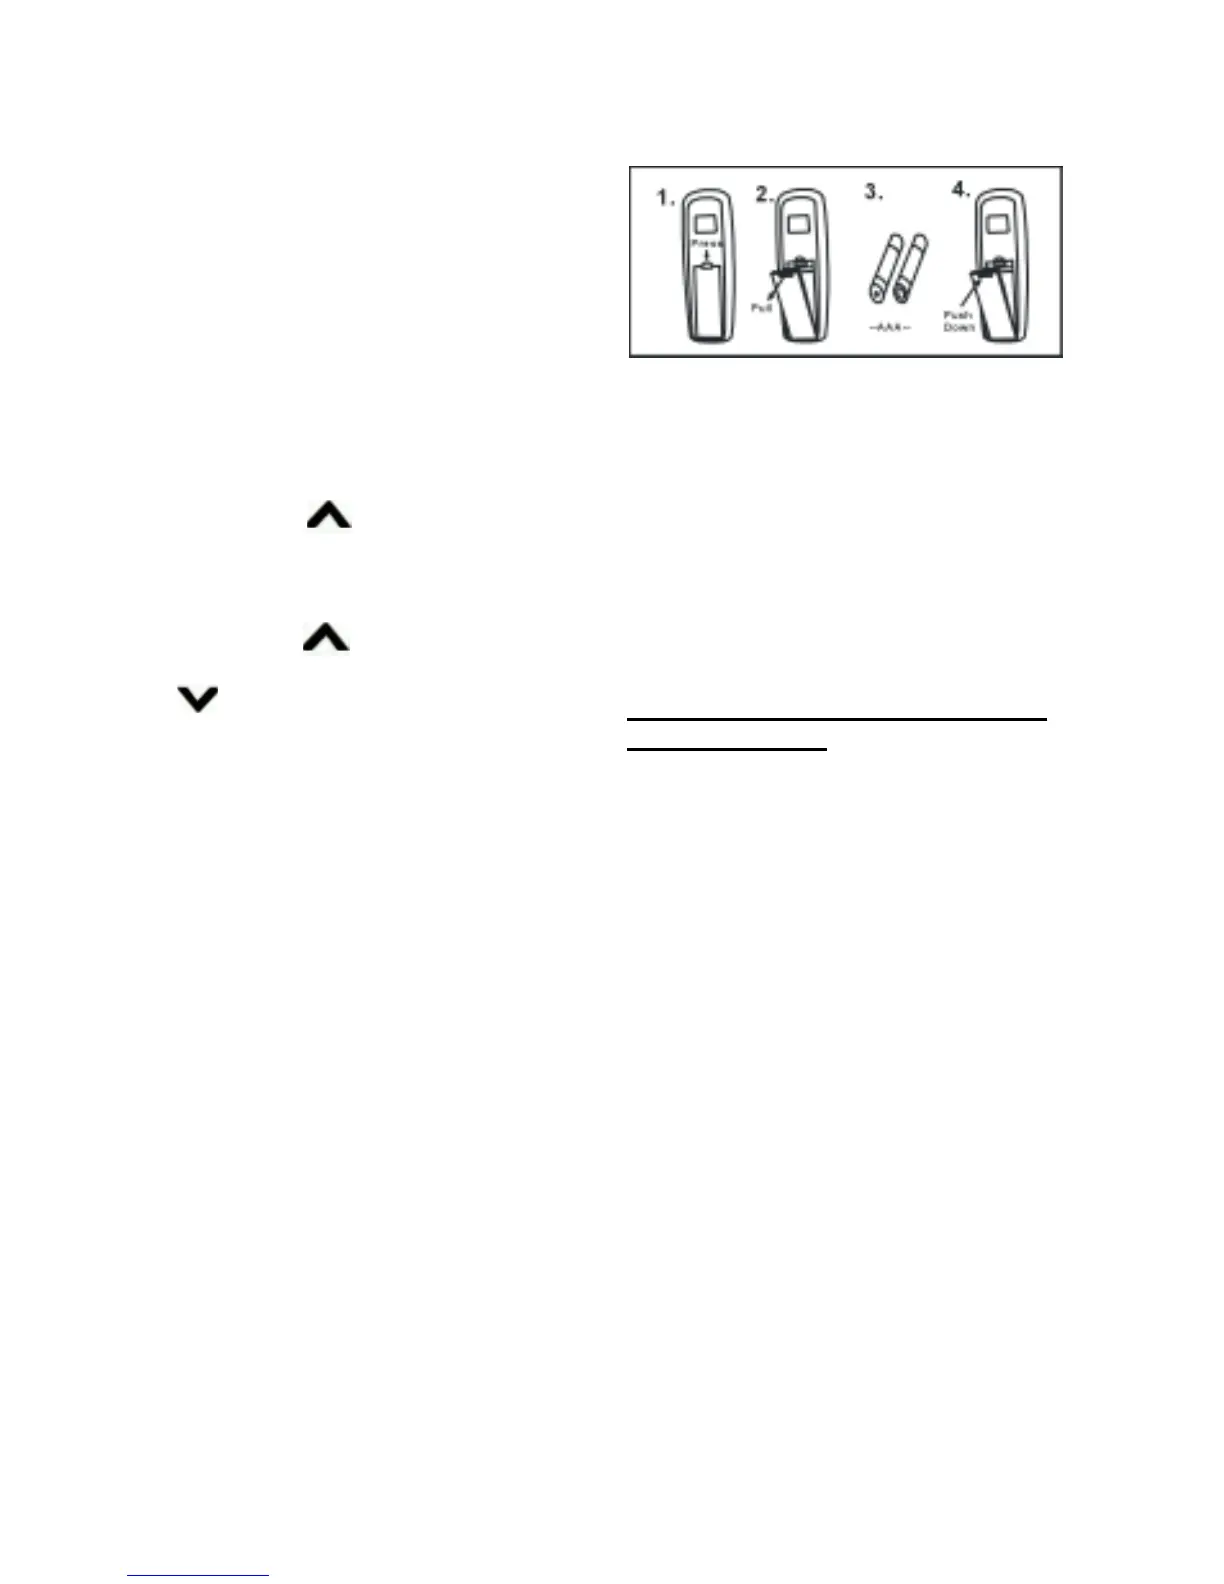
Remote Controller
HOW TO INSERT BATTERIES
NOTE: Remove the batteries if the
remote control is not to be used for a
month or more. Batteries left in the
unit may leak and cause damage.
DO NOT MIX OLD AND NEW
BATTERIES! DO NOT MIX
ALKALINE, STANDARD
(CARBON-ZINC) OR
RECHARGEABLE
(NICKEL-CADMIUM) BATTERIES!
Instructions for the Use of the IR
Remote Control
The buttons of the remote control
function in the same manner as those
on the control panel on the front of
the heater. Set the timer by using the
remote control.
Setting the Timer
1. Press the TIMER button until Set
Time starts flashing. The default
value is 3 hours.
2. Press the “+” button to increase the
set time or the “–” button to
decrease the set time.
The timer can be set from
1 to 12 hours. The timer will set
and execute after the LED display
stops flashing. The heater will shut
OFF automatically when the set
time is reached.
3. To turn the timer OFF, follow step 1,
pressing the “–” button to set the
time to 0. The timer feature will
turn off when the LED stops
flashing.