16 DR
®
PILOT TRIMMER/MOWER
Use only DR belts on your machine. Do not use hardware store variety belts.
Replacing the Trimmer Belt
Tools and Supplies needed:
3/8" Wrench
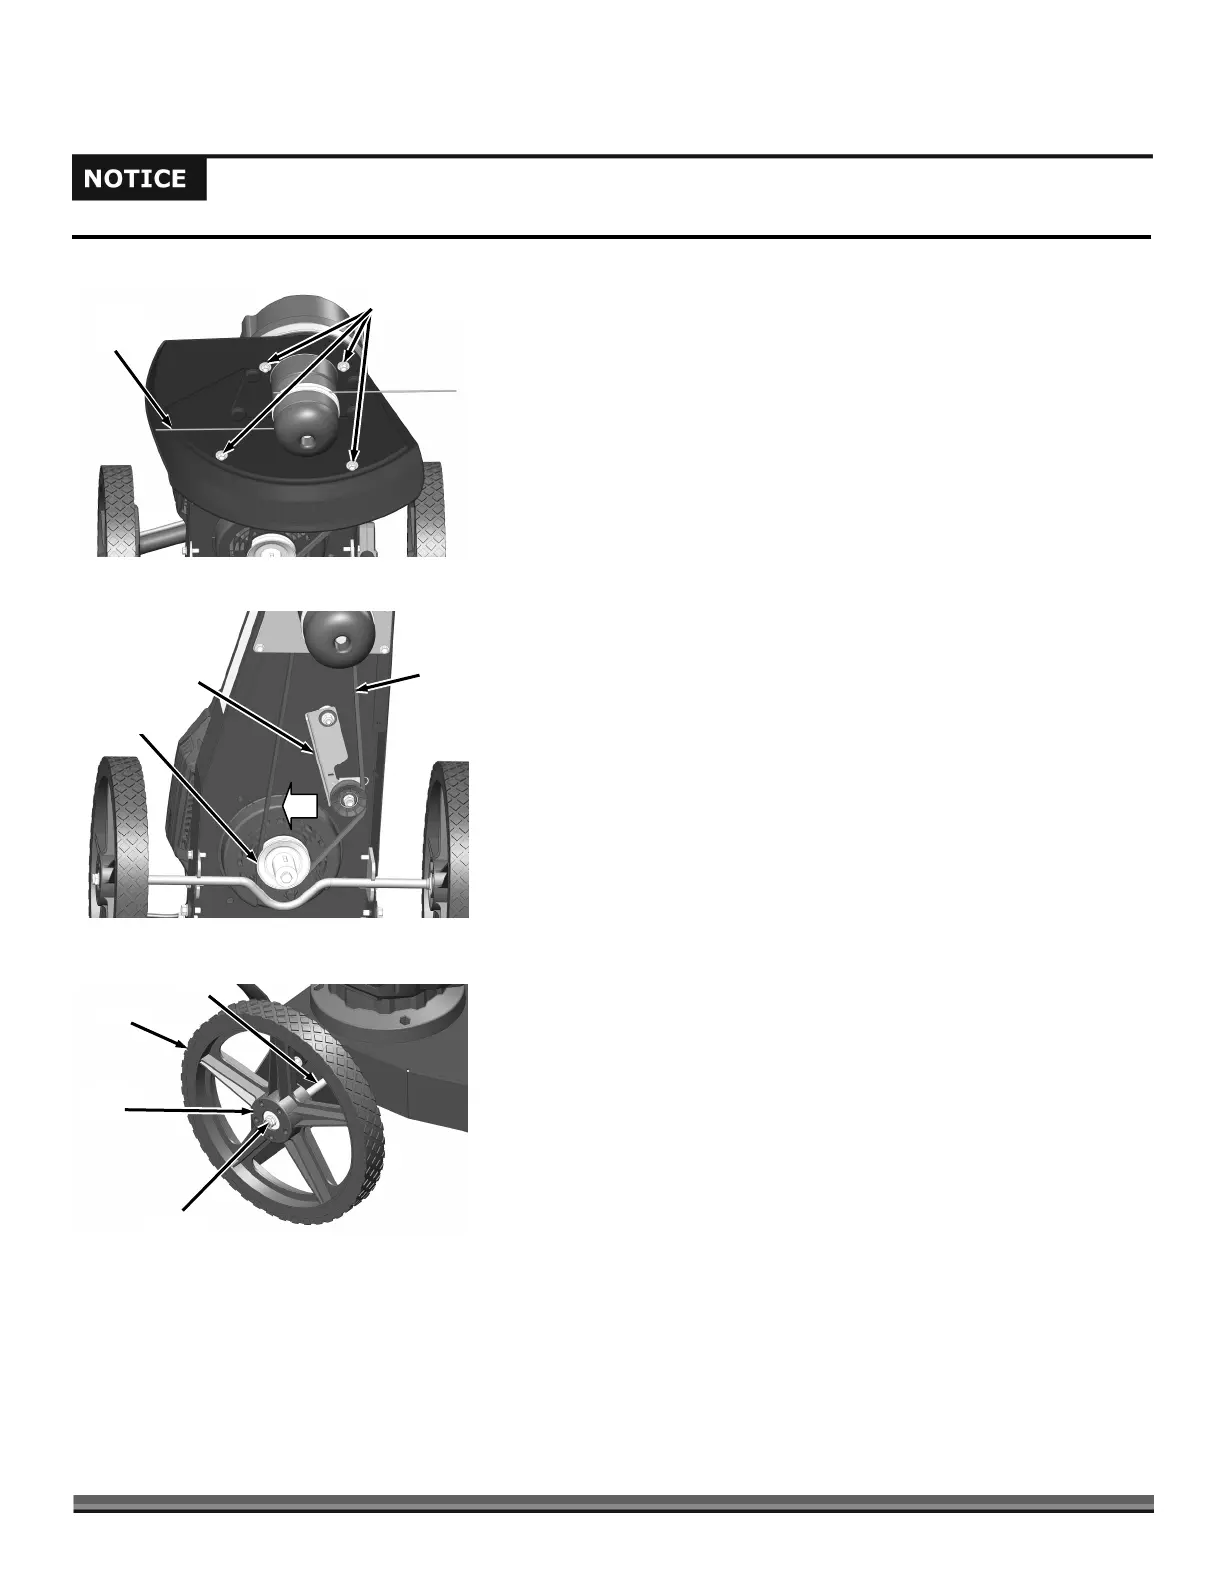
1. Tip the machine back to access the underside.
2. Remove the Trimmer Cords from the Head Assembly.
3. Remove the four Trimmer Guard Bolts and Flat Washers with a 3/8"
Wrench. Remove the Trimmer Guard (Figure 14).
4. Move the Idler Arm away from the Belt and lift the Belt off the Idler Pulley
(Figure 15).
5. Remove the Belt from around the Motor and Head Assembly Pulleys.
6. Install a new DR Drive Belt around the Motor and Head Assembly Pulleys.
7. Move the Idler in and install the Belt onto the Idler Pulley.
8. Position the Trimmer Guard and secure with the four Bolts and Flat
Washers using the 3/8" Wrench (Figure 14).
9. Install the Trimmer Cord and tip the Trimmer down on the Head Assembly.
Replacing the Wheels
Tool needed:
5/8" Wrench
1. Block and stabilize the machine so that the Wheels are off the ground.
2. Remove the Locknut using a 5/8" Wrench (Figure 16).
3. Slide the Wheel off the Axle.
4. Install the new Wheel and secure with the Locknut.
5. Repeat for the other Wheel.
Locknut
Figure 16
Wheel
Plastic
Hub
xle
Figure 15
Belt
Idler
rm
Motor
Pulley
Trimmer
Guard
Figure 14
Bolts and
Flat Washers
Trimmer
Cor