CONTACT US AT www.DRpower.com 17
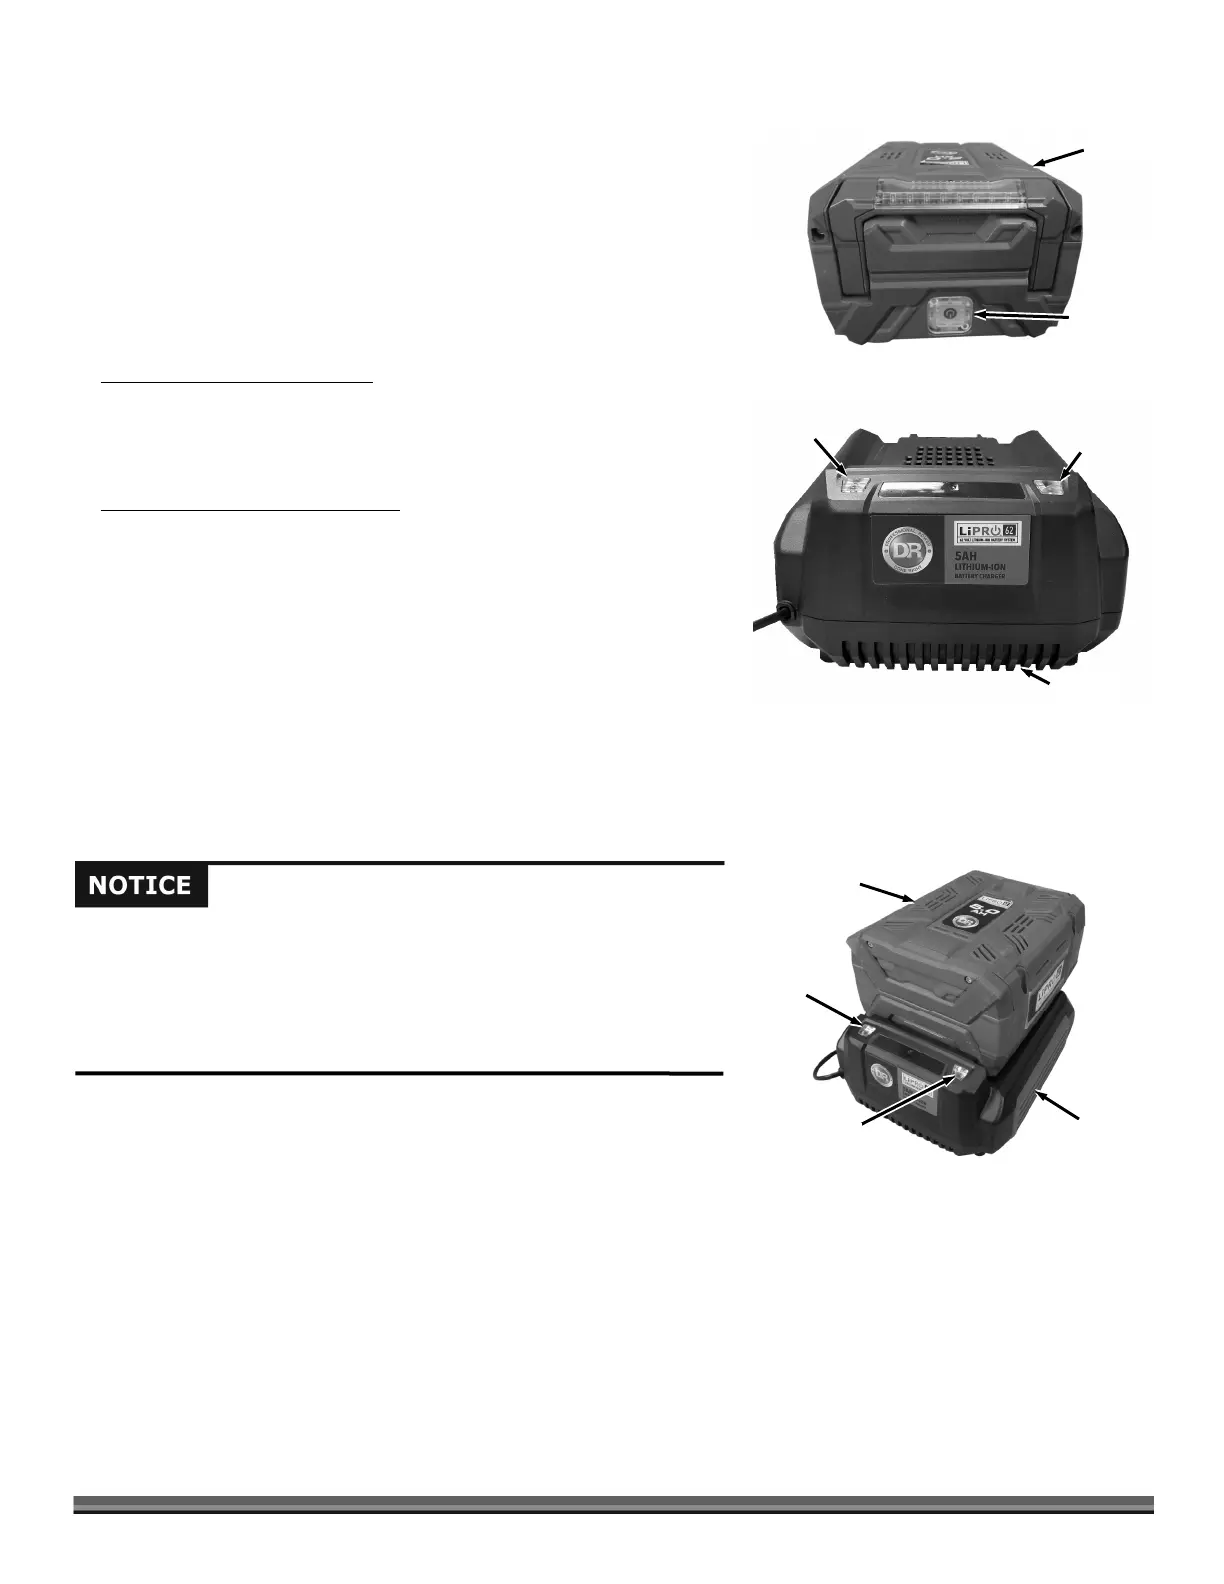
Checking Battery Charge
1. Check the charge percentage of your 62V Battery by pushing the Indicator
Button on the front of the Battery (Figure 17). The number of Green LED
indicators will tell you the % of power left in the battery. 1 LED = 25%, 2
LEDs = 50%, 3 LEDs = 75% and 4 LEDs = 100%.
2. If you press the Indicator Button and only the fourth LED flashes, the Battery
needs charging.
3. Charger indicator Lights (Figure 18)
4. Red LED Lit, green LED is not lit;
The Charger is plugged in but the Battery is
not installed (no load condition).
5. Green LED blinks, red LED is not lit; Battery is charging normally.
6. The green LED is on, red LED is not lit; Battery is fully charged.
7. Green LED is not lit, red LED blinks;
There is a fault with the Battery or
Charger. Remove the Battery from the Charger and wait about 30 minutes,
then reinsert the Battery into the Charger.
8. If the Battery does not hold its charge for very long under normal conditions
or it simply won’t hold a charge, then replace it. You can purchase a
replacement Battery directly from us at www.DRpower.com.
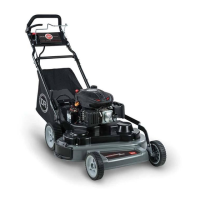
Charging the Battery Pack
1. Connect the charger to a 120VAC outlet. When the Battery is not installed
(no load condition): The Red LED will be lit.
2. Insert the Battery into the Charger (Figure 19). Under normal charging the
Green LED will Blink.
3. When the Battery is fully charged, the Green LED will remain light,
indicating that charging is complete.
4. Unplug the Charger from the Outlet and remove the Battery.
Battery
Figure 17
Indicator
Button
Charger
Red
LED
Green
LED
Figure 18
Figure 19
Charger
Battery
Red LED
Green
LED
Make sure the Charger Power Supply is plugged into a normal household
voltage, 120volts, 60Hz, AC only.
You should operate the Battery Charger in a dry place with temperatures
between 50ºF (10ºC) and +100ºF (+37.8ºC). Operating above +100 ºF
can cause Battery Pack leakage, rust, or degradation of the Battery Pack
performance.