| en
| Duct Mount Kit Polytron 5000/8000 Assembly Instructions 5
Duct Mount Kit Polytron 5000/8000 Asse mbly Instructions
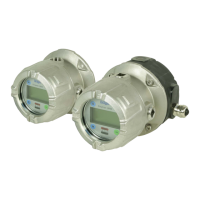
Intended use
The Duct Mount Kit Polytron 5000/8000 is required for
assembling the Dräger Polytron 5000/8000 if concentrations
are to be monitored in ducts. The duct mount kit is intended
for use with Dräger Polytron 5000/8000 in combination with
the following sensor types:
– DrägerSensor Ex DD/DQ
– DrägerSensor Ex LC
– DrägerSensor Assembly
– EC Sensing Head Polytron 5000/8000 Local
– EC Sensing Head Polytron 5000/8000 Remote
– DrägerSensor IR
Ducts must have a diameter of at least 100 mm / 4".
CAUTION
Any installation of the duct mount kit requires full
understanding, knowledge and strict observance ofthe Dräger
Polytron 5000/8000 Instructions for Use.
Mounting
CAUTION
The duct provided for the measurement must not be in
operation during assembly!
All components shown (brackets, gaskets, screws,
washers) are included in the duct mount kit. Apart from the
clamps required for fastening the duct. When used with
Docking Station: Remove the bottom cable entry when using
the DrägerSensor Ex and assemble it onto the side or top.
1. Drill a hole at the required measurement point in the duct:
– for DrägerSensor IR and Dräger PIR 3000:
Ø 45 mm ±2 mm / 1.772" ±0.079"
– for the other Dräger sensors listed: Ø 35 mm ±1 mm
/1.378" ±0.039"
2. Attach the grommet (8, fig. B; types according to hole size)
in the hole.
3. Mount the retaining bracket (2, fig. A) onto the baseplate
(6, fig. A) using 2 screws M6 x 8 (1, fig. A):
– When used with Docking Station: Position A, fig. A
– When used without Docking Station: Position B, fig.
A
4. Only for ducts with a round cross-section: Loosely screw
in the 4 stoppers (7, fig. 1; M6 x 10 with washers) into the
diagonally positioned guides on the baseplate.
5. Mount the rotary disk (5, fig. A) onto the retaining bracket
using 2 screws M6 x 16, washers (3, fig. A), and the
locking disk (4, fig. A). Fix Docking Stationthe rotary disk
in the top position.
6. Mounting onto the rotary disk:
– When used with Docking Station: Mount the
Docking Station (11, fig. C) onto the rotary disk using 4
screws M6 x 65 (12, fig. C).In the standard
configuration, the hinged bracket (10, fig. C) is on the
left-hand side.
– When used without Docking Station: Mount the D-
Box (15, fig. E) onto the rotary disk by using 4 screws
M6 x 20 (14, fig. E). The sensor points towards the
duct in this process.
7. Align the pre-assembled duct mount kit centrally to the
hole and use straps (13, fig. D/F; not included) to mount it
onto the duct.
The duct mount kit can be fitted lengthwise or crosswise
to the duct.
8. Only for ducts with a round cross-section: Align the 4
stoppers so that the duct bracket is supported on the duct
by the stoppers. Tighten the screws securely.
9. Electrical connection:
– When used with Docking Station: Complete the
electrical connection and assembly of the transmitter
in accordance with the Docking Station Polytron
5000/8000 Assembly Instructions.
– When used without Docking Station: Complete the
electrical connection and assembly of the transmitter
in accordance with the Polytron 5000/8000 Instructions
for Use.
Moving the transmitter into the maintenance
position
1. Unscrew the bottom screw and screw into maintenance
position A or B (fig. B).
2. Loosen the top screw (9, fig. B).
3. Remove the transmitter from the gasket, rotate it to the
left or right by 45° and place it onto the bottom screw.
4. Tighten the top screw.

 Loading...