ww w.drilldoctor.com 17
Identifying Correctly Sharpened Drill Bits
(and what to do with those that aren’t!)
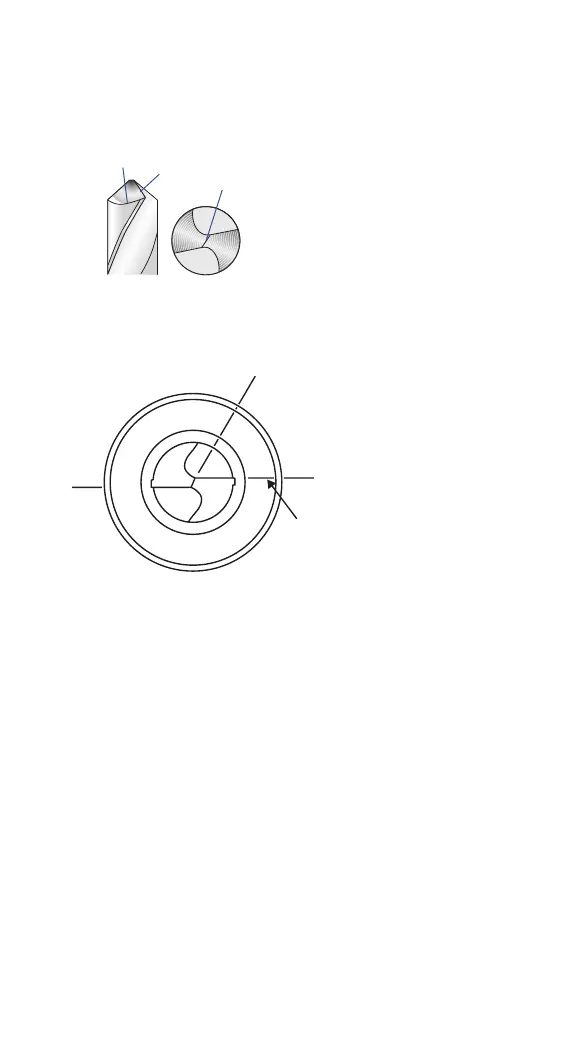
Correctly Sharpened Bits
The entire surface from the Cutting
Edge to the Heel will have a nely
ground surface without ridges or
indentations. The Heel will always be
lower than the Cutting Edge (positive
relief).
Once you have reached spark-out (no more grinding noise at all)
take a look at your drill bit. The chisel angle should be at 1 o’clock
or 1:30.
Heel
Cutting
Edge
Chisel
Point
3:00
1:00
scribe
line
Look at the bit: Hold
the bit up and look at it
with the cutting edges
in line with the horizon
(or parallel with the
9:00 and 3:00 position
imagining a clock’s
face).
2:00 is too far advanced,
and if the chisel gets too
close to 12:00, the relief
will be negative.
Too much relief will cause an oversized hole diameter and rapid
bit wear. Too little relief will limit feed rates, slowing down the
drilling operation or in extreme cases cause the drill not to
perform at all.
If chisel angle looks to be about 2 o’clock, align bit 1-2 ticks on
the minus direction.
If chisel angle is up to about 2:30, align 2-3 ticks minus.
If chisel is about 12:45, it’s at the low end of chisel and relief,
align 1 tick to positive.