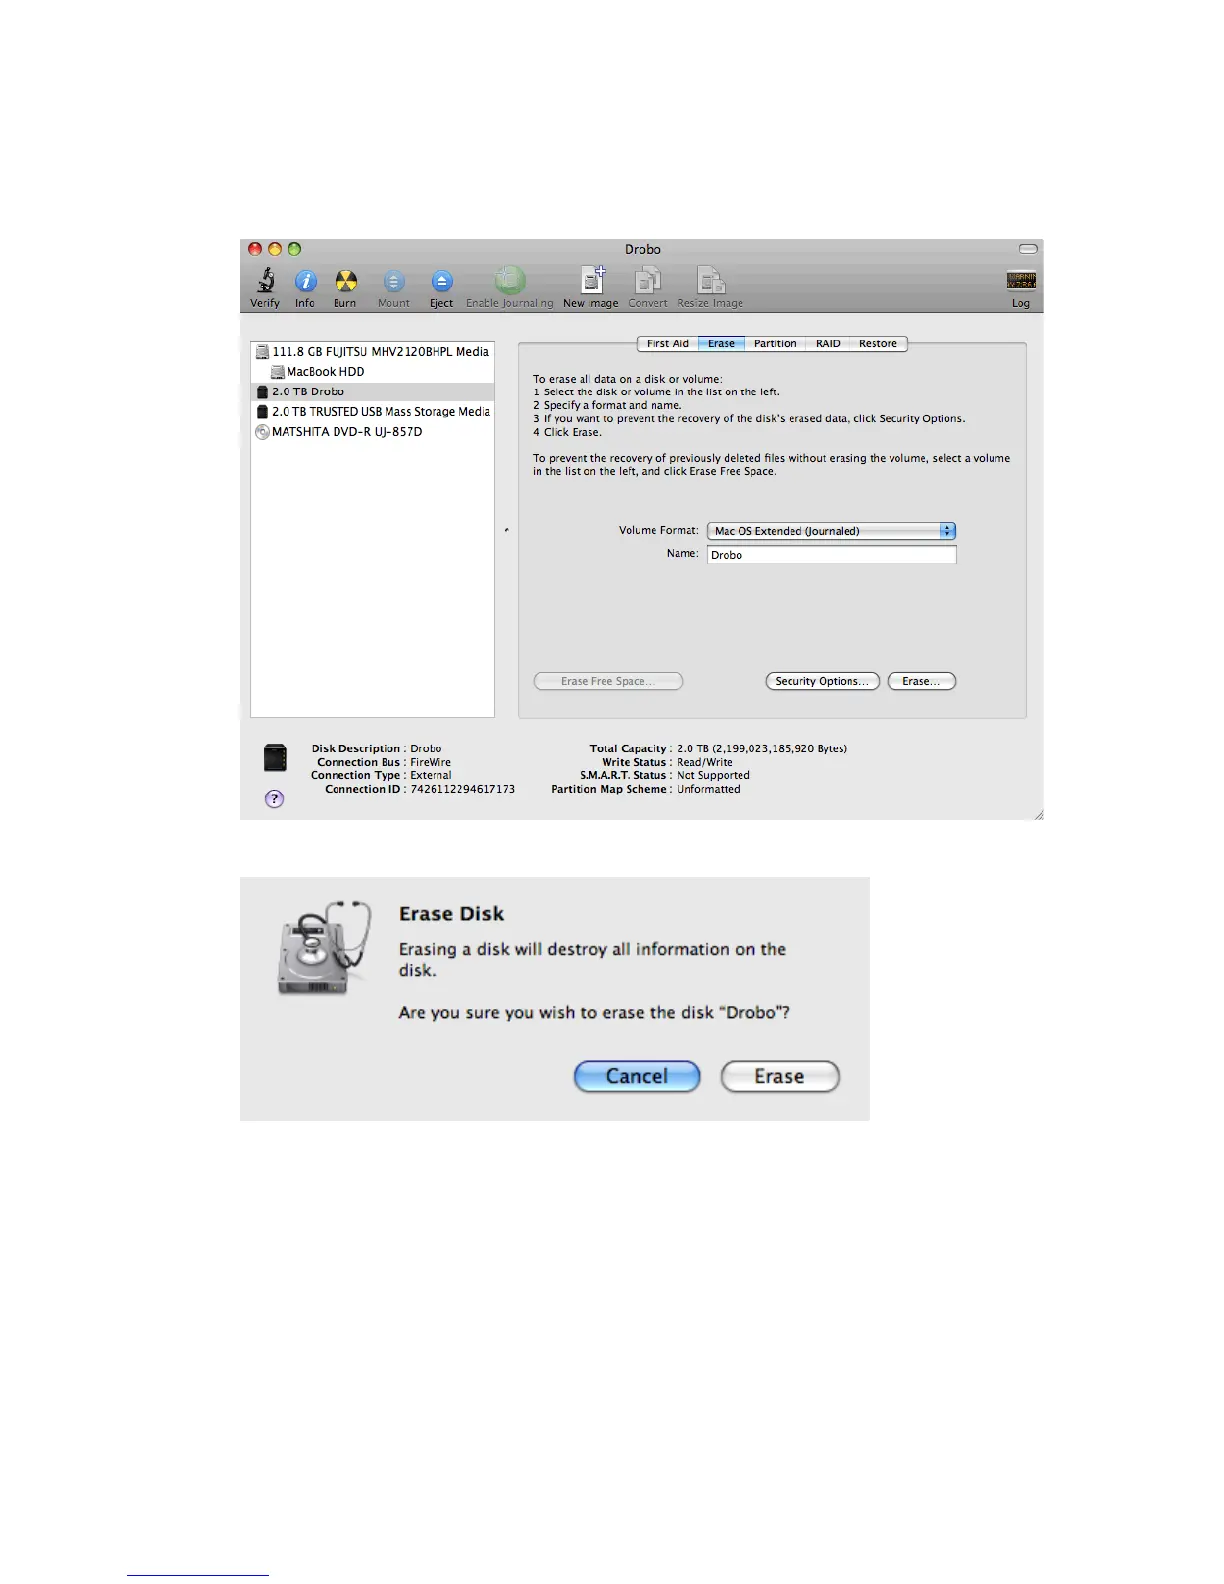
5. From the Volume Format drop-down list, accept Mac OS Extended (Journaled) unless you have a specific
need for a different option.
6. In the Name text box, type a name for your Drobo; for example, Drobo.
7. Click the Erase button to view the Erase warning message.
8. Click Erase to wipe any data and format the new drives in Drobo.
9. Drobo will complete the formatting job, and a Drobo drive icon will appear on your desktop and be ready for
use.
14