28
INSTALLATION MANUAL
• When using stone-like materials and/or plaster fi nishing,
the chimney breast should dry for at least 6 weeks before
it is taken into operation, in order to prevent cracks.
6.7 Placing the wood set
The appliance is supplied with a wood set.
Strictly observe the following instructions
to prevent unsafe situations:
- only ever use the supplied wood set;
- place the wood set exactly as described;
- make sure the pilot burner and the space
around it are kept free from objects (see
fi g. 5a);
- make sure there is no vermiculite’s fi ne
dust on the burner.
6.7.1 Wood set
The wood set consists of black vermiculite (see fi g. 6a)
glow wool (see fi g. 6b) and three logs (see fi g. 7a).
• Fill the burner tray with vermiculite; equally spread the
vermiculite.
!Caution - You can infl uence the fl ame image by
moving the vermiculite, yet
- the burner deck has to remain covered
with vermiculite in order to prevent that
the life expectancy of the burner is
reduced.
• Identify logs A up to C by using fi g. 7a.
!Tip Use the burn stains on the logs for identi-
fi cation.
• Place logs A, B and C; according to fi gures 7b to 7d
• Spread the glow wool over the burner; fi x it under the
logs
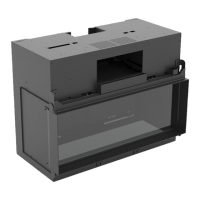
6.8 Glass pane
After placing the wood set you can place the glass pane, as
described below.
!Caution - Avoid damages when removing/placing
the glass pane;
- Use the Allen key supplied for loosening/
tightening the Allen screws.
6.8.1 Removing the glass pane
Remove the glass pane in accordance with the following
instructions (zie fi g. 10a up to fi g. 10d)
• Loosen the Allen screws in the upper glass strip by one or
two strokes.
• Grab the upper glass strip at both sides.
• Pull the glass strip to the front and
• Push it upwards.
• Slightly tilt the top of the glass pane towards you.
• Grab the glass pane at both sides.
• Remove the glass pane from the lower glass strip.
6.8.2 Placing the glass pane
• Place the glass pane in the lower glass strip.
• Pull the upper glass strip to the front and
• Push it upwards.
• Tilt the top of the glass pane away from you.
• Place the upper glass strip over the glass pane.
• Push on the upper glass strip.
• Retighten the Allen screws
!Caution - Avoid/remove fi ngerprints on the pane,
since otherwise they will burn into the
surface;
- The Allen screws must not be over-
tightened, since otherwise they could
strip the thread: tight=tight;
7. Wireless remote control
The appliance is supplied with a wireless remote control.
Ignition, controlling the fl ame height and switching off are
performed by a remote control that operates a receiver.
User Manual, chapter 4, Wireless Remote Control, des-
cribes the operation of the appliance including the way the
remote control works.
Do not ignite the appliance until it is fully
installed.
7.1 Connecting the receiver
The receiver should be connected to the appliance, before the
batteries are installed.
The receiver will be placed under the burner.
Follow the procedure below (see fi g. 11a):
• Fit the connection cable’s brown plug to the receiver (see
fi g. 11a, arrow F).
• Connect the white plug to the gas control.
!Tip The plugs have different sizes that cor-
respond with the connectors.
• Connect the cables of the thermocouple to the receiver;
(see fi g. 11a, arrows B).
!Tip - The size of the eye corresponds with the
size of the screw;
- The colours of eye and screw also cor-
respond.
• Connect the ignition cable to the receiver;
(see fi g. 11a, arrow A).
!Caution The battery holder is lying in a small tray at
the bottom of the slot between the com-
bustion chamber and the convection box.
• Connect the cable of the battery holder to the receiver
(see fi g.11a, Arrow C and fi g. 11b).
Caution
Caution