English
29
INSTALLATION MANUAL
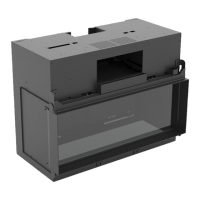
Global 40 CF
• Place the receiver in the holder (see fi g. 4a, arrow 1)
• Bend the antenna out of the clips; see fi g. 11a, arrow D.
• Set the antenna straight.
!Caution - Do not place the antenna too close to
the ignition cable and/or metal parts;
- Do not place the ignition cable over and/
or along metal parts: this will weaken the
spark;
- Do not lay the ignition cable over the
receiver: this could damage the receiver;
- Avoid dust on or in the receiver: cover it
when performing work.
7.1.1 Placing/replacing receiver’s batteries
The batteries should be placed in the special battery holder
and not in the receiver.
Strictly observe this, to avoid damages to
the receiver.
The battery holder is lying in a small tray at the bottom of
the slot between the combustion chamber and the con-
vection box. By pulling the (guide) ribbon towards you, the
battery holder will appear. (see User Manual, fi g. 1 and fi g.
2a up to 2d).
To place/replace the batteries, proceed as follows:
• Pull the (guide) ribbon towards you.
• Grab the battery holder.
• Loosen the screw.
• Slide the cover off.
• Remove and place the 4 penlite (AA type) batteries.
!Caution - Avoid a short circuit between the bat-
teries and metal objects/parts;
- Observe the “+” and “-” poles of the bat-
teries and the holder;
- Use alkaline batteries;
- Batteries are regarded as “small chemical
waste” and may therefore not be dis-
posed with the household rubbish.
• Slide back the cover.
• Tighten the cover.
• Place back the holder.
!Caution Make sure the guide ribbon is under the
holder.
7.2. Setting the communication code
Prior to putting the appliance into operation, a communica-
tion code must be set between the remote control and the
receiver.
When installing a new receiver or remote control, you must
set a new communication code.
The code is chosen randomly from the 65000 available codes.
As a result, the chance that other remote controls near you
are using the same code and affect the operation of your
appliance is very small.
Follow the procedure described below:
• If necessary, place the receiver’s batteries in the battery
holder; see section 7.1.1.
• If necessary, place the remote control’s 9V block battery; see
User Manual , section 4.2.6
• Remove the receiver from the tray below the burner; if
necessary see section 7.3.
• Hold down the reset button on the receiver, until you hear
two consecutive sound signals (see fi g. 12).
• After the second, longer signal, let go of the reset button.
• Press button
(small fl ame) or button (large fl ame) on the
remote control within 20 seconds, until you hear an extra
long sound signal: this is the confi rmation of a correct com-
munication.
7.3 Replacing the receiver
• If possible, remove the cover under the combustion chamber
(see fi g. 4a)
If this is not possible because of the way it is built in, take the
following steps.
• Remove the glass pane (see section 6.8
• Store the glass pane on a safe place
• Remove the vermiculite tray (see fi g. 4b)
• Unscrew the 4 self-tapping screws of the burner mounting
plate and remove the burner mounting plate plus accessories
(see fi g. 4c)
When it is possible to reach the receiver; take the following
steps.
• Replace the receiver and reconnect it (see section 7.1)
• Set the communication code again (see section 7.2)
• Place the parts back in reverse order of the steps described
above.
!Caution Properly connect the fl ue spigot to the
draft interrupter when placing back the
combustion chamber (see fi g. 4h)
8. Final check
In order to check whether the appliance is working pro-
perly and safely, you must perform the following checks
before the appliance is used.
8.1 Gastightness
All connections must be gastight.
!Caution The gas control can be subjected to a
maximum pressure of 50 mbar.
• Check the connections for gastightness
Caution
Caution
 Loading...