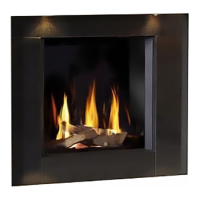
Global 40 CF
English
39
USER MANUAL
!Caution - When pressing the buttons (with the ex-
ception of the SET button), the transmis-
sion symbol ( ) will appear to indicate
that transmission is taking place between
the remote control and the receiver;
- The receiver acknowledges the transmis-
sion with a sound signal;
- The appliance will automatically enter the
standby position, if there is no transmis-
sion for 6 hours.
• Set the remote control to the MAN position.
4.2.1.1 Ignition
- Always wait 5 minutes after the pilot
burner has gone out, before you re-ignite
the appliance;
- When using propane you must be extra
careful. The pilot burner may extinguish
due to air in the pipe, e.g. as a result of re-
placing a propane cylinder: Always strictly
observe a 5 min. waiting time before
restarting the ignition process;
- Close the gas tap in case of malfunctions
and/or poor operation and warn the
installer.
!Tip For propane appliances, please use a
system of two cylinders provided with an
automatic switch to the back-up cylinder, if
separate gas cylinders are used.
Ignite the appliance as follows:
• Simultaneously press the buttons OFF and
(large fl ame)
on the remote control.
• Let go of the buttons when a short sound signal indicates
that the ignition process has been started.
In succession:
- the continuous signals will indicate that the ignition
process is active;
- a short sound signal will indicate that the ignition process
has fi nished;
- the appliance will automatically switch through to the
highest position of the main burner, which will start to
burn in a few seconds.
- If the pilot burner is not burning after
3 ignition attempts, you must close the
gas tap and call the installer;
- When igniting the pilot burner, you will
hear sound signals. After the last short
sound signal, the main burner should be
largely ignited within about 10 seconds.
If this is not the case, you must close the
gas tap and warn your installer;
- If the appliance ignites with a pop sound,
you must close the gas tap and contact
your installer.
!Tip A little motor will start to run when the
main burner operates, you will be able to
hear it.
4.2.1.2 Flame height / standby
The fl ame height can be adjusted continuously by using the
buttons (small fl ame) and (large fl ame). By continuing
to lower the fl ame height, the appliance can be set to the
standby position; this means that only the pilot burner will
still be burning.
• Press button (small fl ame) to lower the fl ame height
and/or to set the appliance in the standby position.
• Press the button
(large fl ame) to raise the fl ame height
and/or to switch on the main burner from the standby
(pilot burner) position.
- If you continue to press down button
(large fl ame) on the remote control, the
main burner should be largely ignited
within about 10 seconds. If this is not the
case, you must close the gas tap and warn
your installer;
- If the appliance ignites with a pop sound,
you must close the gas tap and contact
your installer.
4.2.1.3 Switching off
Switch the appliance off by pressing the OFF button.
The pilot burner will also go out.
4.2.2 Temperature display
The room temperature can be indicated on the display
in degrees Celsius (ºC) using a 24 hour clock or degrees
Fahrenheit (ºF) using a 12 hour clock.
• Simultaneously press OFF and
(small fl ame), until the
correct display appears.
4.2.3 Time
The display can indicate time.
After placing the battery or simultaneously pressing
(large fl ame) and (small fl ame), the time indication will
fl ash on the display and you will be able to adjust the time.
• Simultaneously press
and until the time indication
fl ashes on the display.
• Press the button
(large fl ame) to set the hours.
• Press the button (small fl ame) to set the minutes.
• Press OFF to return to the MAN position, or wait for the
system to automatically return to the MAN position.
4.2.4 Thermostat function
Using the thermostat function you can set two temperatu-
res, which can be controlled thermostatically.
These temperatures are referred to as day temperature
and night temperature.
The ✹ TEMP and TEMP symbols on the display refer to
day and night temperature respectively.
The room temperature is compared to the set day/night
temperature and then the fl ame height is automatically
Caution
Caution
Caution