English
27
INSTALLATION MANUAL
Global 70XT CF
must be permanently kept free from the
ground and the walls of the room in which
the appliance is built.
• Bleed the gas pipe.
• Place the receiver; for details, see section 7.1 of the
Installation manual.
• Set the communication code between the remote control
and the receiver; see section 7.2 of the installation manual.
Do not ignite the appliance until it is fully
installed.
• Check the connections for gastightness as described in
section 8.1 of the installation manual.
• Check the line-pressure as described in section 8.2 of the
installation manual.
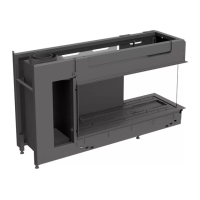
• Place the burner mounting plate plus accessories back and
x it with the self-tapping screws.
• When placing, slide the bottom strip in the U shaped not-
ches to the left and right; see Fig. 4g.
• Place the combustion chamber back in the convection box
and x it at both sides with the Allen screws.
- Properly connect the ue spigot to the
draft diverter when placing back the com-
bustion chamber; see Fig. 4f;
• Place the vermiculite tray in the rear of the combustion
chamber.
• Place the wood set; see section 6.7
• Remove the tape on the convection box.
6.5 Flue gas discharge system
When constructed in an existing chimney (other than the
class 1 chimney in the United Kingdom), a exible stainless
steel pipe is recommended for discharging the ue gases.
In cases of construction in a mantelpiece/ replace connec-
ted to an existing chimney in the United Kingdom (class 1
chimney), the separately supplied English description ‘Fitting
into a conventional class 1 chimney’ also applies. In addition
to the installation instructions, this booklet also contains
supplementary tests.
6.5.1 General
The appliance is of the B
11AS
type.
The passage to the outside is made with a roof terminal
(see section 6.5.2).
Use a suitable Ø100 mm diameter ue
gas discharge system provided with the
CE mark.
The ue gas discharge system is constructed from (the ue
spigot of) the appliance.
6.5.2 Connecting the ue gas discharge system
A discharge pipe of at least 3 metres, should be connected
to the appliance.
Bends in the ue gas discharge system are not allowed.
The roof terminal can end in a sloping and a at roof.
The roof terminal can be supplied with an adhesive plate
for a at roof or with a universally adjustable tile for a
sloping roof.
- Maintain a distance of at least 50 mm
between the outside of the ue gas
discharge system and the walls and/or
the ceiling. If the system is built in (for
instance) a cove, it should be made with
non combustible material all around it;
- Use heat-resistant insulation material
when passing through combustible
material.
!Caution Some heat-resistant insulation materials
contain volatile components that will
spread an unpleasant smell for a prolonged
time; these are not suitable.
Place the ue gas discharge system as follows:
• Build the system up from (the ue spigot of) the
appliance.
• Connect the pipe pieces.
• Apply suf cient clamps, so that the weight of the pipes
does not rest on the appliance.
• Determine the remaining length of the roof terminal.
• Make sure the roof terminal has the right dimensions.
!Caution Make sure that the right insertion length is
maintained.
• Connect the roof terminal to the discharge pipes.
!Caution - Make sure that the universal tile ts well
with the surrounding tiles;
- Make sure that the adhesive plate ts well
onto the at roof.
6.6 Placing the chimney breast
This section describes how the Global 70XT CF is built
into a chimney breast. In order to provide proper heat
discharge, there should be suf cient space around the ap-
pliance. The chimney breast should be ventilated suf ciently
by means of ventilation holes. No ventilation is required in
case of an existing chimney with a masoned replace that is
suf ciently able to absorb the heat. Of course, the ventila-
tion hole does also not apply to the class 1 chimney in the
United Kingdom.
- Use non combustible and heat-resistant
materials for the chimney breast, inclu-
ding the top of the chimney breast, the
material in the chimney breast and the
back wall of the chimney breast;
Caution
Caution
Caution
Caution
Caution
 Loading...