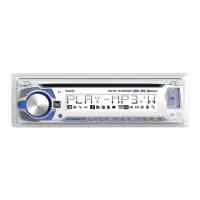
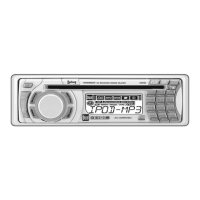
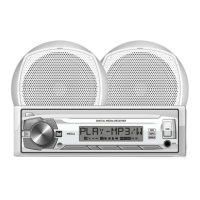
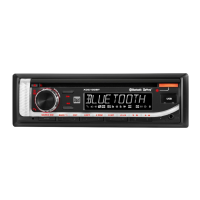
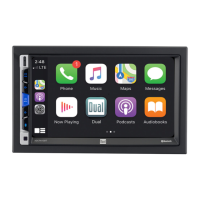
This document describes the MXD340SXM, an AM/FM/USB/SiriusXM-Ready™ receiver with Bluetooth connectivity and a front panel. It includes a SiriusXM Connect Tuner and Antenna. The device is designed for in-vehicle installation and operation, offering a range of audio playback and control features.
Installation and Preparation
Before installation, it is crucial to disconnect the negative battery terminal of the vehicle. The unit should be installed in a location free from high temperatures, direct sunlight, dust, dirt, or excessive vibration.
For typical DIN mounting, the process involves three steps:
- Insert the mounting sleeve into the dashboard or an installation kit.
- Bend multiple mounting tabs around the mounting sleeve to secure it.
- Connect all wiring harnesses and slide the head unit into the mounting sleeve until it clicks into place.
For ISO mounting, existing brackets or those supplied with the installation kit are used to mount the brackets to the sides of the head unit with screws.
The wiring diagram provides detailed connections:
- SXM IN: Connects to the included SiriusXM Connect Tuner and Antenna.
- BLUE (Remote Turn-On): Connects to an amplifier or power antenna. This wire should be insulated if not used.
- BLACK (Ground): Connects to the vehicle chassis ground.
- RED (Accessory): Connects to an existing ignition circuit or a switched 12-volt source.
- YELLOW (Memory): Connects to the battery circuit or a constant 12-volt source to retain settings.
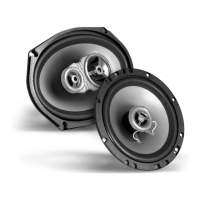
- Speaker Wires: Dedicated wires for Left Front (White/Black and White), Right Front (Gray/Black and Gray), Left Rear (Green/Black and Green), and Right Rear (Violet/Black and Violet) speakers.
The unit uses a 10 amp ATC fuse, located beside the heat sink. When replacing the fuse, it is essential to use the correct type and amperage to prevent damage to the radio.
General Operation
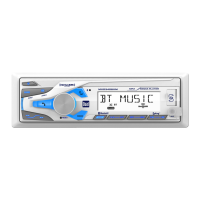
The front panel features various controls:
- Power (ن): Press to turn the unit on or off.
- Band/Zone 1: Selects radio bands (FM1, FM2, FM3, AM1, AM2) or controls Zone 1 audio.
- Mute/Zone 2: Mutes audio or controls Zone 2 audio.
- Talk: Activates voice commands or call functions.
- Volume Up/Down (knob): Adjusts the audio volume (00-40).
- AS/CAT: Used for automatic station storing and category browsing in SiriusXM mode.
- USB Port: For connecting USB devices to play MP3 files.
- Auxiliary Input: A 3.5mm port for connecting external audio devices.
- Preset Buttons (1-6): Stores and recalls radio stations or performs specific functions in other modes (e.g., Folder Up/Down, Random, Repeat, Intro, Play/Pause).
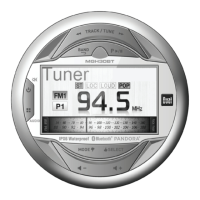
- DISP: Displays clock time or cycles through metadata in SiriusXM mode.
- Mode: Selects between Radio, USB, SiriusXM, Auxiliary Input, and Bluetooth modes.
- Reset: Resets the unit to factory settings.
- Tune/Track Up/Down (◄◄ / ►►): Seeks radio stations or navigates tracks.
- Microphone: For hands-free calling.
Changing Modes: Press the MODE button to cycle through available modes: Radio, USB, SiriusXM, Auxiliary Input, and Bluetooth. The current mode is shown on the display.
Setting the Clock: Press the volume knob to enter clock setting mode. Rotate the knob right to adjust hours and left to adjust minutes.
Display: Press DISP to show the clock time for 5 seconds, after which it returns to the previous display.
Audio/Menu: Momentarily press the volume knob to switch between Audio/Menu functions. Rotate the knob left/right to adjust or activate desired functions.
AM/FM Tuner Operation
- Seek Tuning: Press TUNE ◄◄ or TUNE ►► to find the next strong station.
- Manual Tuning: Press and hold TUNE ◄◄ or TUNE ►► to enter manual tuning mode. Then, momentarily press TUNE ◄◄ or TUNE ►► to change the frequency one step at a time. Pressing and holding will advance quickly.
- Band Selection: Press BAND to select between FM1, FM2, FM3, AM1, and AM2. Each band can store up to six presets, totaling 18 FM and 12 AM stations.
- Storing Presets: Select the desired band and station, then press and hold a preset button (1-6) for over two seconds. The preset number will appear on the display once stored.
- Recalling Presets: Press the corresponding preset button (1-6) to recall a stored station.
- Automatically Store: Press and hold AS/CAT for more than two seconds to automatically store 18 FM and 12 AM stations.
USB Operation
To play MP3 files, insert a USB device containing MP3 files into the USB port.
- Track Select: Press TUNE ◄◄ to skip to the beginning of the previous track, or TUNE ►► to skip to the beginning of the next track.
- Pause/Play: Press ►/II to temporarily stop playback; press again to resume.
- Folder Access: Press Preset 6 (Folder Up) or Preset 5 (Folder Down) to navigate folders. The first file in the selected folder will play after a brief display of the folder name.
- Repeat: Press RPT (Preset 3) to toggle between RPT ALL (plays all tracks on the USB device), RPT ONE (continuously repeats the selected track), and RPT FLR (continuously repeats all files in the current folder).
- Random: Press RDM (Preset 4) to play tracks in random order; press again to cancel.
- Intro: Press INT (Preset 2) to play the first 10 seconds of each track; press again to cancel.
Bluetooth Operation
Preparation: Before using a Bluetooth device, ensure Bluetooth is activated on your device and that it is paired and connected to the head unit.
Pairing a New Device: The head unit constantly broadcasts its pairing signal when no devices are connected. Complete the pairing sequence from your Bluetooth device. The device name is "MXD340SXM" and the passcode is "1234". Pairing can be performed regardless of the head unit's current mode of operation.
Streaming Audio Troubleshooting: The head unit supports A2DP wireless streaming audio from a Bluetooth mobile device.
- Press ►► to skip to the next available audio track.
- Press ◄◄ to skip to the previous audio track.
- Press ►/II to toggle between play and pause.
SiriusXM Satellite Radio Operation
The MXD340SXM is SiriusXM-Ready, meaning it can access over 140 channels of commercial-free music, sports, news, talk, comedy, and entertainment. A SiriusXM Vehicle Tuner and Subscription are required.
Activating SiriusXM Radio:
- After installing the SiriusXM Connect Vehicle Tuner and antenna, power on the radio and select SiriusXM mode.
- Tune to Channel 1 to hear the preview channel.
- Tune to Channel 0 to find the Radio ID of your tuner (also found on the tuner's packaging). Note that the Radio ID does not include I, O, S, or F.
- Activate the subscription online (www.siriusxm.com/activatenow for USA, www.siriusxm.ca/activatexm for Canada) or by phone (1-866-635-2349 for USA, 1-877-438-9677 for Canada).
- Activation typically takes 10-15 minutes, but can take up to an hour. The radio must be powered on and receiving the SiriusXM signal to receive the 'UPDATED' activation message.
- Once activated, you can tune to channels in your subscription plan.
Accessing SiriusXM Radio: Press the MODE button to enter SiriusXM mode.
Direct Channel Tuning:
- Press and hold the volume knob.
- Rotate the volume knob left or right to select the first digit of the channel number.
- Press the Channel Up button, then rotate the volume knob left or right to select the second digit.
- Repeat step 3 for the third digit.
- Press the volume knob to tune to the desired channel.
Channel Browsing: Press and hold the Channel Up or Channel Down button to rapidly browse channels. Releasing the button tunes to the displayed channel.
Category Browsing:
- Long press the AS/CAT button to enter browsing mode (a flashing "b" will appear).
- Rotate the volume knob to select a category. Press the volume knob to enter the selected category.
- Short press ◄◄ or ►► to move up or down categories. Press the volume knob to stay in the desired category channel.
- Long press ◄◄ or ►► for rapid category browsing.
- Press DISP to return to the category list.
- Long press AS/CAT to exit category browsing mode.
- In Category Browse Mode, press DISP to go directly to the "All Channels" category.
Mature Lock Control:
- Long press and release the volume knob, then immediately press DISP to enter the pass code screen for Mature Parental Control.
- Rotate the volume knob left or right to select the first digit of the pass code (default is 0000).
- Press Channel Up, then rotate the volume knob left or right to select the second digit.
- Repeat step 3 for the third and fourth digits. Press the volume knob to enter the pass code.
- Rotate the volume knob right to lock Mature Parental Channels ON, or left to unlock (OFF by default).
Pass Code Set:
- Long press and release the volume knob, then immediately press DISP twice to enter the current pass code. Press the volume knob.
- Enter the new pass code, then press the volume knob. A "SUCCESS" message will appear.
Resetting SiriusXM Data: When the RESET button is pressed, the unit tunes back to CH 1 and resets all presets to factory default (CH 1). The RESET button is located behind the display panel. Remove the display panel, press the release button in the lower right corner, press RESET, then reattach the display panel.
Troubleshooting
The manual provides a table for common problems, causes, and actions:
- Unit will not turn on (no power): Check yellow/red wire connections for proper voltage (11-16VDC), black wire connection to ground, and replace blown fuses.
- Unit has power (but no sound): Check speaker wire connections and ensure all bare speaker wires are insulated from each other and chassis ground.
- Unit blows fuses: Check for pinched yellow/red wires or speaker wires touching chassis ground, and use a fuse with the correct rating.
- "NO FILE" appears on display: Check the device for valid MP3 files.
- "NO SUPPORT" appears on display: Ensure ID3 tags are version 1.0 to 2.0.
SiriusXM Radio Advisory Messages
- Check Antenna: Indicates a fault with the SiriusXM antenna (disconnected or damaged cable). Verify cable connection, inspect for damage, and replace if necessary.
- Check Tuner: Indicates difficulty communicating with the SiriusXM Connect Vehicle Tuner (disconnected or damaged). Verify the tuner cable is securely connected.
- No Signal: Indicates difficulty receiving the SiriusXM satellite signal. Ensure the vehicle is outdoors with a clear sky view, the magnetic mount antenna is on a metal surface, and away from obstructions. Inspect the antenna cable for damage.
- Subscription Updated: The channel is not included in the subscription plan. Contact SiriusXM Listener Care.
- Channel Unavailable: The requested channel is not valid or no longer available. This may also appear briefly when first connecting a new tuner.
- Channel Unsubscribed: The requested channel is not part of the subscription package. Contact SiriusXM Listener Care.
- Channel Locked: The requested channel is locked by the radio's Parental Control feature. Refer to the SiriusXM Satellite Radio Operation section for details on the Mature Channel Lock feature.
Maintenance Features
The device includes a RESET button to restore factory settings, which can be useful for resolving abnormal operation. The fuse is user-replaceable, but it is important to use the correct type and amperage. The troubleshooting guide helps diagnose and resolve common issues.
Limited One Year Warranty
Dual Electronics Corp. warrants the product to be free from defects in material and workmanship for one year from the original purchase date. The warranty covers all defects in material and workmanship but excludes software, installation/removal costs, damage from accident, misuse, improper installation, incorrect line voltage, unauthorized repair, or failure to follow instructions. For service, customers should check the troubleshooting guide, then carefully pack the product with the original receipt and ship it to an authorized service center. Contact information for service is provided (toll-free number and email). The warranty is exclusive and in lieu of all other warranties, expressed or implied, and excludes indirect, incidental, or consequential damages.