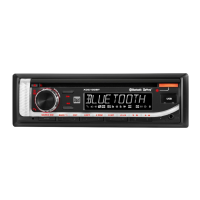
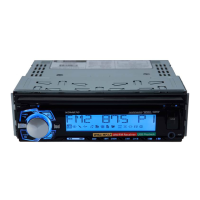
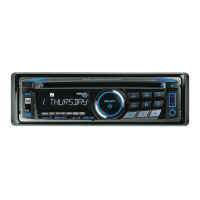
The Dual XDM290BT is an AM/FM/CD/USB receiver designed for in-car audio entertainment. It offers a variety of playback options and features, including Bluetooth connectivity, MP3 and CD playback, USB input, and an auxiliary input. The unit is designed for a typical front-load DIN mounting method.
Preparation and Installation
Before installation, it is crucial to disconnect the negative battery terminal to prevent electrical issues. The unit should not be installed in locations subject to high temperatures, direct sunlight, dust, dirt, or excessive vibration. To begin installation, the trim ring must be removed, followed by two transit screws located on top of the unit. Supplied keys are then inserted into slots to slide the unit out of its mounting sleeve. The mounting sleeve is then installed into the vehicle's opening, with tabs bent to secure it. After this, the wiring harness and antenna are connected. It is recommended to consult a qualified technician if unsure about wiring. Some vehicles may require an additional installation kit and/or wiring harness adapter, which are sold separately. Once connections are made, the unit should be tested for correct operation before being slid into the mounting sleeve to secure it.
General Operation
The unit can be turned on by pressing the power button or any other button except EJECT, and turned off by pressing the power button. The MODE button allows selection between various audio sources: AM/FM, CD player, auxiliary, USB, and Bluetooth. CD and USB modes will only appear if a CD is inserted or a USB device is connected.
For external audio devices, the XDM290BT features a 3.5mm auxiliary input port on the front panel. To use this, the MODE button is pressed to select auxiliary input mode. Volume is adjusted using the volume knob, with a range from 00 to 46. The DISP button shows the clock and, during MP3 playback, rotates through ID3 tag information, elapsed time, track number, and file/folder names.
If abnormal operation occurs or after initial installation, the RESET button, located under the volume knob, should be pressed. To set the clock, press and hold DISP until the clock flashes, then use the TUNE buttons to adjust hours and minutes. The clock displays 12-hour AM/PM time in USA frequency spacing mode and 24-hour time in European frequency spacing mode.
Audio Controls
The volume knob can be pressed momentarily to access audio control settings, including Bass, Treble, Balance, Fader, EQ, Loudness, and Source Level. Each setting can be adjusted by rotating the volume knob left or right once the desired option appears on the display. Bass and Treble can be adjusted from -6 to +6. Balance can be set from BAL 7L to BAL 7R, with BAL EVEN indicating equal balance. Fader can be set from FAD 7R to FAD 7F, with FAD EVEN indicating equal fader. EQ settings include USER, ROCK, BEAT, CLASSICS, JAZZ, POP, and FLAT. Loudness can be toggled OFF/ON. Source Level adjusts the current source volume from -6 to +6.
The setup menu is accessed by pressing and holding the volume knob for more than 3 seconds. Within this menu, the volume knob is used to select functions and adjust settings.
- Auto Station Store: In Tuner mode, pressing DISP seeks and saves 6 strong stations in the current band.
- Local/Distance Tuning: LOCAL OFF activates distance tuning, while LOCAL ON activates local tuning for strong station reception only.
- Tuner Frequency Spacing: FREQ USA sets the unit to USA tuner spacing (200kHz for FM, 10kHz for AM). FREQ EURO sets it to European spacing (50kHz for FM, 9kHz for AM).
- Auxiliary Input: AUX ON enables the front panel 3.5mm auxiliary input, and AUX OFF disables it.
- Beep Confirmation: BEEP OFF disables the confirmation beep, and BEEP ON enables it.
- Programmable Turn On Volume: PRO OFF/VOL# allows setting a specific turn-on volume (1-30), with OFF as the default.
- Power On Message: MSG OFF disables the power-on message, and MSG ON enables it.
- Scrolling Option: SCROLL 15 SP scrolls information every 15 seconds (default). SCROLL ONCE scrolls once then shows the first 10 characters. SCROLL ON scrolls continuously. SCROLL OFF shows the first 10 characters.
- Demonstration Mode: DEMO OFF disables the demonstration mode, and DEMO ON enables it.
- Bluetooth: BT ON enables Bluetooth functionality, and BT OFF disables it.
- Auto Answer: ANSWER Auto automatically answers incoming calls after 2-3 rings. ANSWER Manual requires pressing the phone button to answer.
AM/FM Tuner Operation
- Seek Tuning: Press and hold TUNE or TUNE momentarily to seek the next strong station.
- Manual Tuning: Press TUNE or TUNE momentarily to change radio frequency one step at a time. Press and hold to advance quickly.
- Band Selection: Press BAND to select between FM1, FM2, FM3, AM1, and AM2 bands.
- Storing and Recalling Station Presets: Up to 18 FM and 12 AM stations can be stored. To store a station, select the desired band and station, then press and hold a preset button (1-6) for more than 2 seconds. The preset number will appear on the display. Stations can be recalled by pressing the corresponding preset button.
- Automatically Store Stations: Press and hold the volume knob for more than 3 seconds to find "auto store" in the display, then press DISP to automatically store 6 strong stations in the current band.
CD Player Operation
- Insert CD: Insert a standard size CD with the label facing up into the CD slot. Playback will begin automatically.
- Eject CD: Press EJECT to eject the CD. The unit will switch to the previous mode. If the disc is not removed within 10 seconds, it will reload. The unit does not need to be on to eject a CD.
- Track Select: Press TRACK to skip to the beginning of the next track. Press TRACK to return to the beginning of the current track. Pressing TRACK again skips to the beginning of the previous track.
- Fast Forward/Reverse: Press and hold TRACK or TRACK to fast forward or reverse a track.
- Pause: Press ►/II to temporarily stop CD playback. Press ►/II again to resume.
- Intro: Press INT to enter the Intro menu. Rotate the volume knob to select: OFF (cancels INT), ALL (plays first 10 seconds of each track), or FOLDER (plays first 10 seconds of each track in folder).
- Repeat: Press RPT to enter the Repeat menu. Rotate the volume knob to select: ALL (plays all tracks), TRACK (continuously repeats selected track), or FOLDER (continuously repeats all files in selected folder).
- Random: Press RDM to enter the Random menu. Rotate the volume knob to select: OFF (cancels RDM), ALL (plays all tracks in random order), or FOLDER (plays all tracks in folder in random order).
MP3 Files (CD Player and USB)
- Playing MP3 CD/USB: When an MP3 encoded disc or USB device is inserted, "DISC READ" or "USB READ" will appear. Playback will begin momentarily. If no valid MP3 files are detected, "NO FILE" will be displayed.
- Displaying Information: Press DISP to select between song title, artist, file name, folder name, track number, and clock/elapsed time. "NO ARTIST" or "NO TITLE" is displayed if no ID3 tag information is present. "ROOT" is displayed if the root folder is not labeled. Icons illuminate to indicate displayed information (Title, Artist, Folder, File).
- Folder Access (USB): Press to select the previous folder, and to select the next folder. This is only available on devices with multiple folders.
- Repeat (USB): Press RPT to select: ALL (plays all tracks on device), SONG (continuously repeats selected song), or FOLDER (continuously repeats all files in selected folder).
- Random (USB): Press RDM to select: OFF (cancels RDM), ALL (plays all tracks in random order), or FOLDER (plays all tracks in folder in random order). Random mode is retained in memory.
- Intro (USB): Press INT to select: OFF (cancels INT), ALL (plays first 10 seconds of each track), or FOLDER (plays first 10 seconds of each track in folder).
Bluetooth Operation
- Pairing a New Device: Ensure Bluetooth is active on the device. The unit broadcasts its pairing signal when no devices are connected. Complete pairing from the Bluetooth device. The device name is "DUAL BT" and the passcode is "1234". The unit can be in any mode during pairing.
- Pairing Additional Devices: If a device is connected, press and hold to disconnect it before pairing a new device.
- Connecting a Paired Device: Most Bluetooth devices auto-connect. If a previously paired device doesn't connect, press and hold from Bluetooth mode to reconnect. To connect a device not recently connected, press and hold to disconnect any current devices, then press and hold again. The paired device name will appear on the LCD. Rotate the volume knob to cycle through devices or recent calls (up to ten). Press the volume knob to select a phone number to dial.
- Disconnecting a Device: Press and hold for 3 seconds to disconnect a connected device. The device remains paired but not connected.
- Recent Calls List: From Bluetooth mode, press SELECT to view recent calls (dialed, received, missed). Rotate the volume knob to cycle through numbers. Press SELECT or to dial.
- Redialing Last Number: Press from Bluetooth mode, or press or SELECT again to redial the last number.
- Receiving a Phone Call: Incoming calls appear on the display with a ring tone. The ring tone volume depends on the unit's volume. Press to receive, and press and hold to refuse. If Auto Answer is ON in the setup menu, all calls are received automatically.
- Ending a Phone Call: During an active call, press to end it. The unit will resume the previous mode if the call was received while listening to music in another mode.
- Streaming Audio: The unit supports A2DP (advanced audio distribution profile) for wireless streaming from a Bluetooth mobile device. AVRCP (audio video remote control profile) allows control from the head unit. To stream music, the mobile device must support A2DP and AVRCP. Streaming audio must be enabled on the mobile device.
- Press to skip to the next available audio track.
- Press to skip to the previous audio track.
- Press ►/II to toggle between play and pause.
Dual iPlug P2 Smart App Remote Control
The Dual iPlug P2 Smart App allows control of the receiver via Bluetooth from an Apple or Android smartphone. This app enables changing mode, station, song, volume, and settings without line-of-sight. The app can be downloaded from the Apple App Store or Google Play Store.
Voice Activation
The receiver has an easy-access voice activation button to use Siri® or Google Assistant™ via Bluetooth. After pairing the smartphone with the receiver, pressing the voice activation button switches the receiver to Bluetooth mode, activating the smartphone's assistant. Manual switching back to the previous or desired mode is required after the operation.
Maintenance
For troubleshooting, if the unit has no power, check connections for proper voltage (11-16VDC) for the yellow and red wires, and check the ground connection for the black wire. Replace blown fuses. If there is power but no sound, check speaker connections and ensure no bare speaker wires are touching each other or chassis ground. If the unit blows fuses, check for pinched yellow or red wires, pinched speaker wires, and ensure the correct fuse rating is used. For excessive skipping, ensure the unit is mounted correctly and the backstrap is secure. Check media for physical defects. If "ERR FILE" appears, press eject or RESET. If "NO FILE" appears, check the device for valid MP3 files. If the unit does not accept a disc, check for CD mechanism misalignment and ensure transit screws are removed. If "NO SUPPORT" appears, an invalid ID3 tag version is present (only versions 1.0 to 2.0 are supported).
For optimal MP3 playback, it is recommended to burn MP3 discs with a 128kbps or higher constant bit rate and 44.1kHz or higher sampling frequency. Some files may not play or display correctly depending on sampling rates and bit rates. Only MP3 files with the .mp3 extension can be played. USB devices must be 'mass storage class' and formatted to FAT or FAT32 file systems for compatibility.