A
B
C
D
E
F
G
H
L
M
N
P
Motore
Engine
sezione / section
N 4.4
65Monster 400 - 620 Aggiornamento/Update - M.Y. 2006 - edizione/edition 00
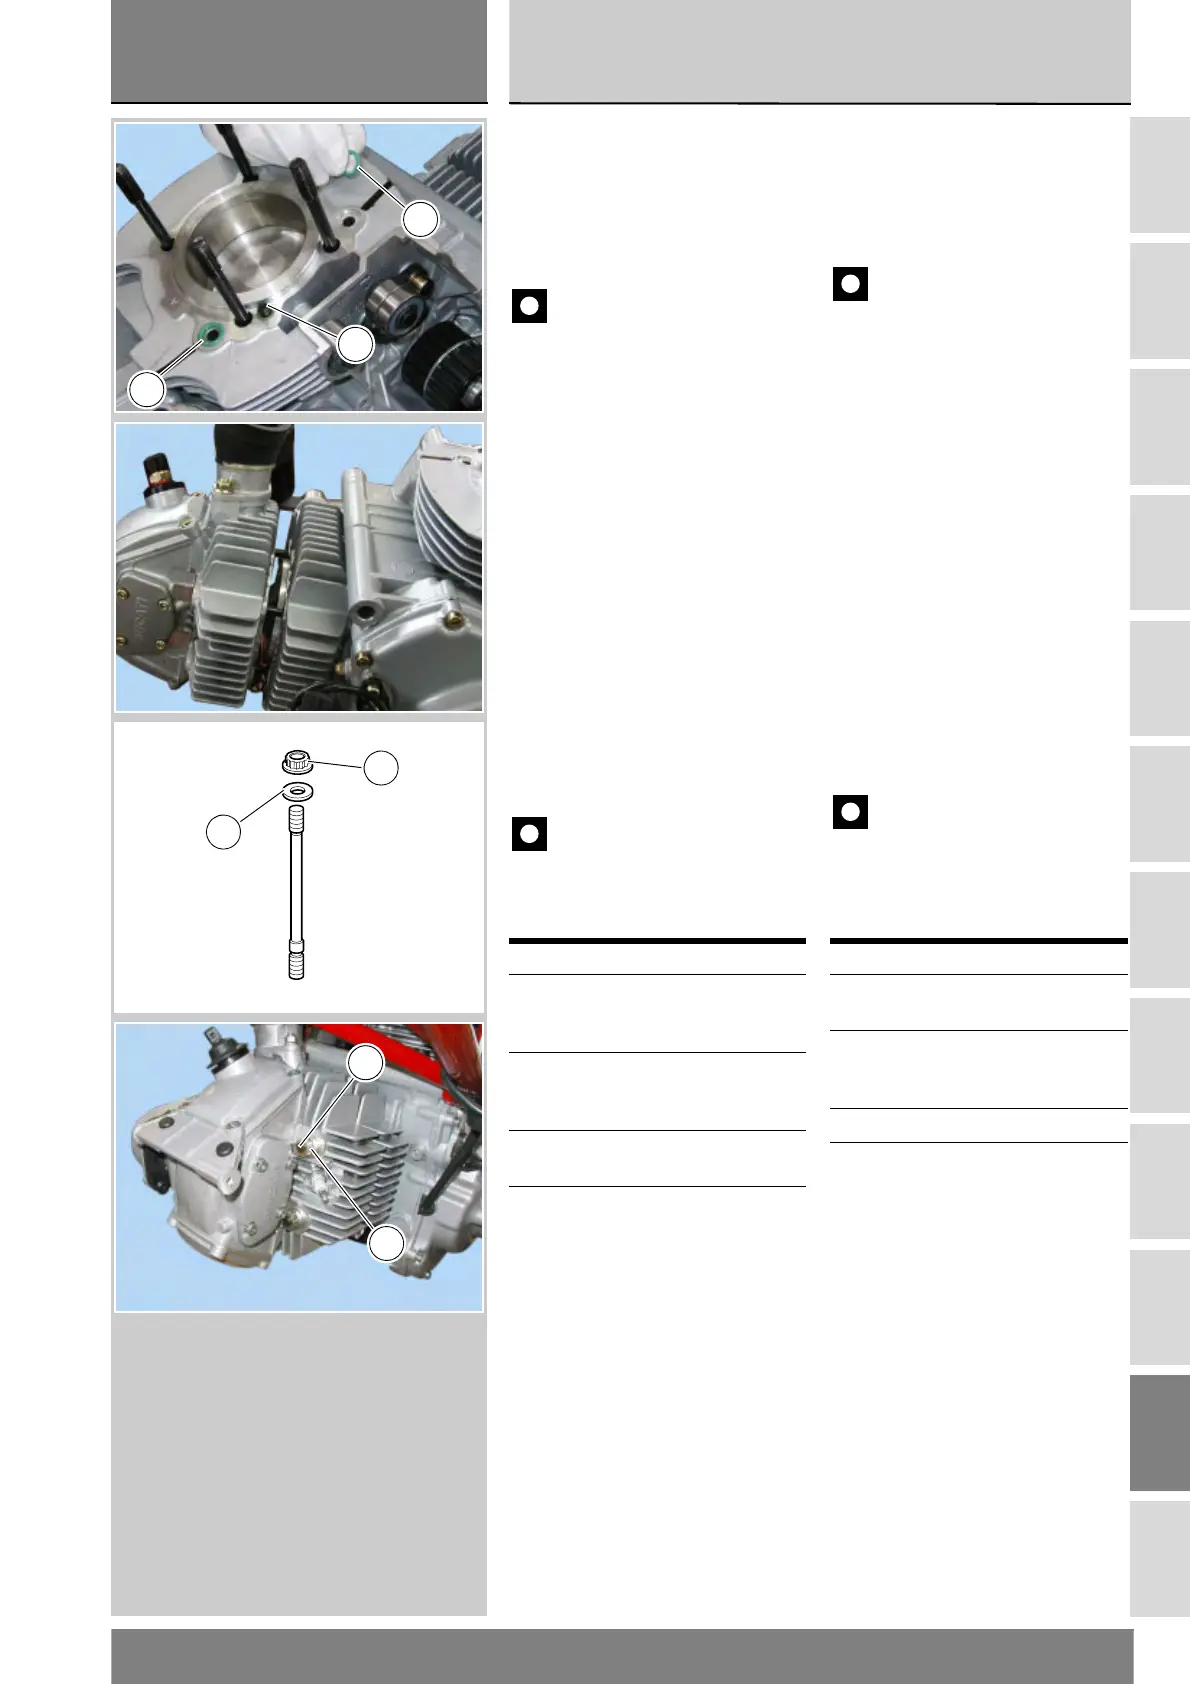
Reassembling the head
Make sure the O-rings (A) and the
locating pin (B) are in place in the
cylinder mating surface (Sect. N 5)
before installing the heads.
Caution
The locating pin (B) must be
installed with the smallest hole
pointing away from the cylinder (Sect.
N 5).
Slide the complete head on the stud
bolts and push it down onto the
cylinder.
Insert the special washers (20) on the
stud bolts (P) with the sharp edge
facing the head and the flat side
pointing inwards.
Grease the ends of the nuts (19) and
the thread of the stud bolts with the
specified grease.
Fit tool part no. 88713.2096 to a
torque wrench and tighten the nuts to
the specified torque in a cross
sequence (Sect. C 3).
Caution
Follow the above procedure
closely. Improper tightening may
cause the stud bolts to stretch
abnormally leading to severe engine
damage.
Operations Ref. Sect.
Refit the side covers
and the timing belts
N 4.2
Connect oil
temperature sensor to
main wiring harness
P 1
Refit the battery mount P 2
Refit the airbox L 7
Rimontaggio teste
Prima di procedere al montaggio delle
teste complete verificare che sulla
superficie del cilindro siano state
installate le guarnizioni OR (A) e la
spina di riferimento (B) (Sez. N 5).
Importante
La spina di riferimento (B) deve
essere montata con il foro di diametro
minore opposto al cilindro (Sez. N 5).
Inserire la testa completa nei
prigionieri del carter e portarla in
battuta sul cilindro.
Inserire nei prigionieri (P) le rondelle
speciali (20) con la superficie a spigolo
vivo rivolta verso la testa e con il lato
piano rivolto verso l’interno.
Ingrassare le estremità dei dadi (19) e
il filetto dei prigionieri con grasso
prescritto.
Utilizzando l’attrezzo 88713.2096
abbinato ad una chiave
dinamometrica, serrare i dadi
fissaggio alla coppia prescritta
procedendo a croce (Sez. C 3).
Importante
Una procedura diversa da quella
indicata può provocare un
allungamento abnorme dei prigionieri
e causare gravi danni al motore.
Operazioni Rif. Sez.
Rimontare i coperchi
laterali distribuzione e
le cinghie distribuzione
N 4.2
Collegare il sensore
temperatura olio al
cablaggio principale
P 1
Rimontare il supporto
batteria
P 2
Rimontare la scatola
filtro
L 7
A
A
B
19
20
20
19
 Loading...