21
3
2
1
Before Using This Machine
1
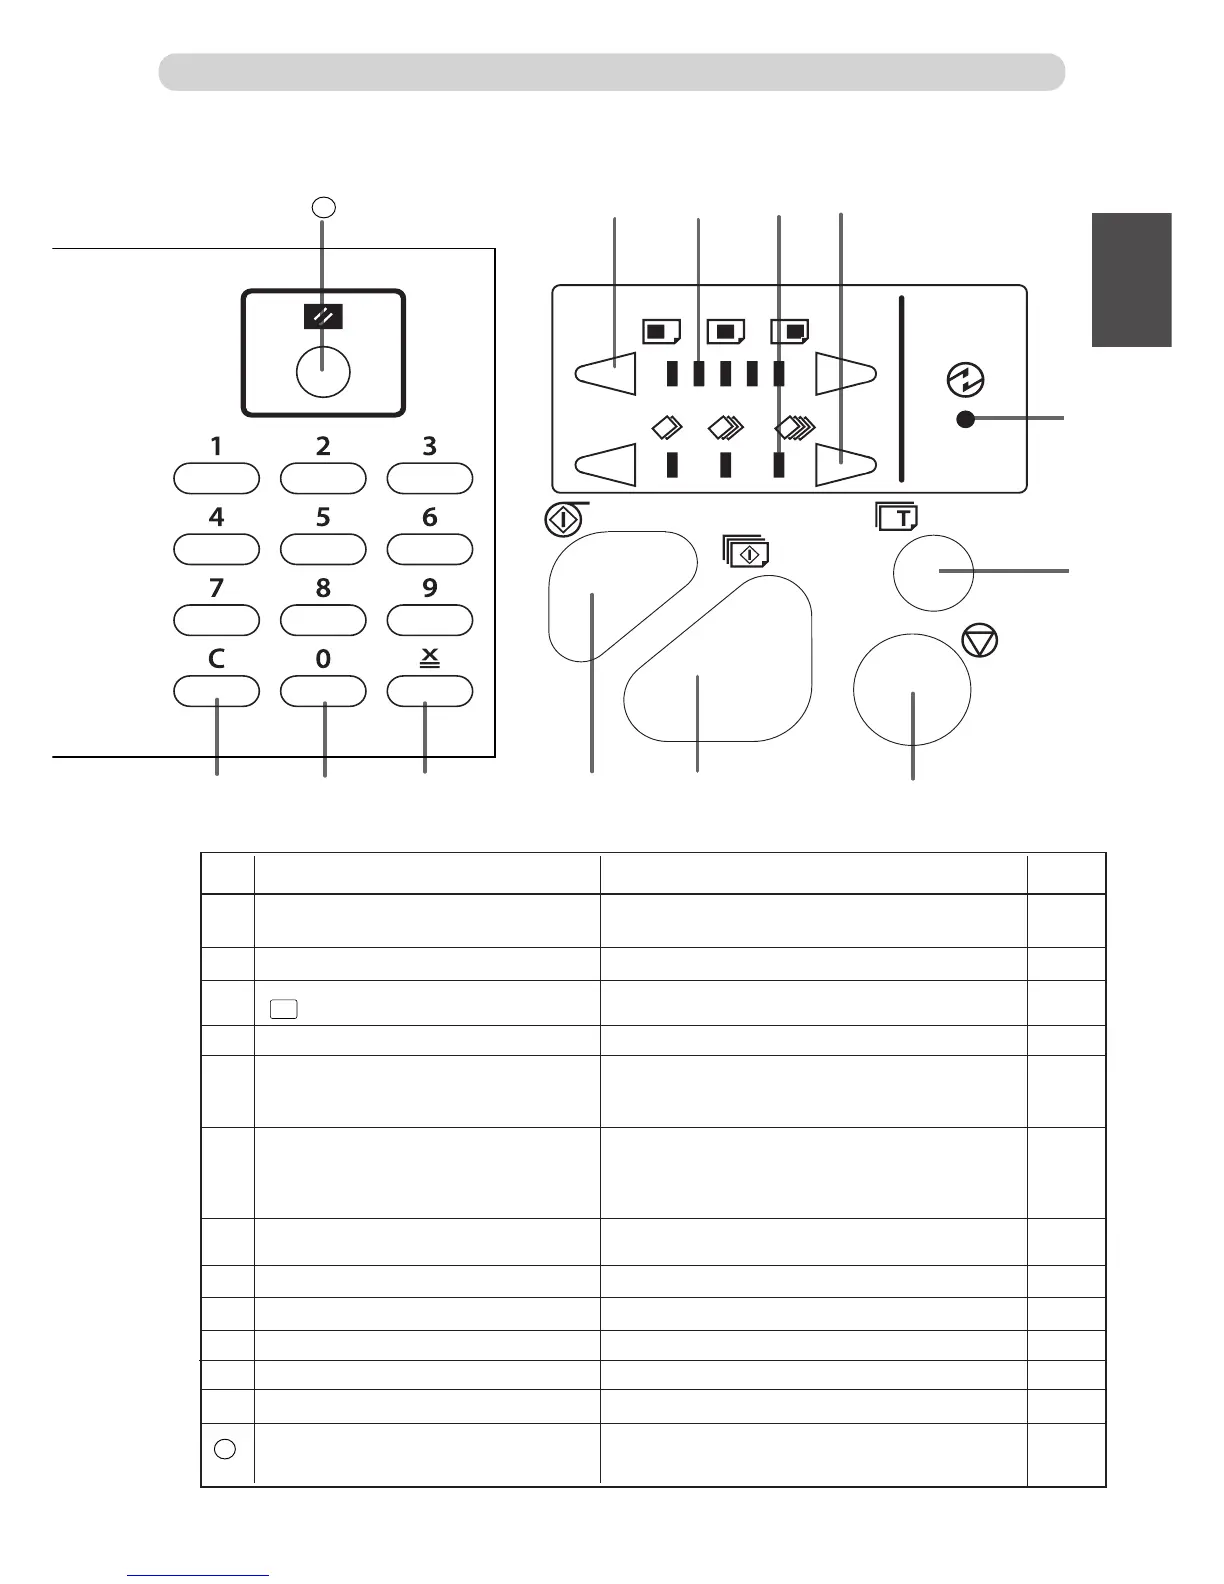
Part Names and Their Functions
No. Name Function
i
“ST
OP” key
Press to stop printing on the way.
If this key is pressed while the machine is stopped,
the total number of prints and masters will be displayed
on the LCD panel.
o
“PRINT” key
Starts printing.
This will not start master making.
Mastermaking will start automatically after the end of
printing if ther
e is a document on the ADF.
!0
“ALL CLEAR” key
Returns the control panel settings to the “Standard
Mode” settings. Press and hold for at least 0.5
seconds.
!1
X
=
key
Press to enter the number of prints and number of sets
for sectional prints.
!2
Ke
y pad Use to enter the number of prints.
!3
“CLEAR” key
Press to reset the displayed number of prints to “0”.
Only the number of prints is cleared.
!4
Printing speed indicator lamp
The lamp of the specified printing speed lights.
!5
“PRINTING SPEED ADJUSTMENT” k
eys
Press to adjust the printing speed.
!6
“PRINTING POSITION ADJUSTMENT”
keys
Press to adjust the printing position.
!7
Printing position indicator lamp
The lamp of the specified printing speed lights.
Refer
ence
page
57
31
67
68
68
69
69
i
o
!0
!1
!2
!3
!4
!5
!7
!6
“TEST PRINT” key
Press to print only one piece of paper for checking the
print darkness or printed position.
“MASTER MAKING”
key
Press to start master making.
24
!
!
2
8
9
0
Energy save mode indicator lamp
The lamp of the energy save mode.
!
8
!
9
2
0
68
30
31
31
70