13
Move the backgauge to the third cut position, say 13.0” and make a cut, the following
screen is displayed:
After you finish storing all cuts, press
Press
(END)
it will beep 4 times, then re-press
(END)
to store the program and this
screen appears:
If you want to start cutting, press
(AUTO),
the backgauge will move to the first cut
position and the following screen appears:
Place your paper and make the first cut, after completing the cut, the backgauge moves to
the second cut position.
Adjust the paper for the 2
nd
cut, after completion the cut, the backgauge will move to the
3
rd
cut position.
Adjust the paper for the 3
rd
cut & make your cut, the backgauge will then “push-out”
your stack automatically. Then it moves to the first
cut position and readies itself for
next cut cycle.
After you have finished all cuts, press
(AUTO)
to remove the automatic backgauge
movement, AUTO will disappear on the display, and this screen appears:
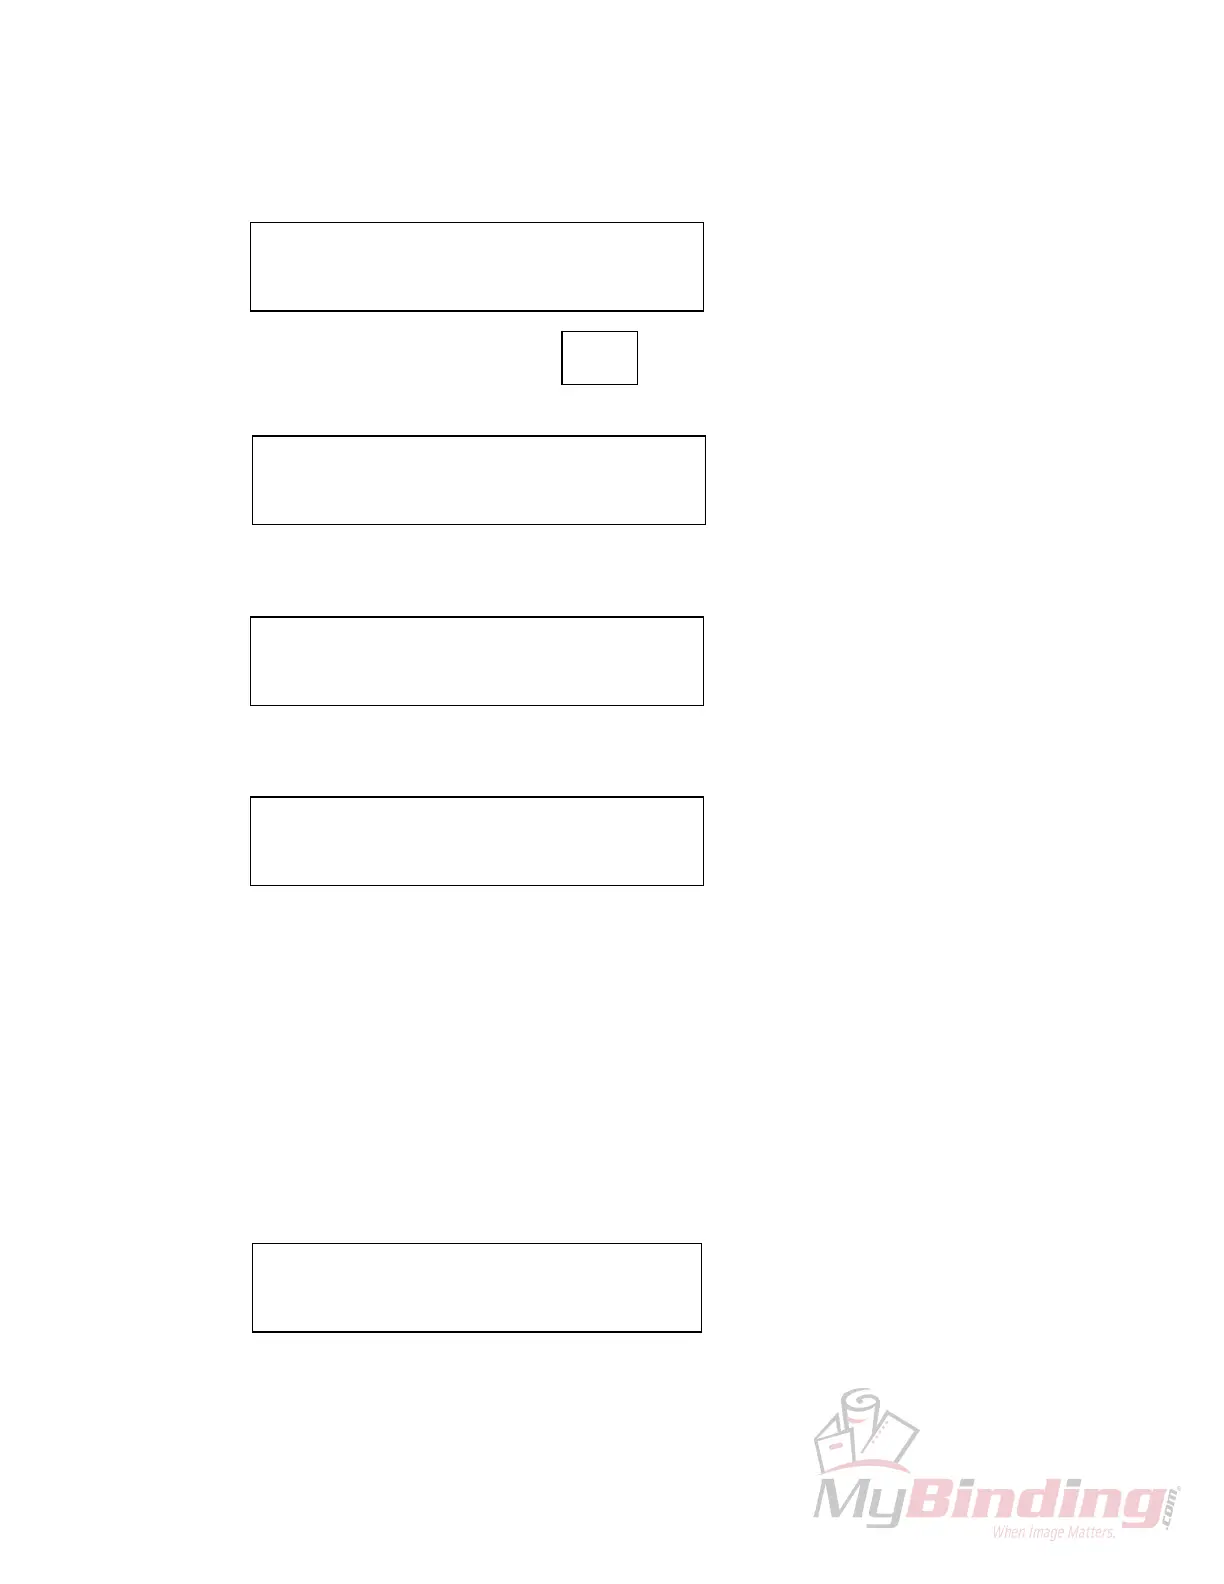
C: 13”000 PROG: 2 C&S
3: 13”000 4: 00”00
❑
CUT &
STORE
C: 13”000 PROG: 2
3: 13”000 4: 00”00
❑
C: 13”000 PROG: 2
1: 15”00
❑
2: 14”500
C: 15”000 PROG: 2 AUTO
1: 15”00
❑
2: 14”500
C: 15”000 PROG: 2
1: 15”00
❑
2: 15”500
, the screen will change to: