17
Press
(END)
it will beep 4 times, then re-press
(END)
to store the program and the
screen will change to:
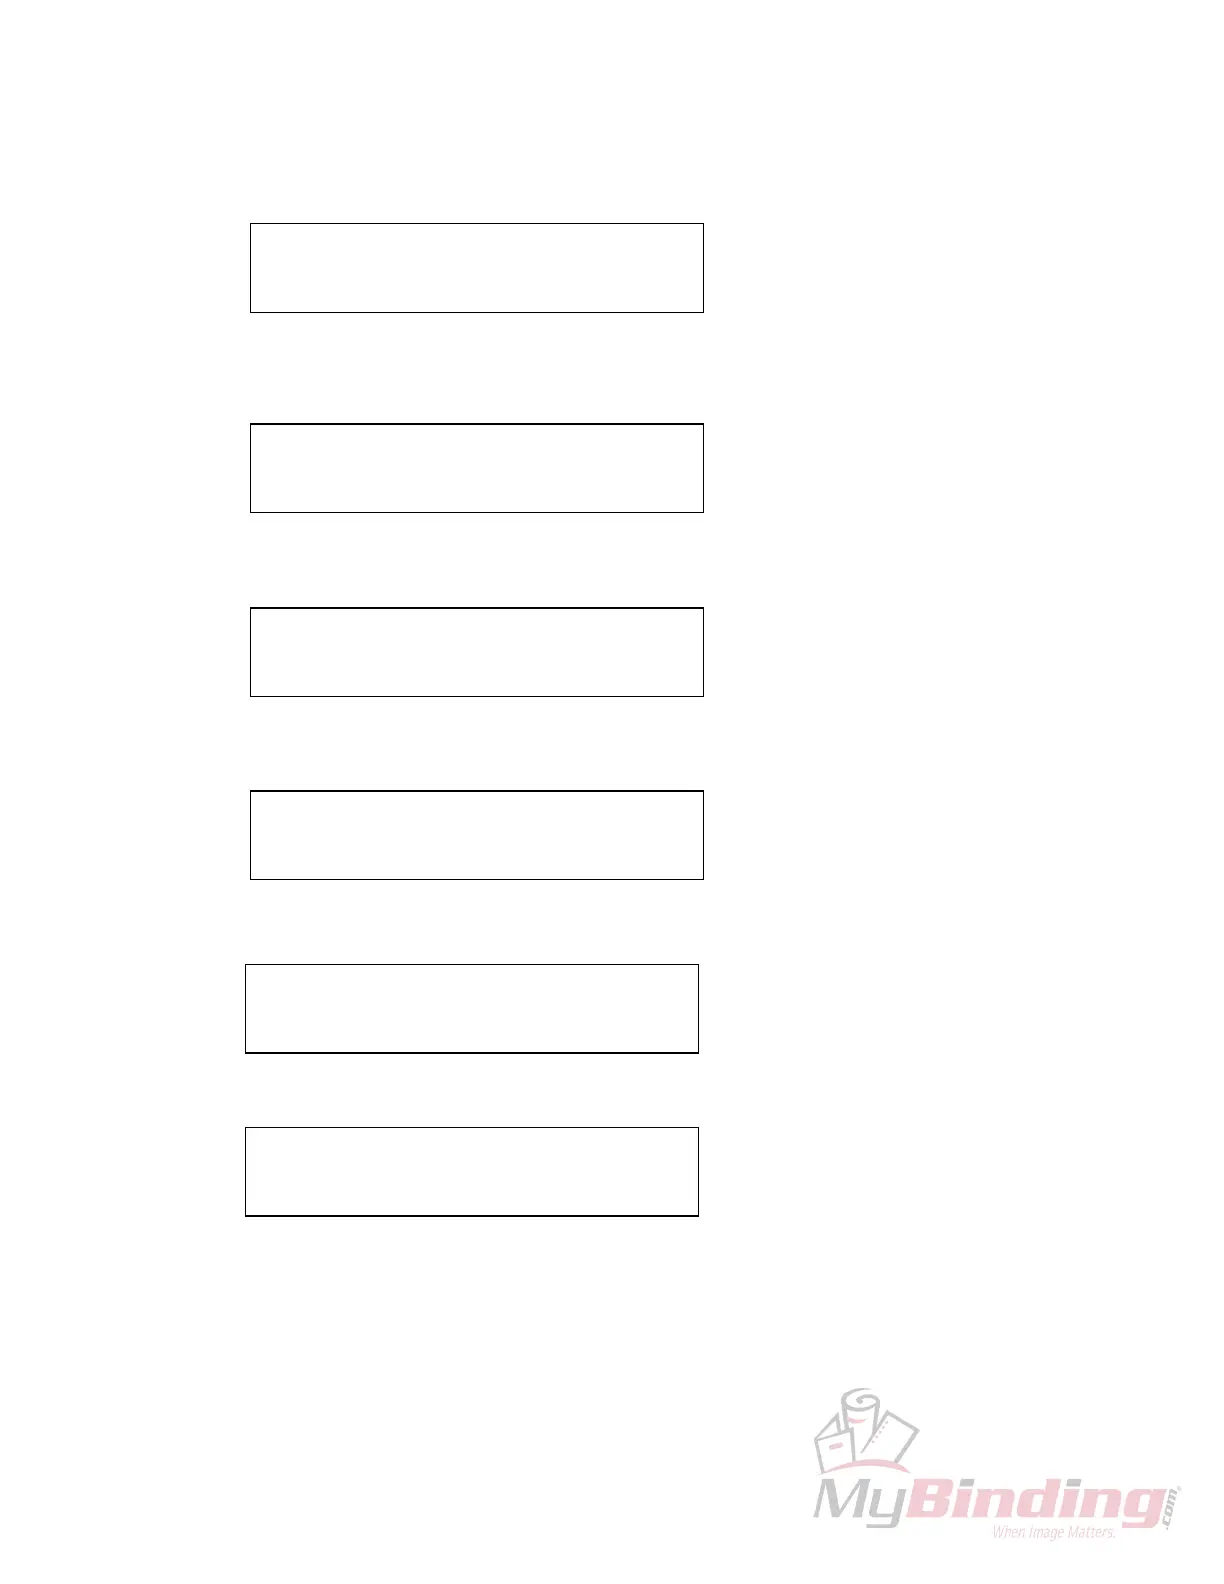
If you want to make a cut, press
(AUTO)
, the backgauge will move to 8.75” position and
the following screen appears:
Make the first cut and the backgauge moves in forward 2.0”, the following is on the
screen:
After the second cut is made, the backgauge moves in forward 0.25” and the following
appears:
After you finish your 2.0” x 4 pieces & 0.25” x 3 trims, the backgauge moves to the first
cut position at 8.75”, then you can make the second cycle cut:
After you have finished all cuts, press
(AUTO)
to remove the automatic backgauge
movement, AUTO will disappear on the display, and this screen appears:
NOTE: If you want to correct the programmed cut positions, press keys (LAST)
and (NEXT) to move the black square to the position which require, and re-enter
new cut sizes, then press (NEXT).
C: 26”125 PROG: 4
1: 08”75
❑
2:
−
02”000
C: 08”750 PROG: 4 AUTO
1: 08”75
❑
2:
−
02”000
C: 06”750 PROG: 4 AUTO
3:
−
00”25
❑
4:
×
03
C: 06”500 PROG: 4 AUTO
3:
−
00”25
❑
4:
×
03
C: 08”750 PROG: 4 AUTO
1: 08”75
❑
2 :
−
02”000
C: 08”750 PROG: 4
1: 08”75
❑
2:
−
02”000