6
❏
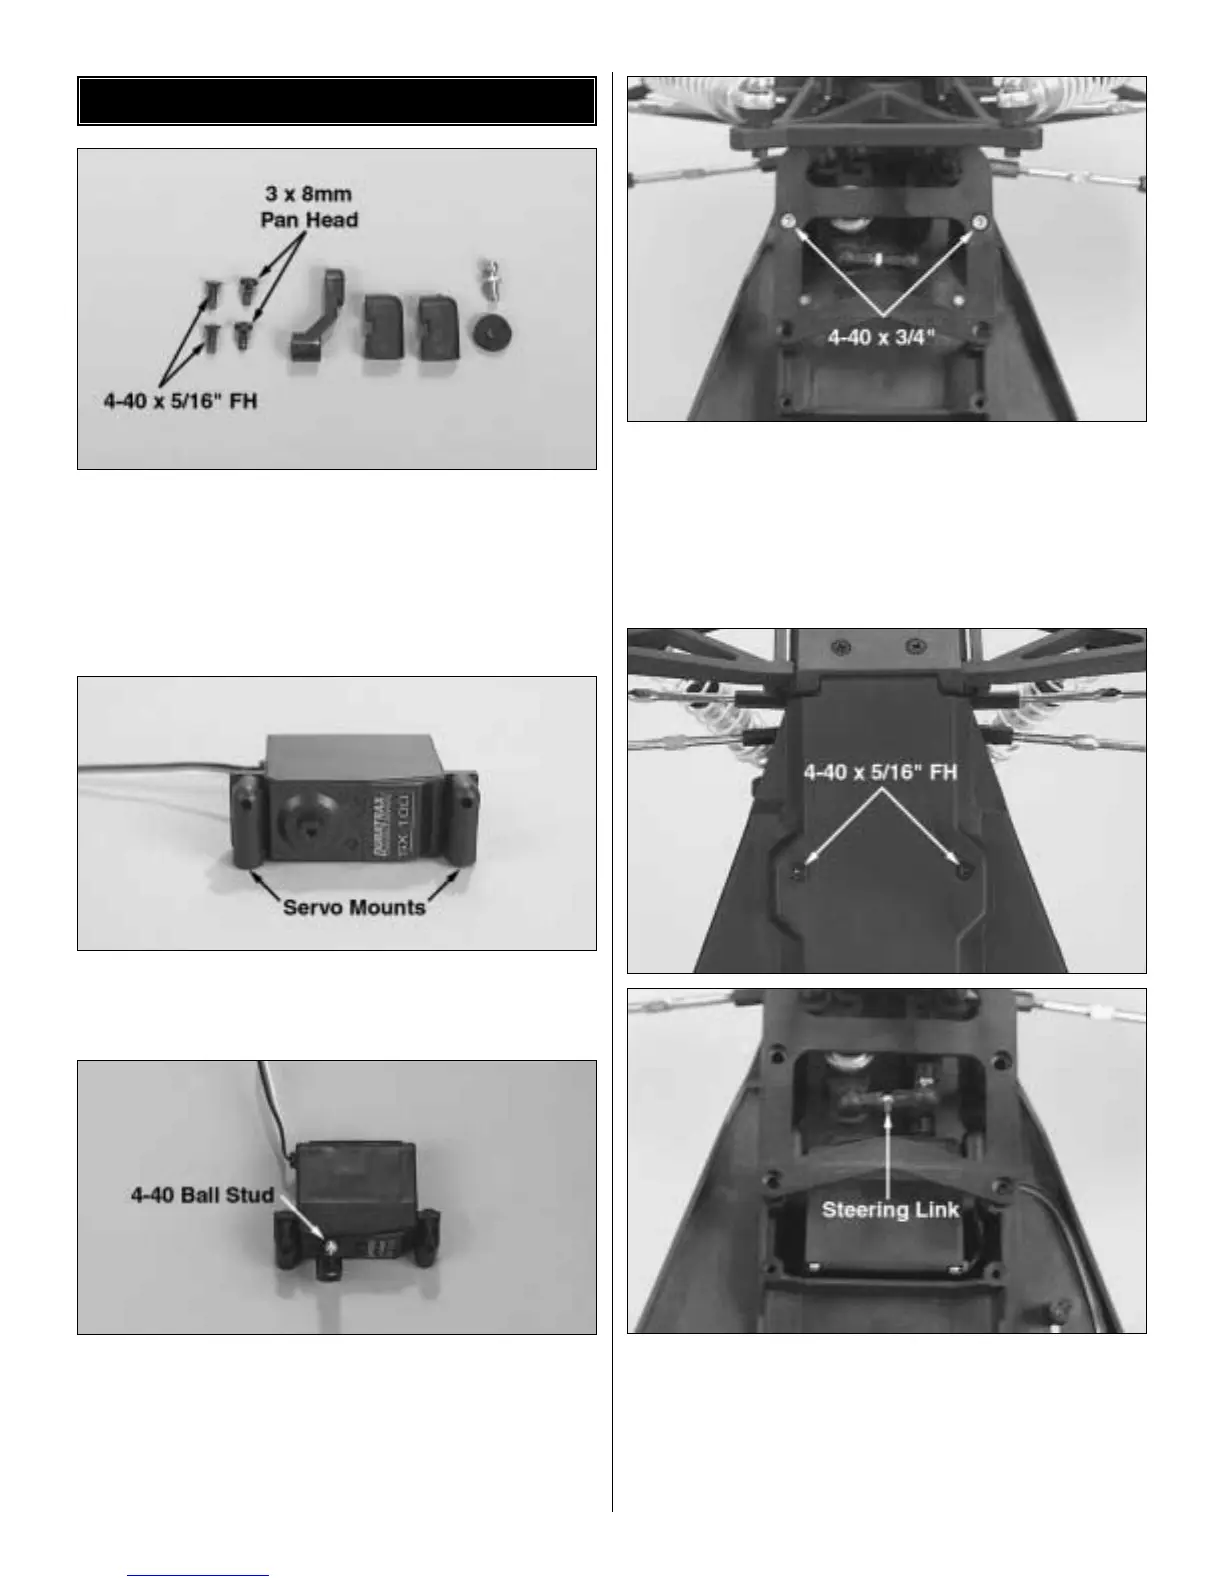
1. Locate and remove from the parts bag two (2) steering
servo mounts, one (1) servo arm (determine which servo arm
is required for your radio system), one (1) 4-40 ball stud, one
(1) foam washer, two (2) 3x8mm pan head screws and two
(2) 4-40 x 5/16
"
flat head machined screws To ensure that
you are using the right size screw, match the screw to the
picture on the hardware chart.
❏
2. Attach the servo mounts to the servo using the two (2)
3x5mm screws as shown
❏
3. Install the 4-40 ball stud into the flat side of the steering
servo arm in the upper hole. With the steering servo centered
as described in “Preparing the Radio System”, install the
correct steering servo arm onto the servo splines as shown
above. (Note: If the steering servo is not properly centered, the
steering could be off). Re-install the servo horn screw, securing
the horn onto the servo.
❏
4. Remove the two (2) 4-40 x 3/4
"
socket head machined
screws from the upper plate and rotate the front of the truck
forward. (Note: Be careful that you do not loosen any of
the steering assembly parts during this process).
❏
5. Install the steering servo into the mounting slot. Line up
the holes in the servo mounts with the two holes in the chassis.
(Note: there are two different mounting holes in the servo
mounts. Use the appropriate holes for your servo). Install the
two (2) 4-40 x 5/16
"
flat head machined screws through the
bottom of the chassis into the servo mounts. Attach the
steering link ball cup onto the 4-40 ball stud on the servo.
STEERING SERVO INSTALLATION