7
❏
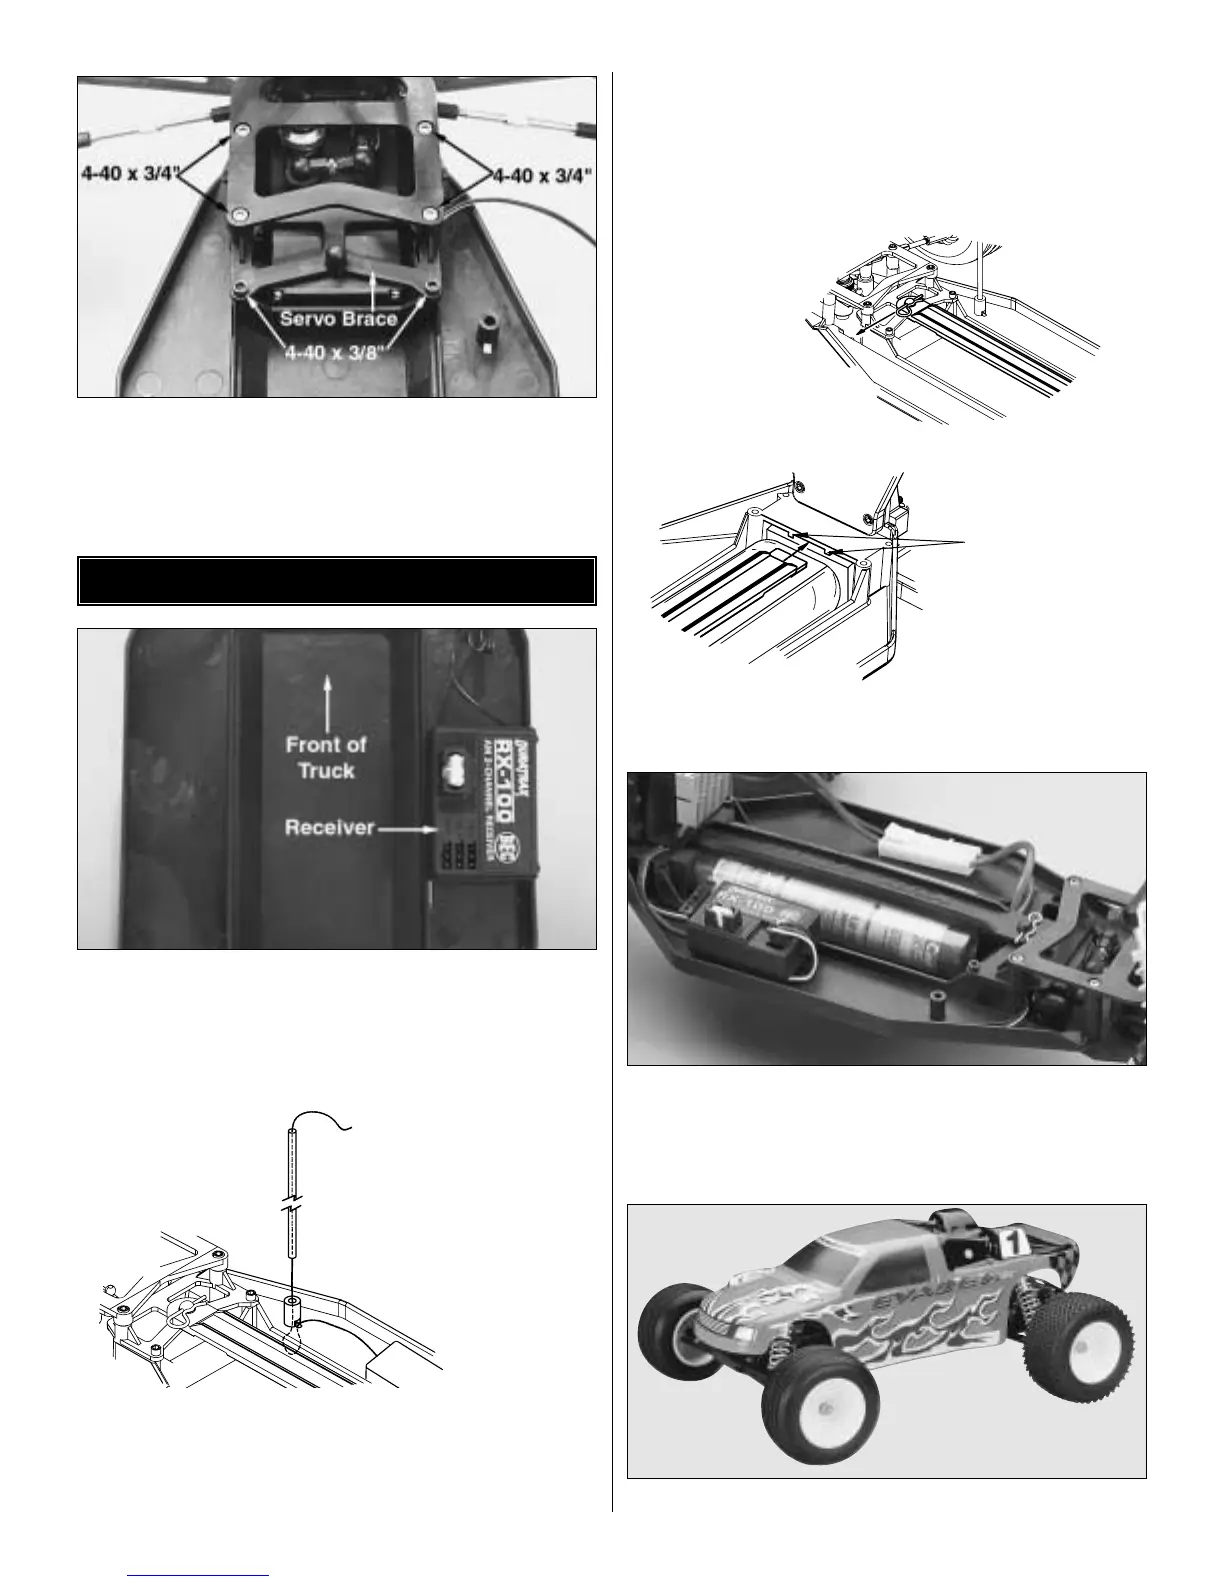
6. Install the servo brace onto the chassis using the two (2)
4-40 x 3/8
"
socket head machined screws and two (2)
4-40 x 3/4
"
socket head cap screws. Re-install the two (2)
4-40 x 3/4
"
socket head cap screws into the upper plate.
❏
1. Install the receiver onto the chassis as shown. Remove
the protective backing from one side of the included 1/4" thick
piece of foam tape and install it onto the chassis. Then
remove the other piece of protective backing and install the
receiver onto the foam rubber.
❏
2. Route the receiver antenna through the holes in the
chassis as shown above. Locate the antenna tube, and
thread the receiver antenna through the antenna tube. The
antenna will be longer than the antenna tube. DO NOT CUT
OR COIL THE ANTENNA WIRE. Press fit the antenna tube
into the hole in the chassis. Tip: Run the antenna wire
through your fingers to straighten out the kinks before
running through the antenna tube. Also, applying a small
amount of soap and water to the antenna wire will help
lubricate the wire for threading into the antenna tube.
❏
3. Remove the body pin from the battery strap post, and
remove the battery strap from the Evader ST.
❏ 4
. Install the charged 6 or 7 cell battery into the battery slot.
Re-install the battery strap onto the Evader ST. Note that
there is a channel in the chassis for the battery strap to
rest in. Re-install the body clip into the battery strap post.
❏
4. Decal the body if desired.
and then through the tube.