5.3 Lower thread
Look out! Danger of injury!
Turn off main switch!
The l ower thread may only be threaded with the sewing
machine switched off.
Threading the lower thread (hook thread)
–
Place the thread spool on its column.
–
Pass the lower thread through the thread guide on the take-up arm and alternately
through the guide of the pre-tensioner 1.
–
Pass the thread anti-clockwise round tensioner 1 and once more through the thread
guide.
–
Carefully wind a few turns of thread anti-clockwise onto the spool by hand and
place the spool on its column.
–
Swivel the bobbin winder 4 against the empty s pool.
The thread is wound onto the spool during sewing.
When spool 3 is full, winding-on is halted by the bobbin-winder lever 4.
–
Adjusting tension 1.
The thread should be wound on at minimum tension.
Threading the lower thread
–
Raise flap 5 and remove the empty spool with a magnet or tweezers.
–
Insert spool 6 in such a way that when the thread is unwound from it moves in the
opposite direction to the hook.
–
Pass the thread through slit 7 and below spring 10.
–
Pass the thread through slit 8 and pull about 3 cm through.
–
Close flap 5 and pass the thread through the flap’s guide 9.
Adjusting the lower-thread tension
The lower-thread tension should be s et in accordance with the type of seam required.
Adjust the tension with screw 11.
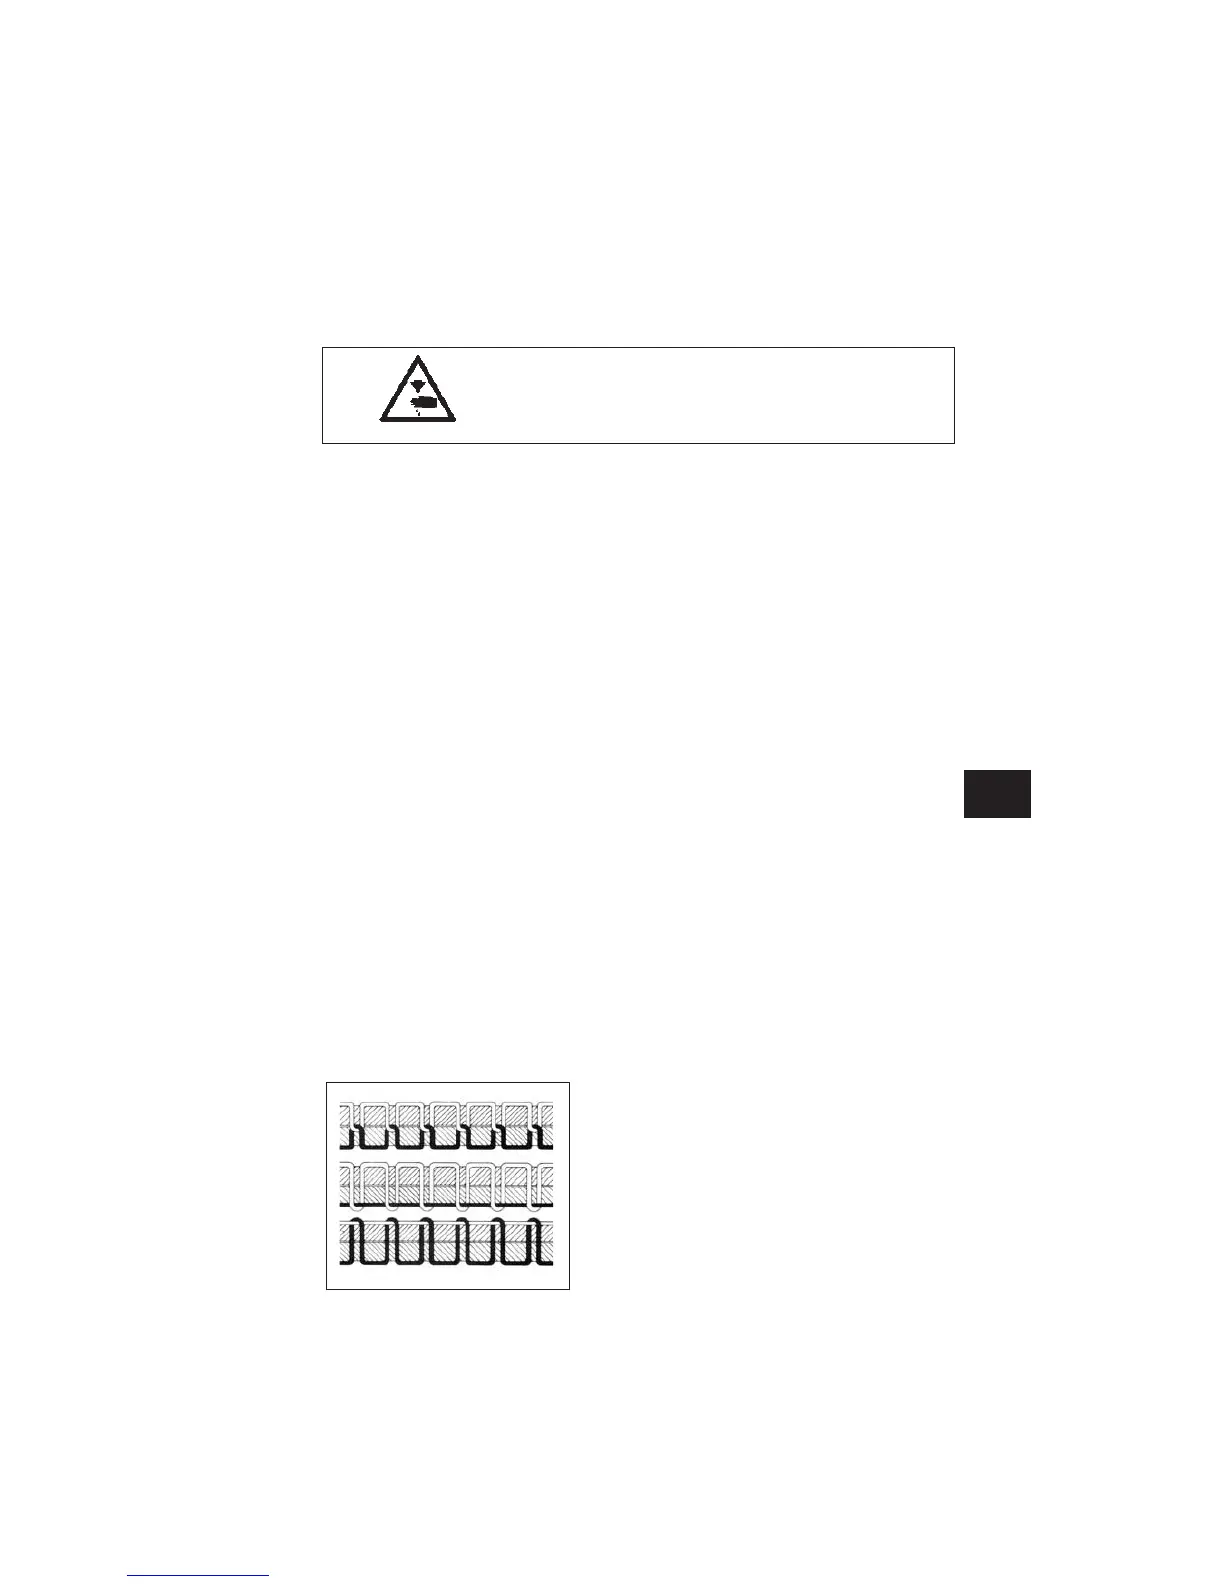
Fig. a: correct thread interlacing in the centre of
the material
Fig. b: needle-thread tension too low
or looper-thread tension too great
Fig. c: needle-thread tension too great
or looper-thread tension too low
13
GB
 Loading...