6
WoodCeiling WoodCeiling
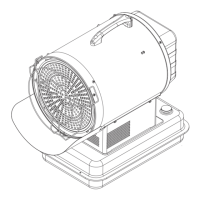
MOUNTING THE BRACKET
RefertoFigures4aand4b.
1.Locateawoodstudinthewoodceilingjoist/sidewall.Forceilingonly,ifyou
cannotlocateawoodstud,youhavetoinstallawoodpieceontheceilingas
thisheatermustbesecurelyfastened.
2.Removethemountingbracketfromtheheatingunitbylooseningbracket
screwswithawrenchandslippingthehandleoffoverthescrewheads.
3.Placeawasheronscrewsbeforeinsertingthroughtheholesinthemounting
bracketandscrewthemsecurelyintoaceilingjoistorwallstud.
NOTE:Ifyouwanttoswiveltheheatereithertotherightorleftaddingawasher
tobothsidesofthebracketisrecommended.Alongerlagboltmayberequired
toproperlysecuretheunit.SeeFigure4a.
HANGING THE HEATER
1. Attachtheheatingunittothemountingbracket.
2. Lifttheheaterupandintothemounting
bracket.
3. Alignthebracketscrewswiththekeyholeslots
inthemountingbracket.
4. Iftheheateristobetilteditmustbepositioned
inthekeyholeslots-seegure5.
5. Tightenthebracketscrewswithawrenchso
theunitissecurelysuspendedathorizontalor
verticallevel.
Figure 5
ADJUSTING AIR FLOW DIRECTION
1.Toturntheunitwhenithasbeeninstalled
withasinglelagbolt(asshowningure
4a),simplyturntheentireheaterasneeded.
Theunitcannotbeturnedhorizontallyifit
hasbeeninstalledwith2lagbolts.
2.Totilttheunitvertically,loosenthebracket
screws(seegure5).
Figure 4a. Single-Screw Mounting Figure 4b. Double-Screw Mounting
INSTALLATION
Side Wall
Side Wall