DI651ST2 User Manual 10
Wall Mounting
A wall mount is not included. Please purchase a VESA Standard wall mount to secure the LCD.
DynaScan is not responsible for damages caused by using non-standard wall mounts.
Verify that the mounting location can support the weight of the LCD before installation.
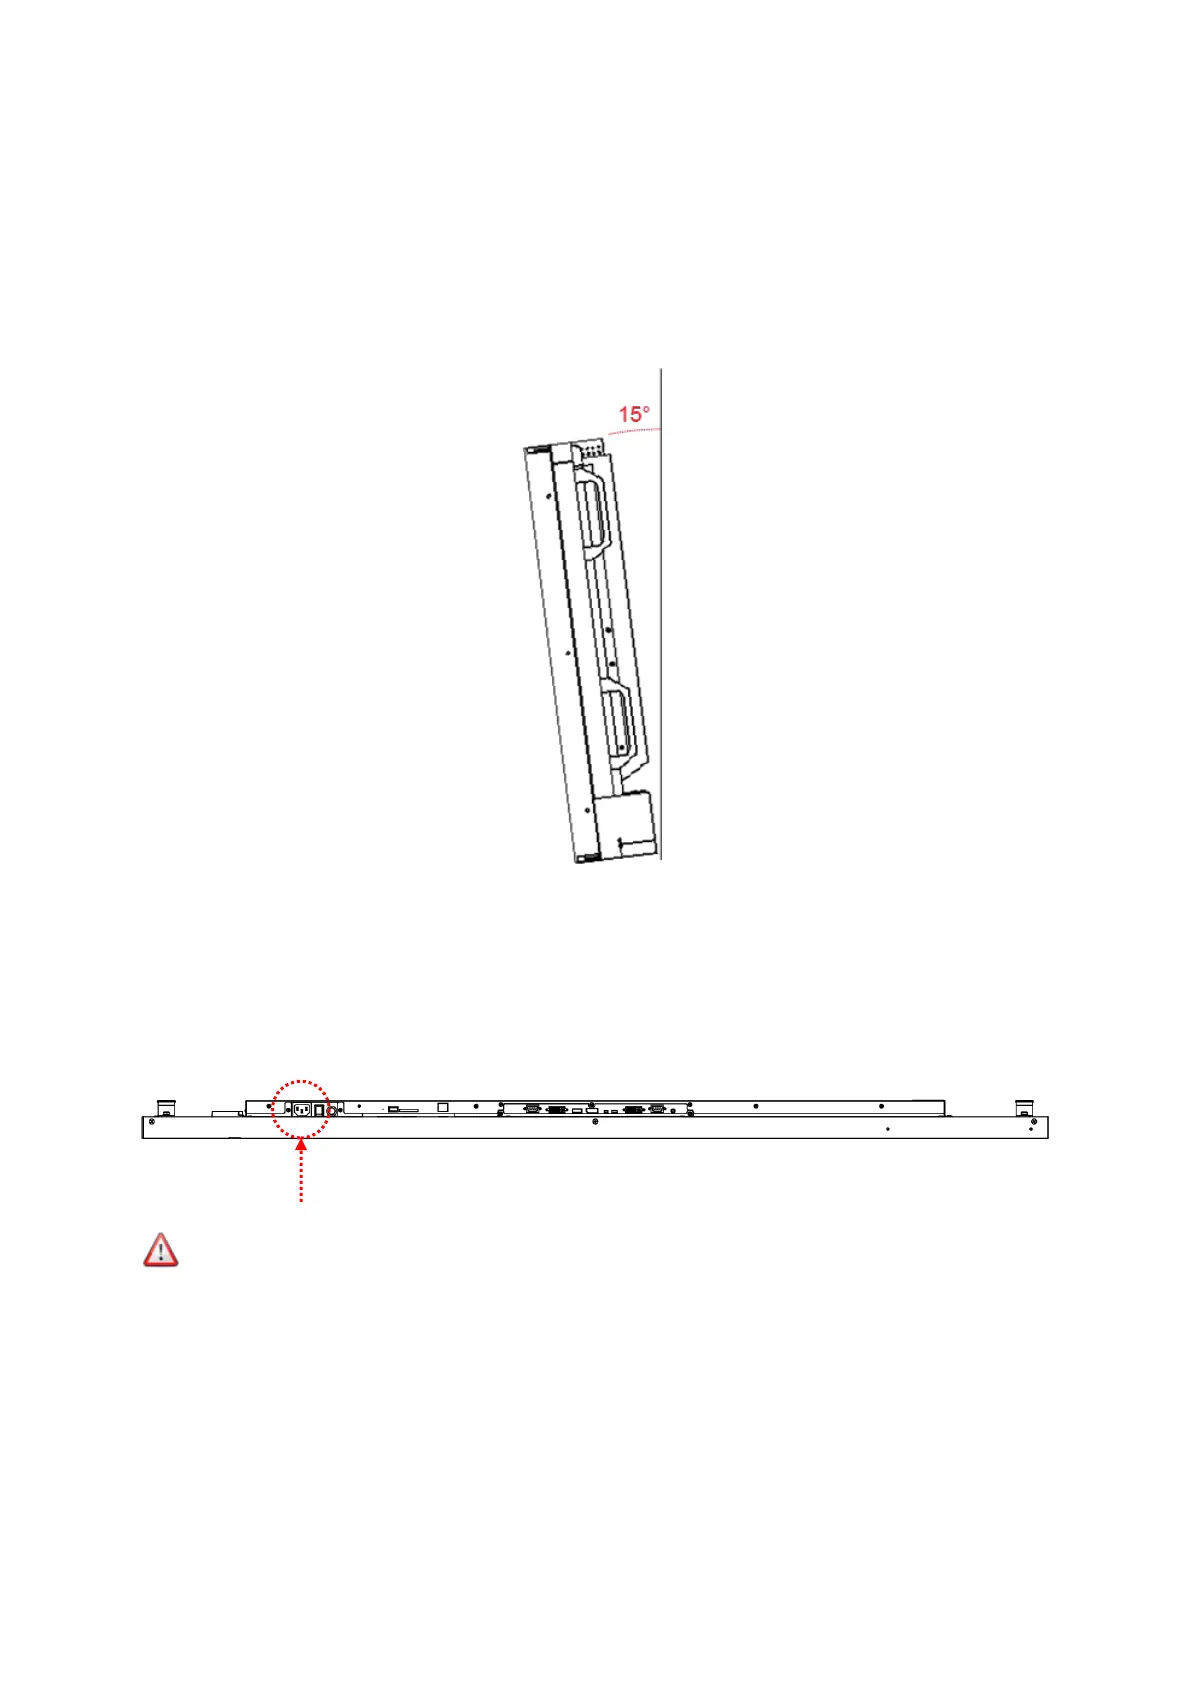
The installation angle must be within 15 degrees of the vertical axis.
Do not install the wall mount while the power is turned on as it may cause serious injury from
electrical shock
Connecting to a Power Source
Using the power cable provided, plug it in the power inlet on the back of the display shown in the
diagram below. Connect the power cable to a 100-240 volt, 50 / 60Hz AC power outlet.
Insert the plug completely into the socket. A loose power connection may cause damage to the
display and/or lead to a fire hazard.
Note: Picture shown is for
illustration purpose only.
 Loading...