Configuration and Use
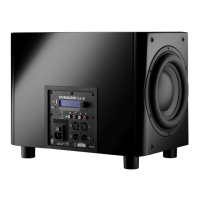
With the Sub 6 subwoofer positioned in the listening room and connected to signal cables and mains power it
can be switched on via the mains switch above the mains input socket on the rear panel.
The Sub 6 must be configured appropriately for the audio system and main speakers with which it is to be used.
This is achieved via the rotary controller, display and menu based interface on the rear panel. Turn the rotary
controller to select configuration parameters and press the control to select options and save any changes.
General Tips
Check it out
Try dierent subwoofer positions and settings, before you finally choose a setup.
Note down settings
When looking for the best subwoofer position in the room, note down the ideal setting you found for a position.
When moving the subwoofer between two positions you will be able to set the subwoofer to the same
configuration as found before.
Vary the listening music
When experimenting to find the optimal settings, use a couple of music tracks with repetitive bass across a large
spectrum. The tracks should be suciently dierent from each other and each should cover a wide bass-range.
Musical instruments, such as a double-bass, bass guitar, church organ, etc. covering a wide spectrum in the
bass region and above, are very suitable as these depend on accurately balanced subwoofers and main
speakers.
Verify changes
Although in general it is best to make adjustments in the sequence outlined below, note that changing one setting
may influence another. For example, finding the right setting for phase may result in having to decrease gain, even
if this was set correctly before.
It is recommended that you double-check the previous settings before moving on to the next one. Obtaining the
best integration of the subwoofers generally involves a considerable amount of repeated fine-tuning.
Note
If multiple subwoofers are employed, ideally they should not be “daisy-chained”. Multiple subwoofers should be
configured according to the individual subwoofer positions with the same input settings and the same low &
high pass filters.
If multiple subwoofers are to be “daisy-chained”, please follow the instructions in Connection Scheme 3 and
Connection Scheme 4.
Sub 6 Configuration Menus
Auto, ON/OFF
The Auto, ON/OFF switch enables auto standby (Auto) or forces the subwoofer to be permanently on (ON/OFF).
In Auto mode, the subwoofer can be “woken up” by
▪ an audio input signal,
▪ rotary knob push,
▪ a trigger input if Trigger is enabled in the menu.
24 Sub 6 User manual