12
Large Extended Tilt Mount
www.dynexproducts.com
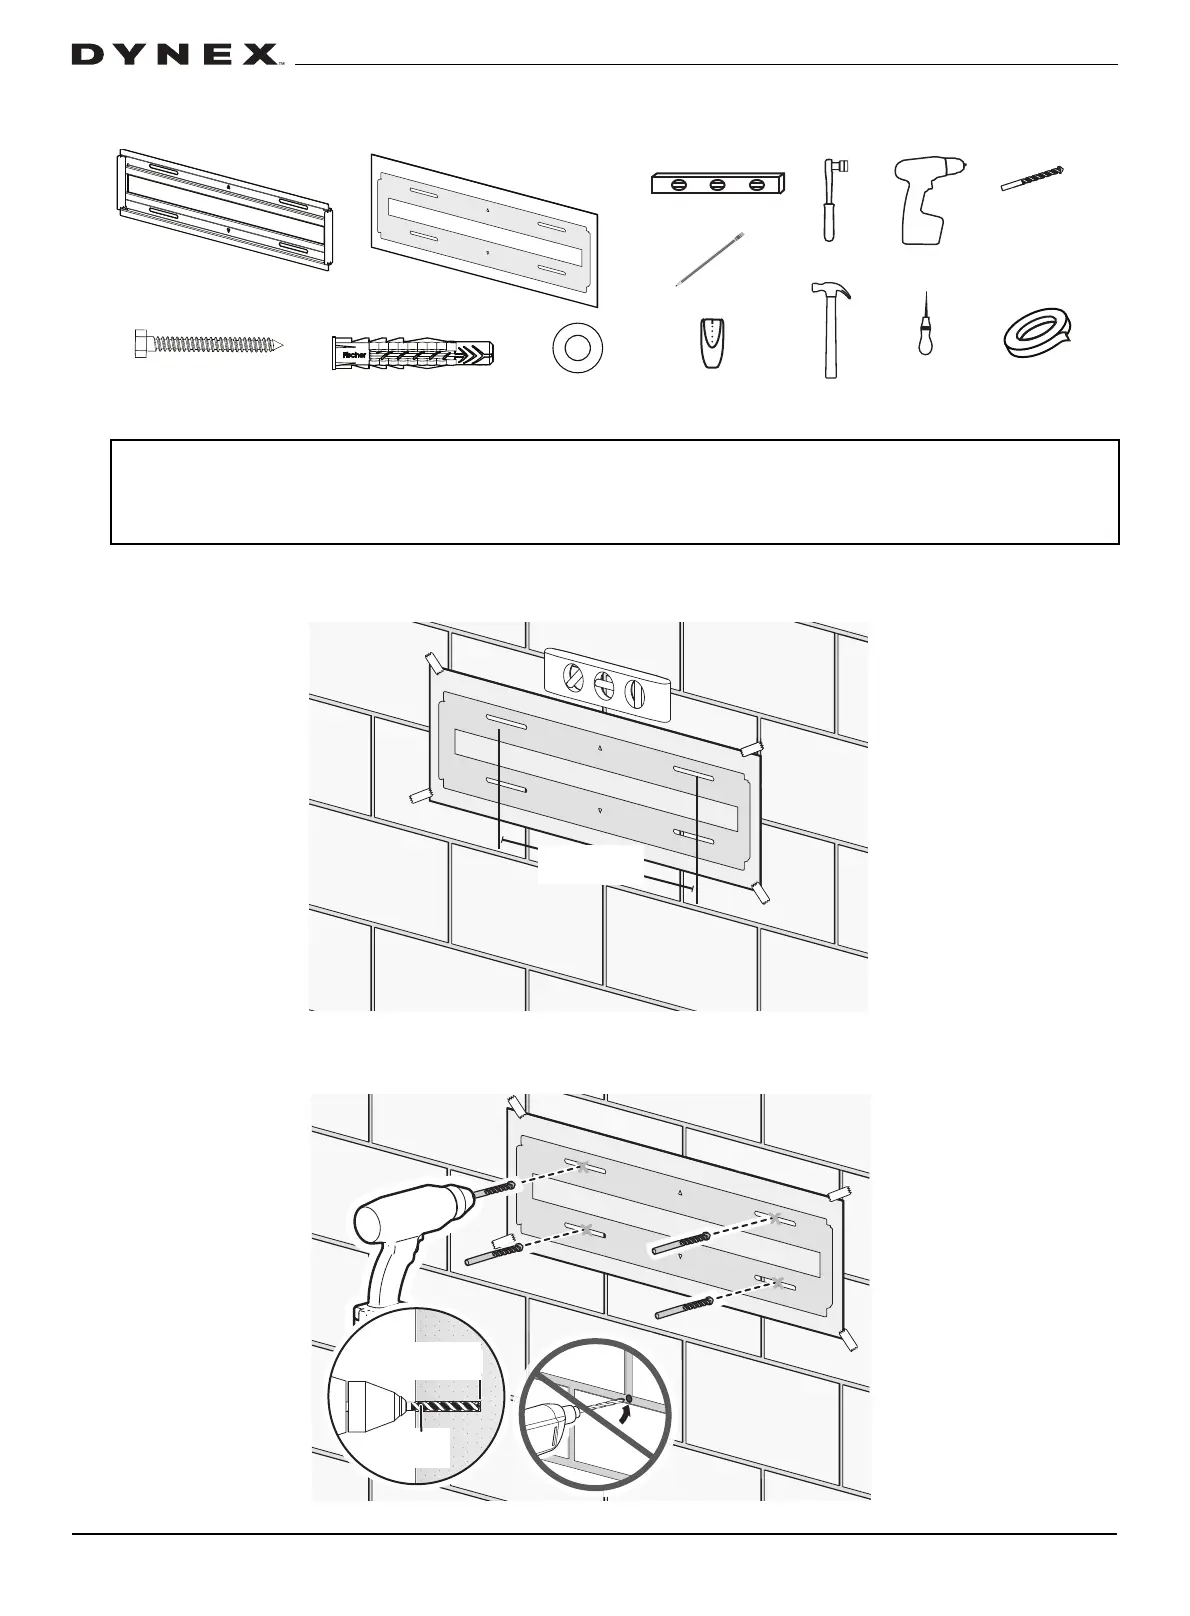
STEP 5 - Option 2: Install on a solid concrete or concrete block wall
You’ll need (Note: Concrete wall installation kit not included)
1 Align the center of the wall plate template at the height (a + b) you determined in the previous step, make sure that it is
level, then tape it to the wall.
2 Drill four pilot holes through the template to a depth of 3 in. (75 mm) using a 3/8 in. (10 mm) diameter masonry drill bit,
then remove the template.
CAUTIONS:
• To prevent property damage or personal injury, never drill into the mortar between blocks.
• Mount the wall plate directly onto the concrete surface (no wall covering).
• Minimum concrete block size: 8 x 8 x 16 in. (203 x 203 x 406 mm).
• Minimum horizontal space between fasteners: 16 in (406 mm).
3/8 in.
masonry drill
bit
Hammer
Socket wrench
Drill
Edge-to edge
stud finder
Tape
5/16 x 2-3/4 in.
Lag bolt (4)
Level
Pencil
Wall plate template
Lag bolt washer (4)
Concrete anchor (4)
Wall plate
Awl
3 in.
(75 mm)
3/8 in. (10 mm)