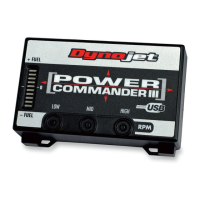
8 Unplug the stock wiring harness from the
rear injector (Fig. E)
This injector is located on top of the air
box.
To remove the connector you must first
remove the spring clip. This is best done
with a pick or small screwdriver.
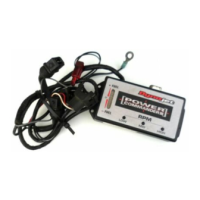
9 Plug the YELLOW colored wires from the
PCIII in-line of the stock wiring harness
and rear injector (Fig. F).
Make sure to reinstall the spring clip on
the stock connector.
10 Use 1 of the small supplied zip ties to
secure this connection to the fuel line.
Make this connection as compact as
possible.
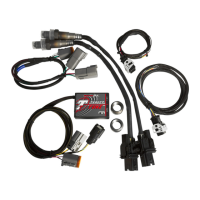
11 Unplug the stock wiring harness from the
front injector (Fig G).
This connection is very difficult to access.
It is best to get to thru the front of the bike
directly above the radiator.
Figure G was taken from the front of the
bike inside the right hand fairing and
above the radiator.
Fig. EFig. FFig G
2007 Ducati 1098 - PCIII USB - 3
Unplug
PCIII connector Stock connector
Zip tie
Stock connector

 Loading...