EI-1000 & 2000: Setup, Calibration and Troubleshooting.
Page 12 of 19
4-20 mA parameter setup:
• Enter the configuration as shown on page 9.
• Use the UP arrow to get to P600. This sets what the 4-20 output follows.
• The selections are: Gr - gross weight, rE - remaining weight, GT - gross
total, rT - remaining total. “Total” modes transmit the sum of both sides of
the display on channel 1.
• EI-1000 - Press SELECT and use the arrows to change the value if
needed. Press SELECT again.
• EI-2000 - Use the right arrows to change the value if needed.
• Now go to parameter P610. This set the weight value that equals 20 mA.
• Change the value if needed as shown above.
• See “4-20 mA output testing” for calibrating or testing if needed.
4-20 mA output testing:
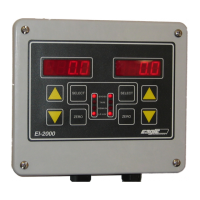
EI-1000: Press and hold [SELECT] + [RIGHT ARROW] for greater than three seconds.
EI-2000: Press and hold [LEFT SELECT] + [RIGHT SELECT] for greater than three seconds.
• Use the arrows to get to “AOUT”. Press SELECT.
• “Ao.test” (EI-1000) or “Ao T 4.00” (EI-2000) will be displayed.
• If using an EI-1000 press SELECT and “4.00” will start to flash.
• The output is now forced to 4 mA. Connect a current meter or check the
remote readout to check the output.
• Using the arrows (right side on EI-2000) will force the output to the value
shown.
• Go up to 20.0. Check the output is 20mA or full scale on the remote
readout.
• Go to 12.00 mA. Check the output is 12mA or half scale on the remote
readout.
• On the EI-1000 press SELECT when done to return to Ao.TEST.
Calibrating the 4-20mA outputs:
Enter the configuration as shown above and select “AOUT” as shown in the first step.
1. Go up to “Ao.1 4“ (“Ao.1 4.0” on EI-2000, use the left arrows.)
2. Connect an mA/current meter capable of displaying 20.00mA to
0.01 mA to CH1 output.
3. On the EI-1000 press SELECT. The “4” will flash.
4. Use the up/down arrows to set the output to 4.00 mA on your
meter. The readout on the indicator will not change. (Use right
arrows on EI-2000)
5. On the EI-1000 press SELECT. The “4” will stop flashing.
6. Use the up arrows (left on EI-2000) to get to “A.o 1 20”
7. Press select on the EI-1000.