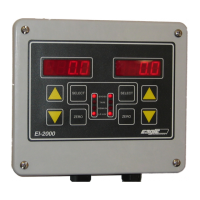
EI-1000 & 2000: Setup, Calibration and Troubleshooting.
Page 13 of 19
8. Use the arrows to set the output to 20.00 mA on your meter.
9. Press select on the EI-1000 to stop the flashing and save the
value.
10. If needed, now hook your meter to CH2 output.
11. Go up to “Ao.2 4”
12. Repeat steps 3 through 9 using the Ao.2 prameters to set the
channel 2 output.
13. Use the left SELECT button or the right pointing arrow on the
EI-1000 to exit all the way back to the weight reading to save
the new calibration.
Setting the zero and full scale on your remote readout:
Enter the configuration as shown on page 9.
• Use the arrows to get to “AOUT”. Press SELECT.
• “Ao.test” (EI-1000) or “Ao T 4.00” (EI-2000) will be displayed.
• If using an EI-1000 press SELECT and “4.00” will start to flash.
• Go to 4.00 mA. Zero your remote readout if needed.
• Go to 20.00 mA. Set your remote readout to full scale.
• On the EI-1000 press SELECT when done to return to Ao.TEST.
4-20 mA troubleshooting:
Go through the output testing as shown above.
• If you find any trouble when using a DMM, check your meter against a
known good 4-20 output to verify it is functioning properly. Worn test leads
may not make a good connection and cause low readings. We’ve also
found some low cost digital meters do not read low DC currents properly.
• If there is no current output, set your meter to volts DC. Measure the
output. If you have a reading of 10 VDC or higher the current fuse in your
meter may be bad.
Remote readout isn’t working:
• The EI1000/2000 is an active or sourcing output. Check that your remote
is set as a passive input.
• Disconnect the loop and hook a meter up to the output directly. Check the
4,12, and 20 mA points again. If the output works now any problems are in
the remote readout or the wiring.