10
Instruction Leaflet IL01906008E
Effective March 2011
Instructions for Testing Magnum DS
Digitrips with the MTK2000 Test Kit
EATON CORPORATION www.eaton.com
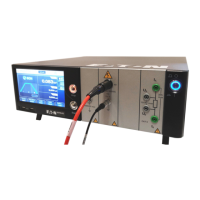
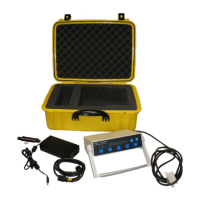
5.9.2 MTK2000
Press Test Select until “SHORT DELAY TEST” name comes up.
Press Start.
The MTK2000 display is specifying that values need to be set, these
values were set in the Digitrip Instructions. Press Start.
Set the “s” value on the MTK2000 display to match the Digitrip’s
“SHORT PU” value by scrolling the up and down arrows.
Once value is set press Start on MTK2000.
A message of “TRIP CURRENT FOUND –> PASSED” or “TRIP
CURRENT FOUND –> FAILED” will appear on the MTK2000 display.
5.10 Short Delay Time Settings
5.10.1 MDS 1150 Digitrip Models
If any of the red LEDs are blinking press “Reset” on Digitrip.
Set the desired test value for the “SHORT TIME” function.
Once selection has been made, press “Save” under the “Edit Value”
Menus buttons.
5.10.2 MTK2000
After the “SHORT DELAY TEST” current is found press Test Select
until “SHORT DELAY (at 1.5xs)” comes up on the MTK2000 display.
ote:N If Test Select is hit more than once, the MTK will skip the next test
sequence. The only way to return to the time test is to redo the Is Short
Delay Pick-up current test.
Set the “Ts” value on the MTK2000 display to match the Digitrip’s
“Short TIME” values by scrolling the up and down arrows.
Once value is set press Start on MTK2000.
A message of “SHORT DELAY PASSED” or “SHORT DELAY
FAILED” will appear on the MTK2000 display.
ote:N If test is failing please reference Section 2.3 MTK2000 Breaker Cables.
5.11 Ground Settings
5.11.1 MDS 1150 Digitrip Models
If any of the red LEDs are blinking press “Reset” on Digitrip.
•
Set the “SHORT PU” function to maximum.
•
Set the desired test value for the “GND PU” function.
Once selection has been made, press “Save” under the “Edit Value”
Menus buttons.
5.11.2 MTK2000
Press Test Select until “GROUND FAULT TEST” comes up on the
MTK2000. Press Start.
Set the “g” value on the MTK2000 display to match the Digitrip’s
“Ground PU” values by scrolling the up and down arrows.
Once value is set press Start on MTK2000.
ote:N The “g” value must not go above 1200Amps, please keep this in mind
when rating plugs are above 1200Amps.
A message of “TRIP CURRENT FOUND –> PASSED” or “TRIP
CURRENT FOUND –> FAILED” will appear on the MTK2000 display.
5.12 Ground Time Settings
5.12.1 MDS 1150 Digitrip Models
If any of the red LEDs are blinking press “Reset” on Digitrip.
Set the desired test value for the “GROUND TIME” function.
Once selection has been made, press “Save” under the “Edit Value”
Menus buttons.
5.12.2 MTK2000
After the “GROUND FAULT TEST” current is found press Test Select
until “GF Delay” comes up on the MTK2000 display.
ote:N If Test Select is hit more than once, the MTK will skip the next test
sequence. The only way to return to the time test is to redo the Ig Ground
current Pick-up test.
Set the “Tg” value on the MTK2000 display to match the Digitrip’s
“GND TIME” values by scrolling the up and down arrows.
Once value is set press Start on MTK2000.
A message of “GROUND FAULT PASSED” or “GROUND FAULT
FAILED” will appear on the MTK2000 display.
ote:N If test is failing please reference Section 2.3 MTK2000 Breaker Cables.
5.13 Instantaneous Settings (If Applicable)
5.13.1 MDS 1150 Digitrip Models
If any of the red LEDs are blinking press “Reset” on Digitrip.
•
Set value for the “LONG PU” function to maximum.
•
Set value for the “LongTIME” function to maximum.
•
Set value for the “SHORT PU” function to maximum.
•
Set value for the “INST PU” function to “ON”.
•
Set the desired test value for the “INST PU” function.
Once selection has been made, press “Save” under the “Edit Value”
Menus buttons.
5.13.2 MTK2000
Press Test Select until “INSTANTANEOUS TEST” comes up on the
MTK2000. Press Start.
The MTK2000 display is specifying that values need to be set, these
values were set in the Digitrip Instructions. Press Start.
Set the “i” value on the MTK2000 display to match the Digitrip’s
“INST PU” settings by scrolling the up and down arrows.
Once value is set press Start on MTK2000.
A message of “TRIP CURRENT FOUND –> PASSED” or “TRIP
CURRENT FOUND –> FAILED” will appear on the MTK2000 display.
5.14 Instantaneous Time Settings
5.14.1 MDS 1150 Digitrip Models
If any of the red LEDs are blinking press “Reset” on Digitrip.
5.14.2 MTK2000
After the “INSTANTANEOUS TEST” current is found press Test
Select until “INSTANT MAX TIME” comes up on the MTK2000 dis-
play.
ote:N If Test Select is hit more than once, the MTK will skip the next test
sequence. The only way to return to the time test is to redo the Ii current
test.
Press Start and the MTK2000 will return the Instantaneous trip
time.
A message of “INSTANTANEOUS PASSED” or “INSTANTANEOUS
FAILED” will appear on the MTK2000 display.
ote:N If test is failing please reference Section 2.3 MTK2000 Breaker Cables.
 Loading...