EATON Powerware
®
5125 (9910-P18) Quick Start for IBM
®
Applications S 164201646 Rev A 1
NOTE The following procedure is for an IBM
R
pSeries
R
rack only. If you have another type of rack, contact your service representative (see page 4).
Step 1. UPS Setup
Qty. Eaton Part Number Description Qty. Eaton Part Number Description
2 — Mounting Handles 2 — Mounting Brackets
4 — Mounting Handle Screws 4 — Mounting Bracket Screws
1 157605899-001 Left Fixed Mounting Rail Assembly 2 157605900-001 Rear Hold-Down Brackets
1 157605899-002 Right Fixed Mounting Rail Assembly 4 — 10-32×1/2I Flat-Head Screws
4 — 10-32 Clip Nuts 8 — 10-32×1/2I Pan-Head Screws
1 164201357 Powerware 4-Post Rail Kit User’s
Guide
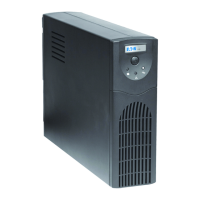
1 05147305 Powerware 5125 Two-in-One UPS (1000–1500 VA)
User’s Guide
1. Attach the supplied mounting handles to the
mounting brackets.
Align the mounting brackets with the screw holes
on the side of the UPS and secure with the
supplied screws.
NOTE The UPS and Extended Battery Modules (EBMs) MUST
be installed at the bottom of the rack. If placed in a rack with
existing equipment, the rack must be reconfigured to allow the
UPS and EBM installation at the bottom of the rack.
NOTE The EBMs must be installed below the UPS.
2. Install the clip nuts over the holes on the back of
the rack.
NOTE The clip nuts for the first set of rails go over the holes in
positions 2 and 4. If you are installing additional rails, place the
next set of clip nuts 4 and 6 holes above the last installed clip
nut.
Powerware 5125 (9910-P18)
Quick Start for IBM Applications
164201646 Rev A
®
®
Position 2
Position 4
Position 8
Position 10Position 10
Second Set of Clip Nuts
First Set of Clip Nuts