18
Section VIII - Overhaul
WARNING
Before breaking a circuit connection, ensure
system power is off and system pressure has
been relieved. Lower all vertical cylinders,
discharge accumulators and block any load
whose movement could generate pressure. Plug all units
and cap all lines to prevent entry of dirt into the unit or
system.
A. Unit Removal
1. Thoroughly clean the exterior of the valve and the area
around the valve to prevent contamination of the system
during removal.
2. Remove the valve from its subplate or mounting pad as
follows:
A. If the valve is equipped with the insta-plug feature,
loosen the two slotted screws and unplug the electrical
wiring from the pilot section.
B. If the valve has an air operated section, turn off air
supply and disconnect the pressure lines from the
connection plate.
WARNING
In the following step make sure electrical
power is off, then disconnect the solenoid
wiring. Label each wire to provide assembly
information.
C. If the valve has standard electrically operated
solenoids, remove the four nameplate screws on top of
the pilot section. Move nameplate and gasket aside to
expose interior of the wire cavity. Disconnect solenoid
wiring.
D. Loosen the six mounting screws that hold the main
stage section to the mounting pad. Be ready to catch the
fluid retained inside the lines and valve.
E. Remove the valve from the mounting pad and set it
on a clean work bench. Use a chain lift when necessary.
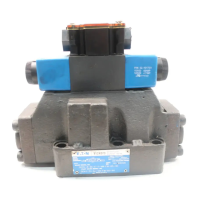
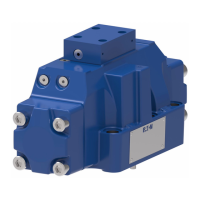
B. Disassembly (General)
The manual describes the disassembly sequence of a typical
DG5V8 two-stage directional valve. See Figures 17 and 18.
Slight variations may be noted on your model depending on
the type of accessories and unit design. Figure 17 may be
used for all models, except pressure centered ‘‘D’’ models
regardless of the design. Refer to Section E and Figure 18
for pressure centered ‘‘D’’ models. Figure 19 shows the
disassembly sequence of a DG4V-3(S)-*A(L)/B(L)-FJ/FW-60
standard performance pilot valve.
C. Pilot Valve Crossover Plate Removal
1. Remove the four attaching screws (1) from the pilot valve
or crossover plate (2). Remove the pilot valve from the
main stage body (3).
Note
The following section pertains to main stage
disassembly. If your unit does not require main stage
disassembly, omit the following section.
D. General Main Stage Disassembly
(Refer to Figure 17)
WARNING
Spring in end cover is under tension. Slowly
remove end cover screws alternatively to
avoid damge to equipment and injury to
personnel
Note
Repeat steps 1 and 2 for opposite side cover disassembly.
1. Loosen the four end cover screws (5) from end cover (6).
Be ready to catch any oil trapped inside the unit. Remove
the end cover and discard ‘‘O’’ ring (7).
Note
Spring (8) and washer (9) do not exist on spring offset
‘‘A’’ or floating type models.
2. Remove spring (8) and washer (9) from the main stage
spool (10).
3. Remove main stage spool (10) from body (3).
4 Turn the body (3) on its side and remove ‘‘O’’ rings (11
and 12) and plugs (14) and (15) from mounting face.
5 Remove plugs (16) and (17) and ‘‘O’’ Rings (18) and (19)
from body (3).
6. If necessary, remove rest pins (13) with vise grip pliers.
 Loading...