96 INCH CHIPPER
ENGLISH
ASSEMBLY
To avoid sparks and a possible explosion or re due
to a short circuit, do not touch the positive (+) battery
terminal and any surrounding metal with tools, jewelry
or other metal objects. When installing battery cables,
connect the positive (+) cable rst and the negative (-)
cable last.
WARNING
Gasoline and diesel fuels are highly
ammable and their vapors are
explosive. To prevent personal injury or
property damage:
Store fuel only in approved containers,
in well ventilated, unoccupied buildings,
away from sparks or ames. A container
with a capacity of 2 gallons or less with
a pouring spout is recommended. Do
not ll the fuel tank while the engine is hot or running,
since spilled fuel could ignite if it comes in contact
with hot parts or sparks from ignition. Do not start the
engine near spilled fuel. Never use fuel as a cleaning
agent.
DO NOT MIX OIL WITH FUEL.
WARNING
Use only those types of fuels that are recommended in
your engine owner's manual.
To add fuel:
1. Stop engine, wait for all parts to stop moving and
disconnect spark plug wire. Remove key from key
switch. Allow the engine and muer to cool for at
least three minutes.
2. Clean area around fuel ll cap and remove cap.
3. Using a clean funnel, ll fuel tank to 1/2" below bottom
of ller neck to provide space for any fuel expansion.
Install fuel ll cap securely and wipe up any spilled
gasoline.
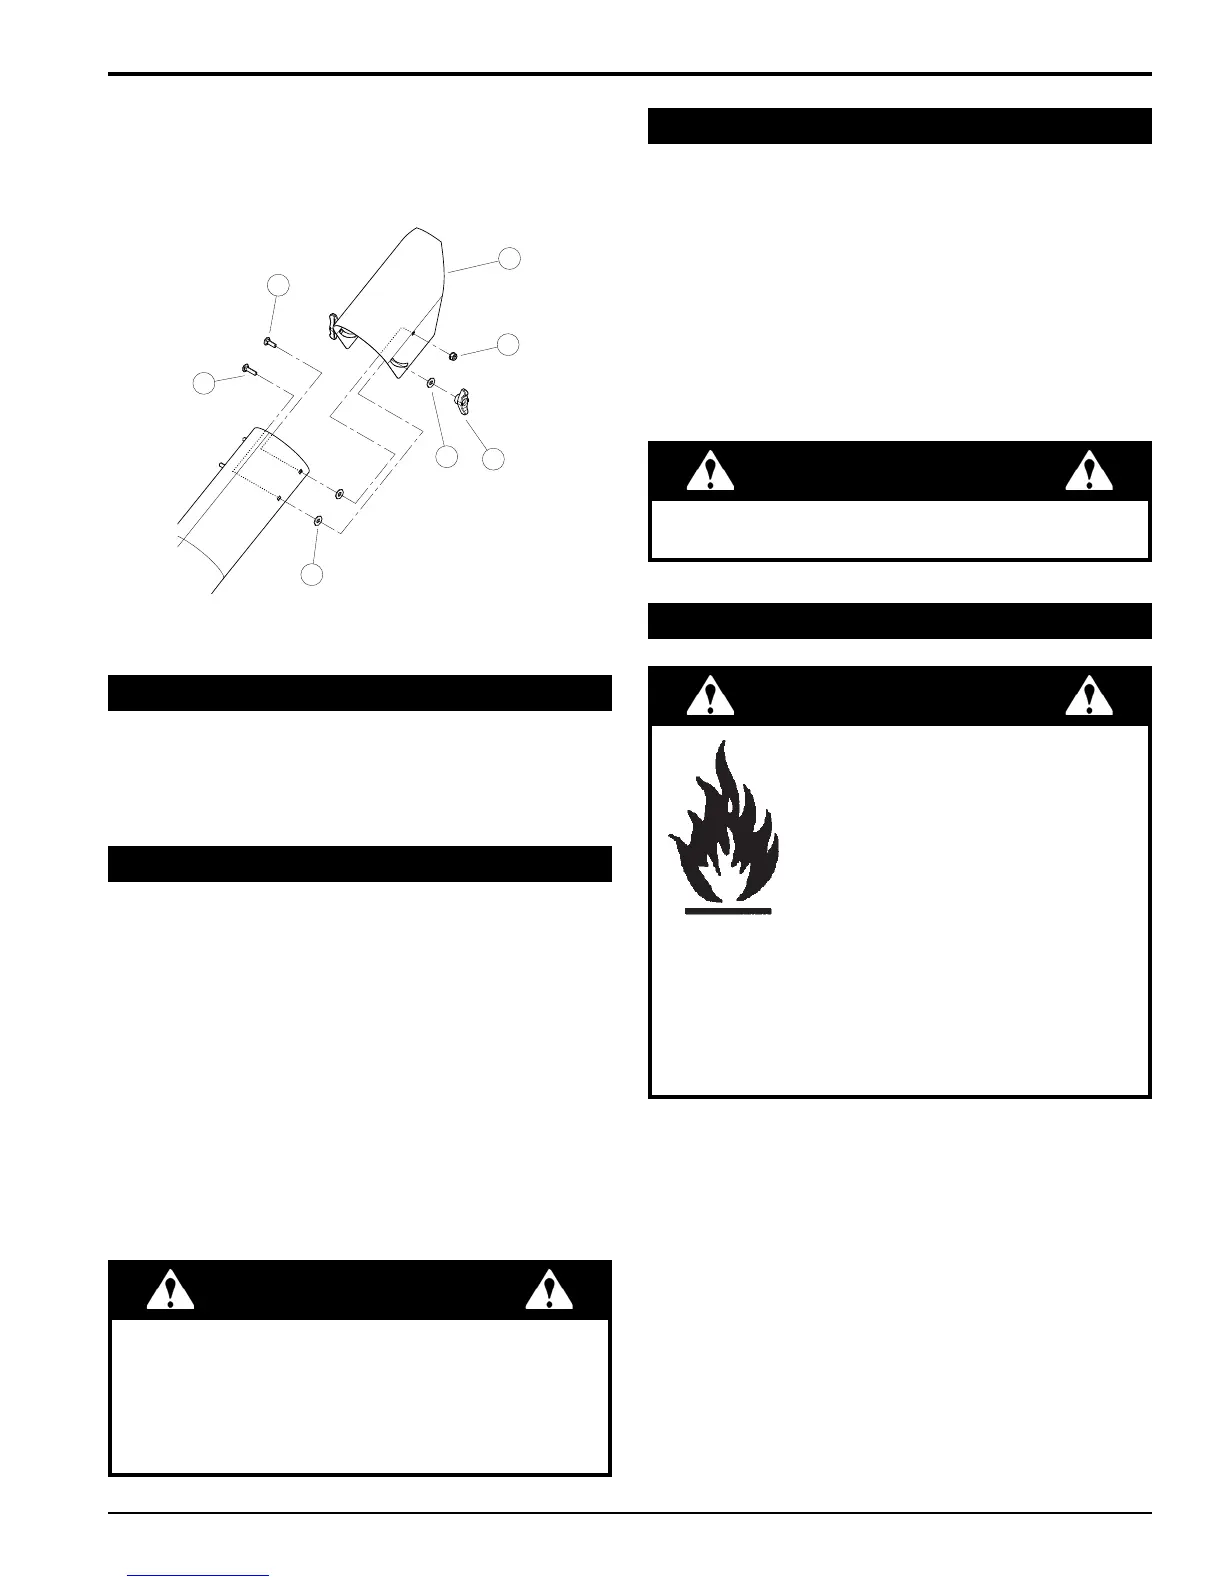
Figure 2.8, Attach Discharge Deector
7
8
9
10
11
12
13
Hydraulic uid drives the feed roller. The machine was
shipped with uid, as it was tested at the factory. However,
check the uid levels before initial operation and add if
necessary.
The hydraulic pump requires premium hydraulic uids
containing high quality rust, oxidation, and foam inhibitors.
These include premium turbine oils, API CD engine oils
per SAE J183, M2C33F or G automatic transmission
uids meeting Allison C-3 or Caterpillar TO-2, and certain
specialty agricultural tractor uids.
Check the oil level and, if needed, ll the engine crankcase
with the type and amount of oil specied in the engine
owner’s manual.
You will need to purchase a battery. Choose a battery
that meets or exceeds the engine manufacturer’s
specications. Consult your engine owner’s manual or
authorized dealer for specication details.
To install the battery:
1. Open the battery box (8-1/4 x 5-1/2 x 6") and insert
battery into the battery box.
2. Attach the positive (red) battery cable from the engine
to the positive (+) battery terminal.
3. Attach the negative (black) battery cable from the
engine to the negative (-) battery terminal.
4. Secure the cover on the battery box with the strap.
For additional information, please see the chart under
Temperature Operating Window (Section 7).
IMPORTANT
2.8 ADD OIL TO ENGINE
8. Finish bolting the deector to the tube with two 5/16
x 1" bolts (10) through the end hole in the discharge
tube and secure with 5/16" washers and nylock nuts
(11).
2.9 INSTALL BATTERY
2.10 CHECK/ADD HYDRAULIC FLUID
2.11 FILL THE FUEL TANK