25
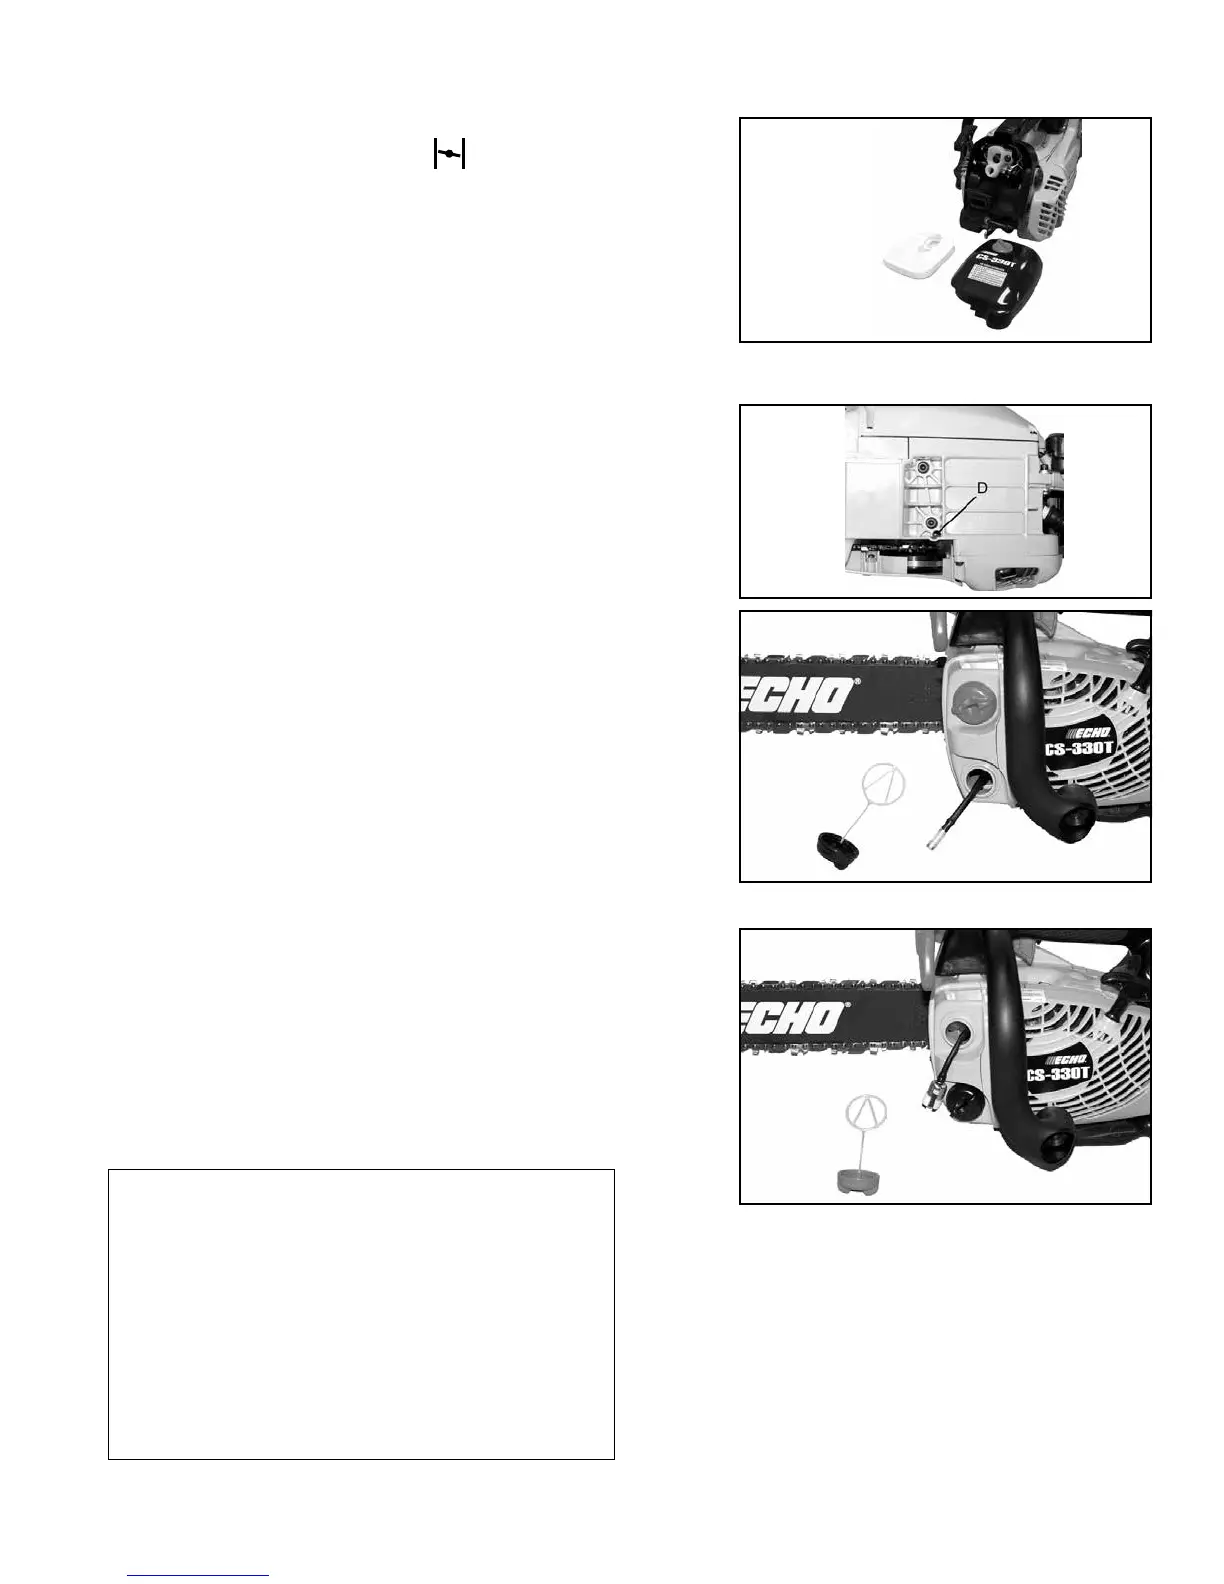
AIR FILTER
1. Close choke (Cold Start Position [ ]). This prevents dirt from
entering the carburetor throat when the air lter is removed.
Brush accumulated dirt from air cleaner area.
2. Remove air lter cover. Brush dirt from inside cover.
3. Remove air lter and lightly brush debris from lter. Replace
lter if it is damaged, fuel soaked, very dirty, or deformed.
4. Install air lter cover.
AUTOMATIC OILER
• The discharge volume of the automatic oiler is adjusted to 6 to 7
cc/min (@ 7000 rpm) prior to shipment from the factory.
• Always check oil discharge when in use.
• Turn adjusting screw (D) counter-clockwise to increase oil volume,
clockwise to decrease oil volume.
OIL STRAINER
• Check periodically.
1. Do not allow dust to enter oil tank.
2. Clogged oil strainer will affect the normal lubricating system
3. Using a wire bent into the shape of a hook, pull strainer out
through oil port and inspect strainer.
4. If the strainer is dirty, clean with suitable cleaning uid.
5. If the inside of the oil tank is dirty, rinse with suitable cleaning
uid.
6. Install strainer into lower front of oil tank to ensure proper
chain lubrication.
FUEL STRAINER
1. Do not allow dust to enter fuel tank.
2. Clogged strainer will cause difculty in starting engine or ab-
normalities in engine performance.
3. Using a wire bent into the shape of a hook, pull strainer out
through gas port, and inspect strainer.
4. If the strainer is dirty, clean with suitable cleaning uid.
5. If the inside of the tank is dirty, rinse with suitable cleaning
uid.
NOTE
Federal EPA regulations require all model year
2012 and later gasoline powered engines pro-
duced for sale in the United States to be equipped
with a special low permeation fuel supply hose
between the carburetor and fuel tank. When ser-
vicing model year 2012 and later equipment, only
fuel supply hoses certied by EPA can be used to
replace the original equipment supply hose. Fines
up to $37,500 may be enforced for using an un-
certied replacement part.