24
GUIDE BAR AND SAW CHAIN REPLACEMENT
WARNING DANGER
Never try to replace or adjust guide bar and saw chain with engine
running. This saw chain is
VERY sharp, wear heavy gloves to
protect your hands when handling it. Wear eye protection meeting
CE or ANSI specification Z87.1.
Guide Bar Replacement / Installation
Level 2.
Tools required: 10x19mm (13/32x3/4) T-Wrench
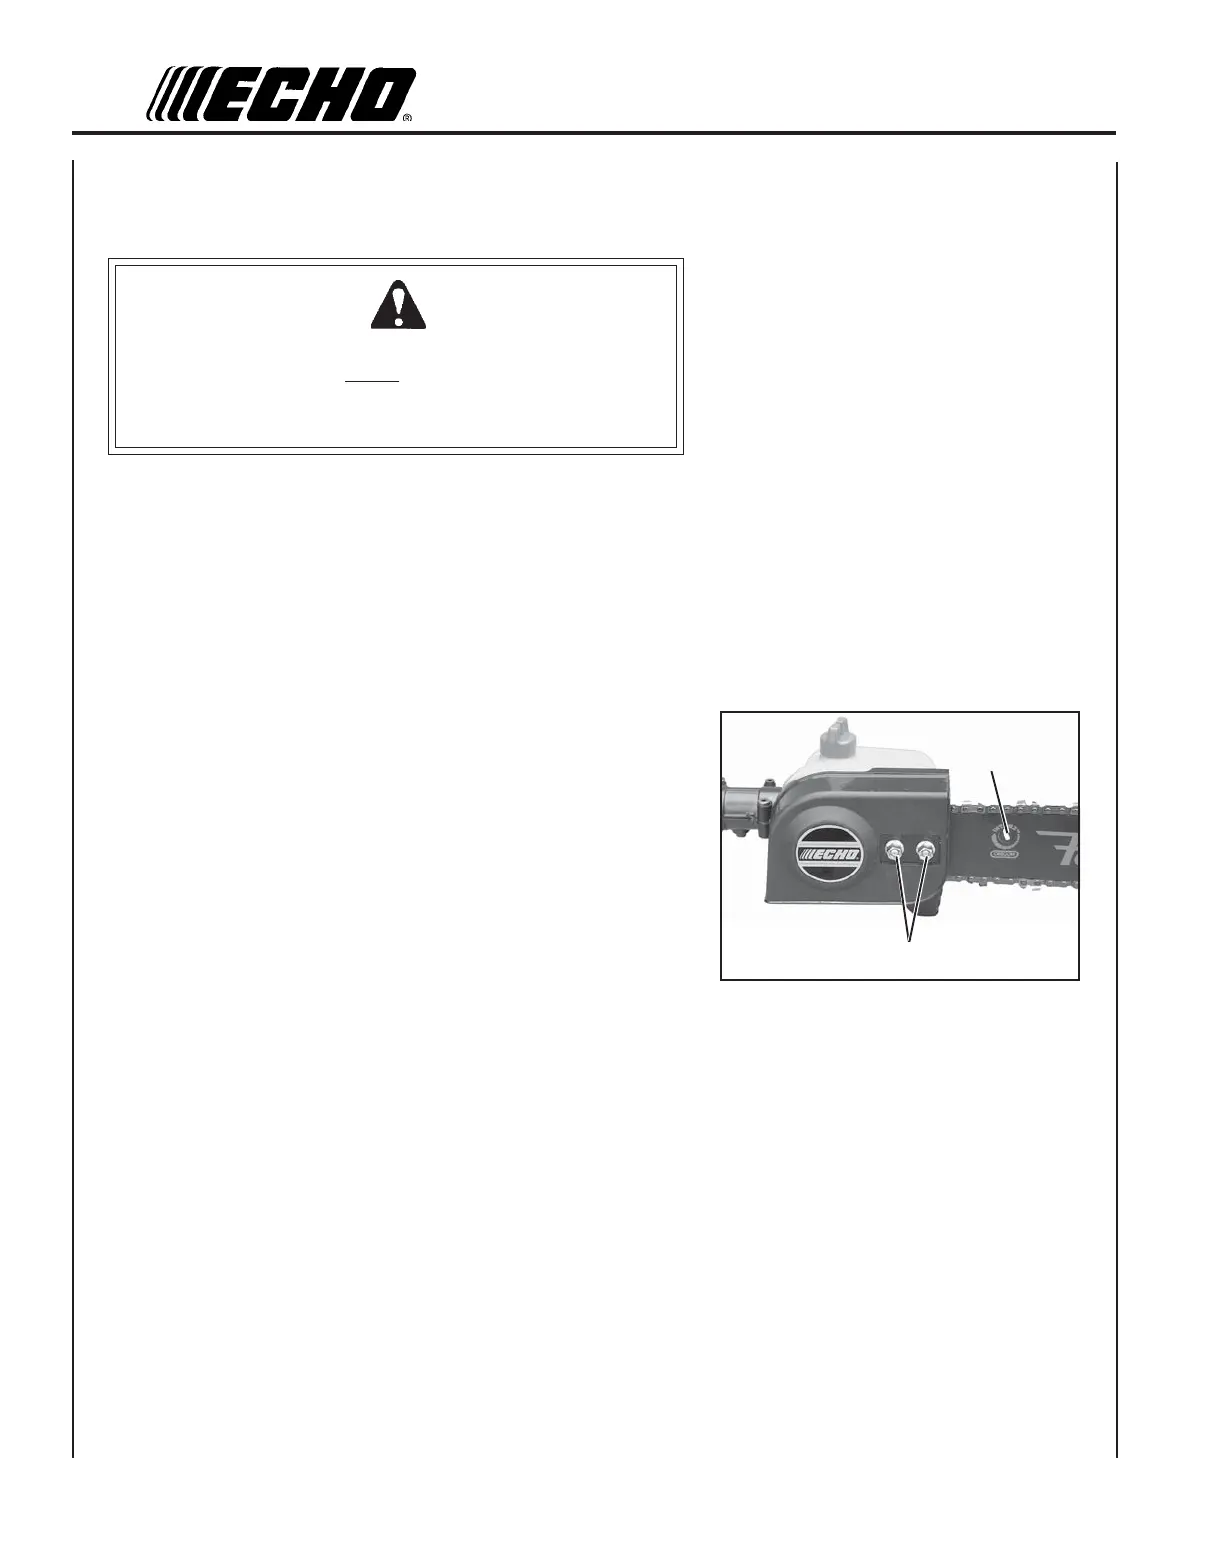
• Loosen two (2) 10mm (13/32 in.) guide bar nuts (A) and relieve saw
chain tension turning adjuster slot (B) counter clockwise.
• Remove sprocket cover.
• Free saw chain from sprocket and remove from guide bar. If guide bar
is okay proceed to saw chain installation.
• Slide guide bar forward and remove from cutting attachment. Install
new guide bar sliding it onto the cutting attachment as far as
possible.
Saw Chain Installation
Level 2.
• Install new saw chain onto guide bar. Make sure cutting links are
faced towards the nose of the guide bar.
• Engage saw chain with sprocket.
• Replace sprocket cover and guide bar nuts.
• Follow instruction on adjusting saw chain tension page 12.
B
A