Using The Ego
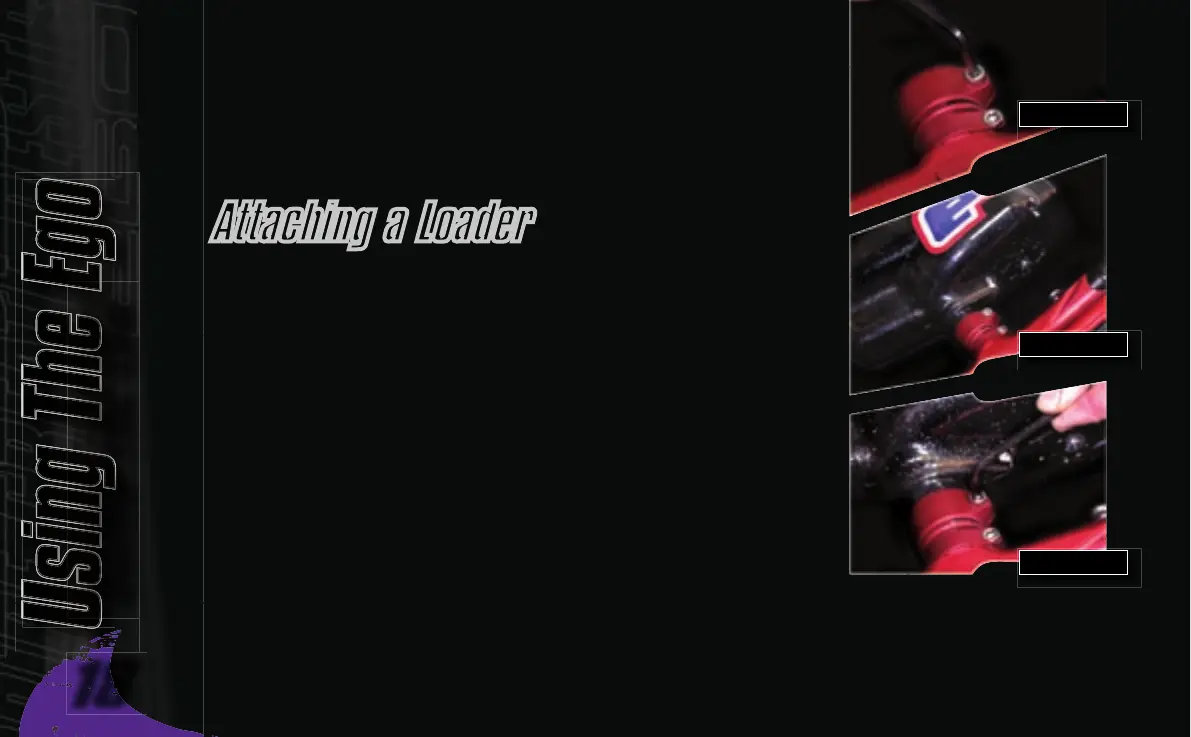
Using a 5/32” hex key, turn the top screw of the clamping feed tube counter
clockwise until the feed neck of your loader can easily be pushed into the
top of the clamping feed tube
(See Figure 3.7)
. Push your choice of loader
firmly into the clamping feed tube so that it rests on the shelf inside the
clamping feed tube
(See Figure 3.8)
. Using a 5/32” hex key, tighten the top
screw of the clamping feed tube by turning it clockwise until the loader is
firmly gripped
(See Figure 3.9)
.
You have now attached a loader to your Eclipse Ego. Once you have filled
your loader and air tank you will then be ready to begin using your Eclipse
Ego.
Attaching a Loader
FIGURE 3.9
FIGURE 3.8
FIGURE 3.7
Using The Ego
Using The Ego
18
19