Maintenance
Assembling the Ego
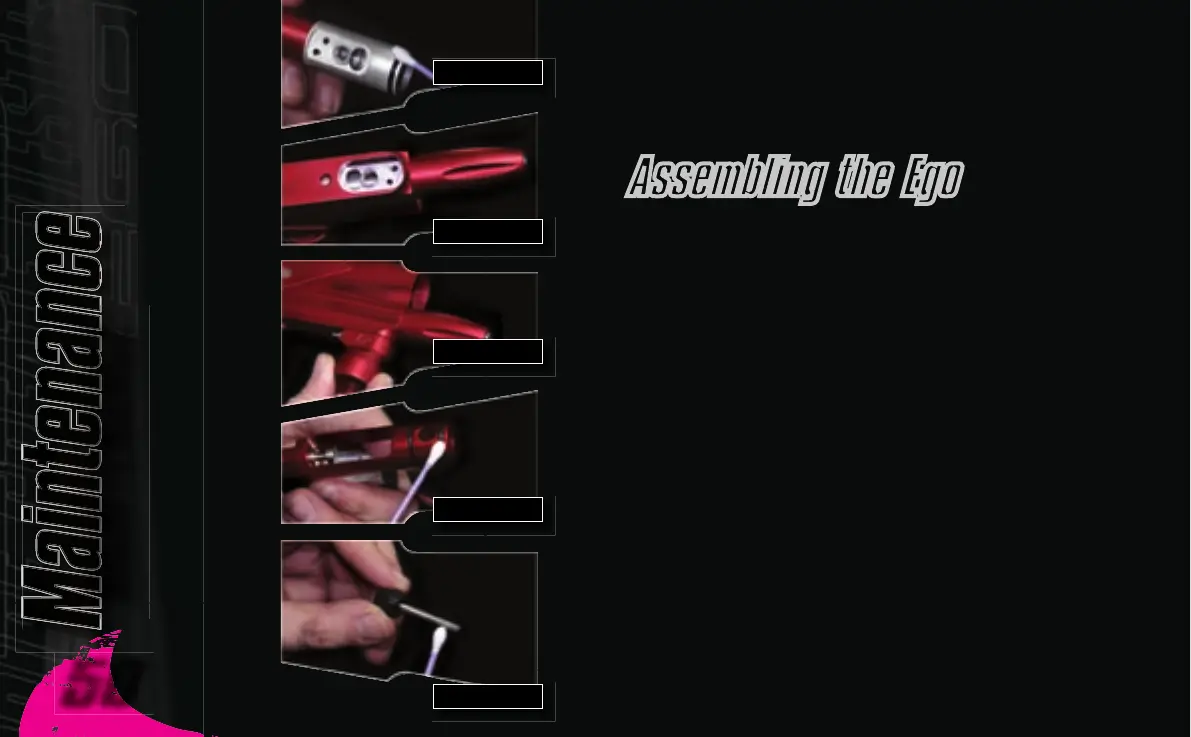
Having stripped down the Eclipse Ego, here is a guide
of how best to re-assemble it.
Clean and lubricate the seal at the back of the LPR
body
(See Figure 6.52)
. Slide the entire LPR back into
the Eclipse Ego body, so that the bottom of the LPR
body lines up with the FRM window in the bottom of the
Eclipse Ego body
(See Figure 6.53)
.
Insert the FRM, ensuring that all of the seals are in the
correct place and that the FRM lines up with the bottom
of the LPR body
(See Figure 6.54)
. Using the 3/16th"
inch hex key tighten down the FRM retaining screw to
secure both the FRM and LPR in place.
Lubricate the two seals at the front of the rammer
assembly
(See Figure 6.55)
and lubricate the exhaust
valve shaft before inserting exhaust valve into the brass
bushed valve guide
(See Figure 6.56)
.
FIGURE 6.52
FIGURE 6.53
FIGURE 6.54
FIGURE 6.55
FIGURE 6.56
Maintenance
Maintenance
50
51