10
3.7 Setting the Clock (Clock Set Menu)
To set the clock, proceed as follows:
1. Remove and reset the electric supply of the stove using the general switch on the back.
2. The display will show FINAL CLEANING and then OFF.
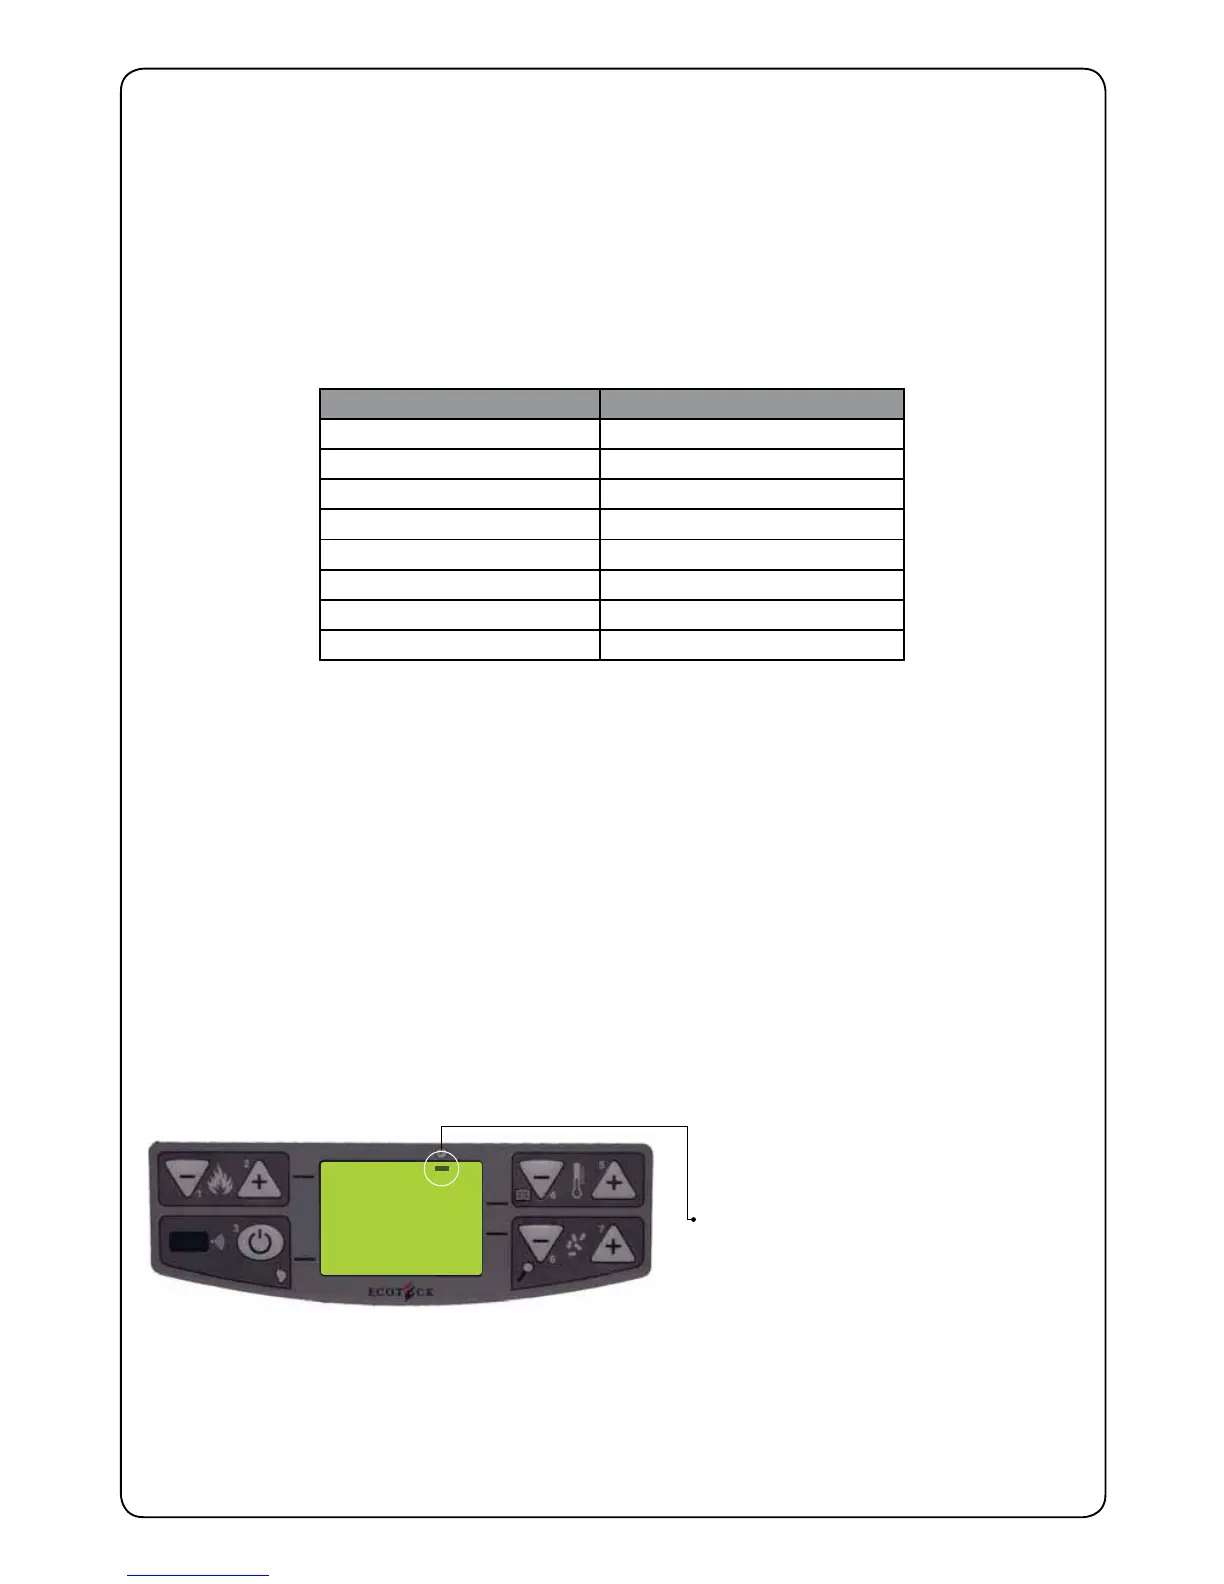
3. Keep the P4 button pressed for 2 seconds, CLOCK SET MENU will appear and conrm
with the button P6.
4. DAY CLOCK will appear: with buttons P4 and P5 set the current day according to the table
shown below and conrm with button P6.
5. TIME CLOCK will appear on the display and the current time will be shown: using buttons
P4 and P5 adjust the hours and conrm with button P6.
6. MINUTES CLOCK will appear on the display; set the minutes with buttons P4 and P5 and
conrm with button P6.
7. Conrm with button P6 to return automatically to MENU’ 01 CLOCK SETTING.
3.8 Chronothermostat Setting Menu
With the chronothermostat function, switching on and off the stove for each day of the week can be
programmed in two independent time intervals (PROGRAMME 1 and PROGRAMME 2). To enter this
menu, proceed as follows:
1. Keep button P4 pressed for 2 seconds, CLOCK SETTING MENU will appear,
2. Press button P4 once; the display will show CHRONOTHERMOSTAT SETTING MENU
3. Access with button P6: the display will show the screen desired.
Display Meaning
01 Monday
02 Tuesday
03 Wednesday
04 Thursday
05 Friday
06 Saturday
07 Sunday
OFF Deactivated
10:00
PROG - 1
START
If this black segment is not lit up on the display
corresponding with the symbol of the clock, it
will not be possible to programme anything.
To activate it, please see the chapter on
setting the current day (Setting The Clock)
as the value must be other than OFF.