EasyManuals Logo

EDMI Atlas Series User Manual

EDMI Atlas Series
112 pages
To Next Page IconTo Next Page
To Previous Page IconTo Previous Page
Page #13 background imageLoading...
Page #13 background image
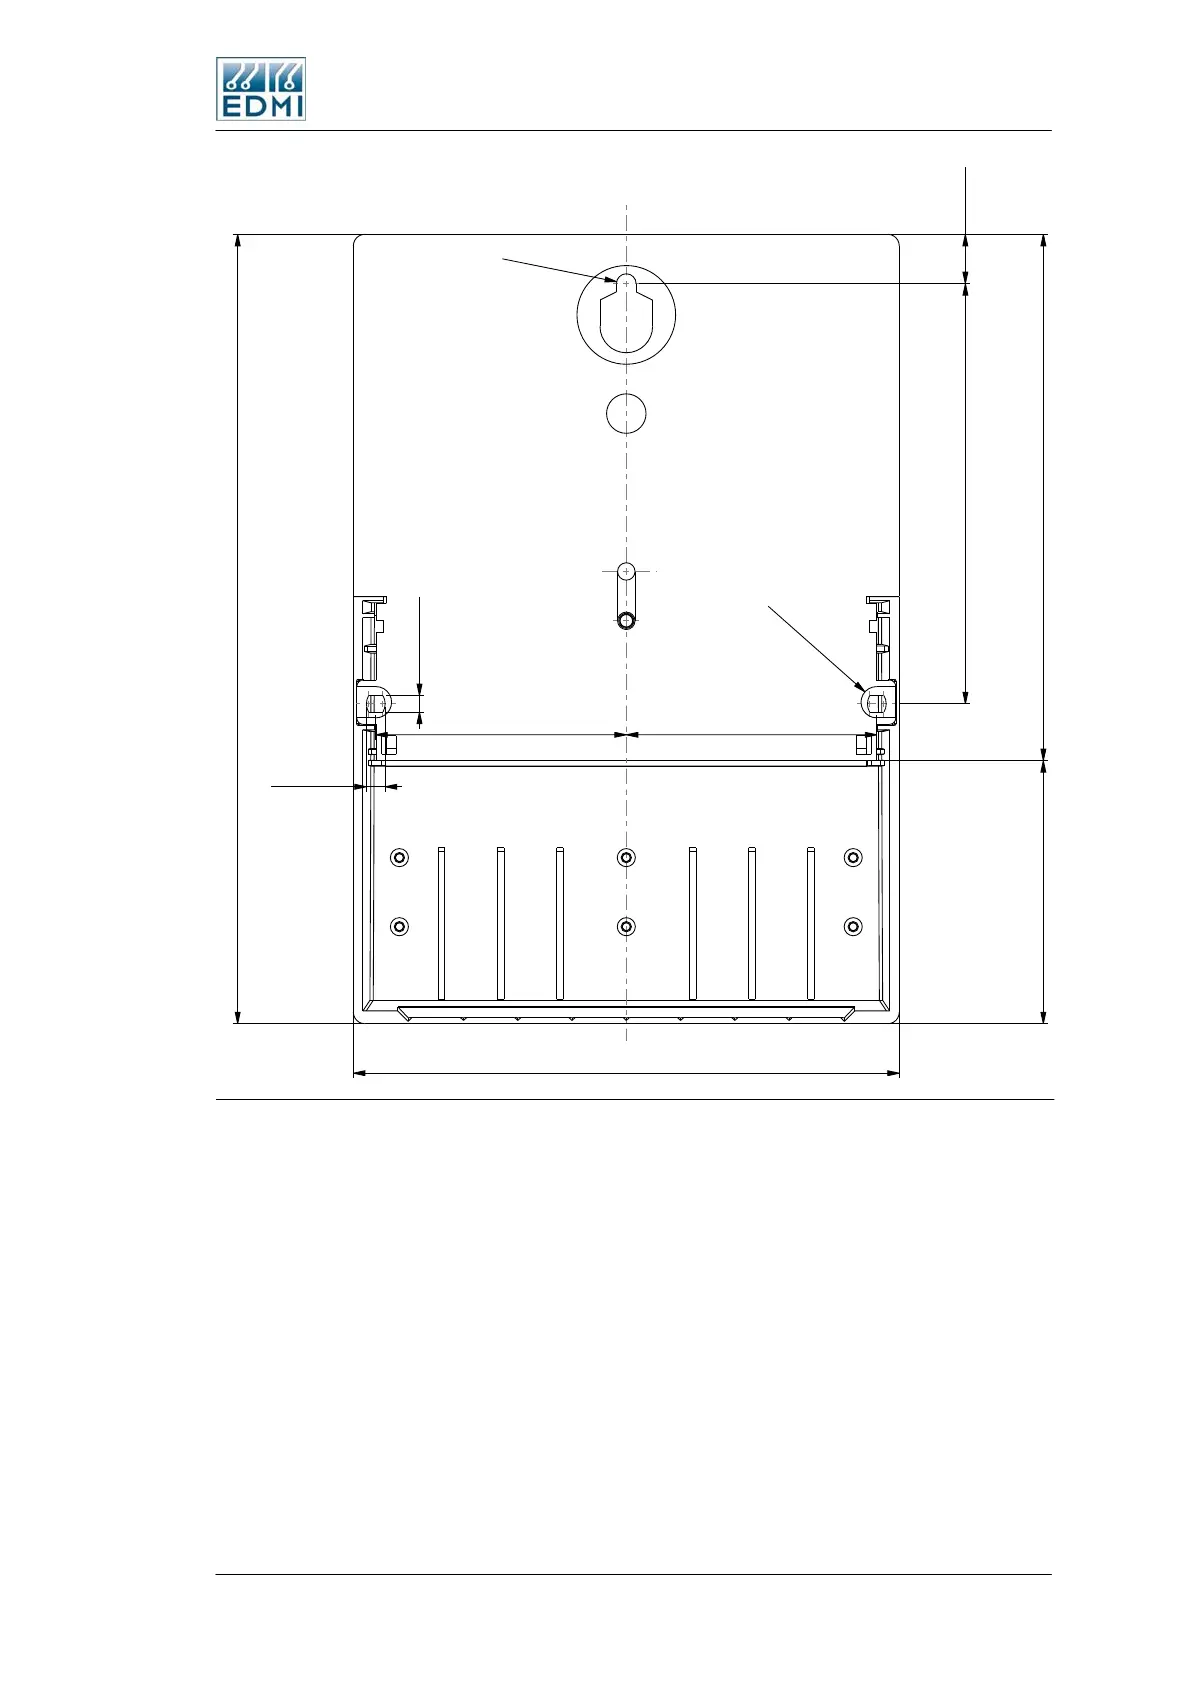
Dimensions and Mounting
2-
3
.0015
R.003
R(2X)4,75
.00(2X)5
166
160
80
240
5.70(2X)
127,75
76,18
76,18
Figure 2-3 Mounting points, extended terminal cover
For mounting use three screws with a threaded section no larger than 5mm in diameter
with a screw head no smaller than 8mm in diameter.
In general:
1. Screw the first (top) screw into the wall. Leave enough space between the head and
the wall for the plastic around the keyhole.
2. Hang the meter on the screw using the keyhole in the back of the meter.
3. Insert the remaining two screws (meter base, under the terminal cover) to hold the
meter securely.
The Mk10 Meter 2-3

Table of Contents

Questions and Answers:

Question and Answer IconNeed help?

Do you have a question about the EDMI Atlas Series and is the answer not in the manual?

EDMI Atlas Series Specifications

General IconGeneral
TypeElectricity Meter
DisplayLCD
PhaseSingle Phase, Three Phase
CommunicationRS-485
MountingDIN Rail
Operating Temperature-25°C to +60°C
Storage Temperature-40°C to +70°C

Related product manuals