© Edwards Limited 2018. All rights reserved. Page 11
Edwards and the Edwards logo are trademarks of Edwards Limited.
Operation
D023-92-880 Issue F
4 Operation
4.1 Pressure measurement
Immediately after connecting the APGX-H to a power supply, the status LED will rapidly flash red and green for
approximately 2 seconds while calibration information is downloaded from the tube to the electronics housing. The
status LED will then turn green if the gauge is operating correctly.
For most accurate pressure measurement, allow the APGX-H to warm-up for at least 10 minutes and then use the
procedure described in Section 5.1 to adjust the APGX-H.
If the APGX-H is connected to an Edwards AGC, TIC or AGD, the display will indicate the corresponding pressure.
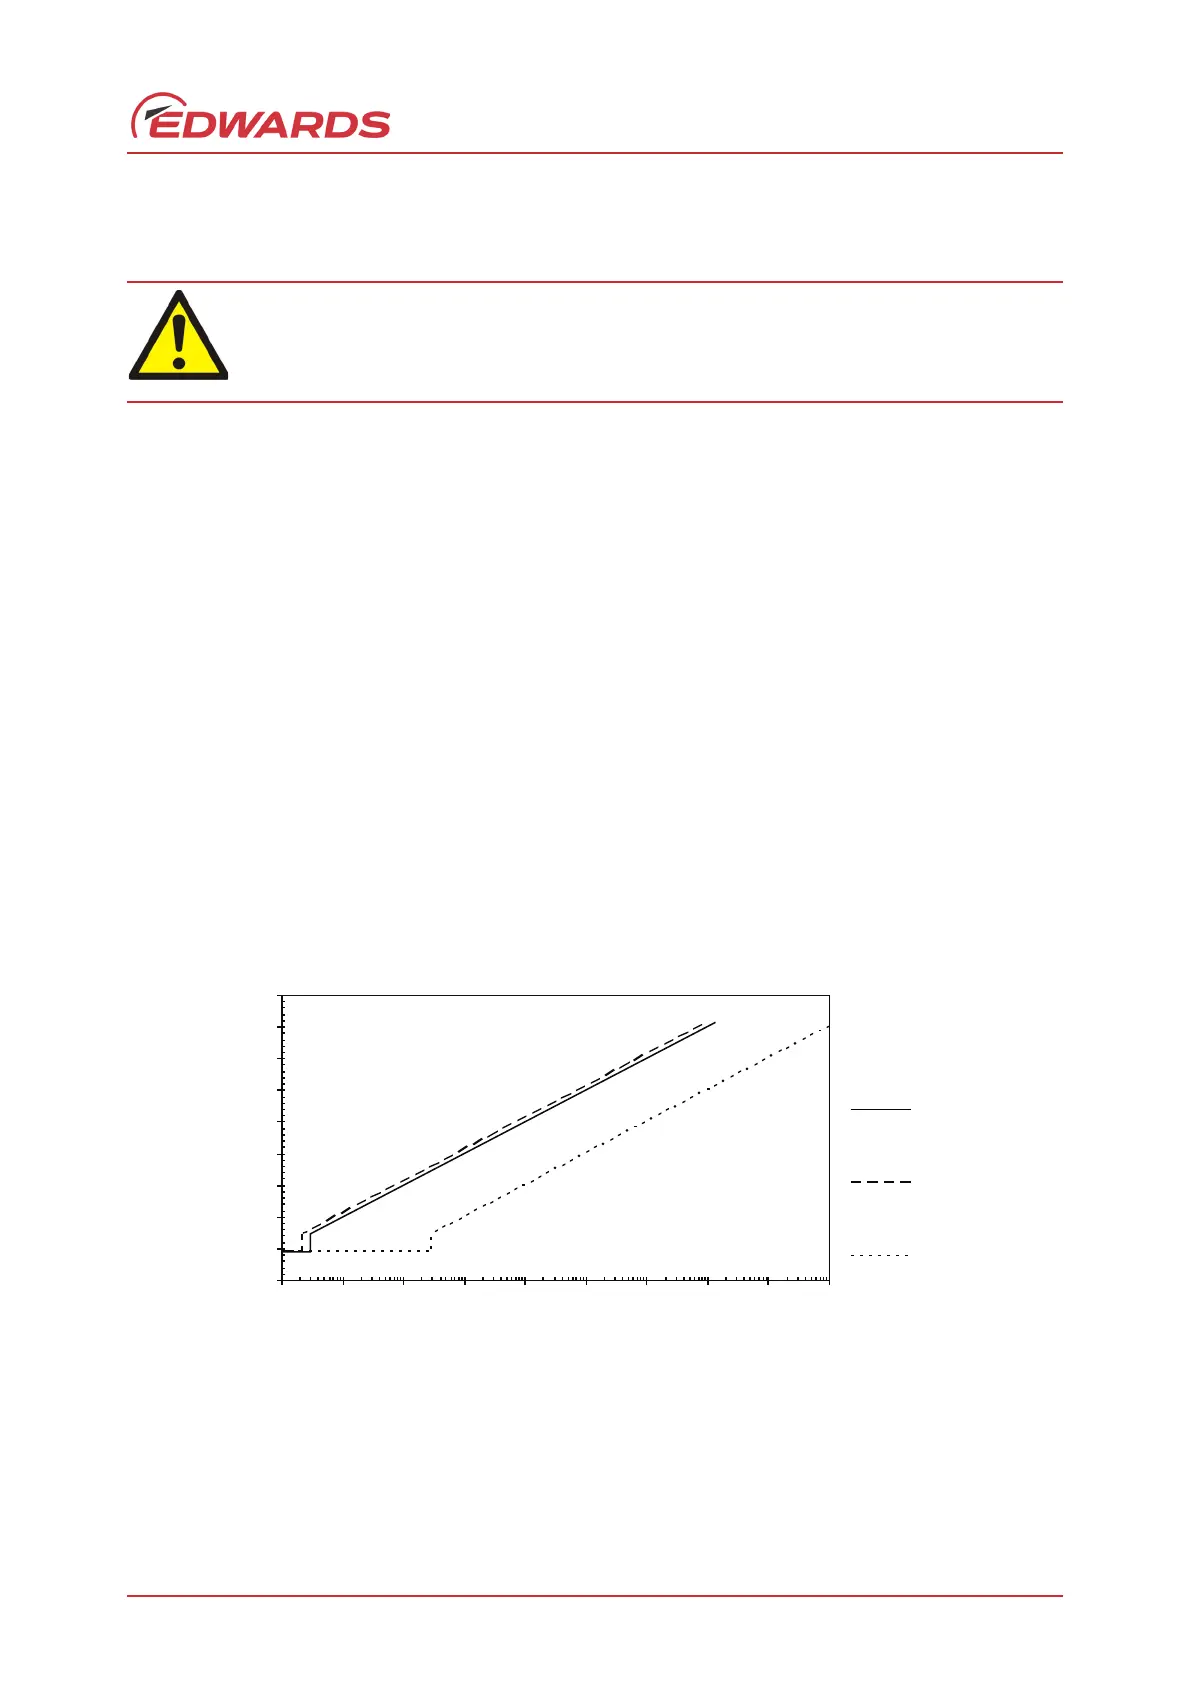
If the APGX-H is connected to a voltmeter, convert the measured voltage to the corresponding pressure using the
following equation:
P = 10
(V-6)
mbar
P = 10
(V-6.125)
Torr
P = 10
(V-4)
Pascal
where V is the measured voltage in volts. For example, if the measured voltage V = 4 volts, then the pressure P = 1
x 10
-2
mbar. Refer to Figure 4.
Figure 4 - Pressure-Voltage Characteristics of the APGX-H
4.2 Set-point adjustment
Note: If you use an Edwards AGC, TIC or AGD the APGX-H set-point is not used.
The default value for the set-point is 1 mbar.
Do not use the APGX-H to measure the pressures of explosive or flammable gasses or mixtures. The
gauge contains a heated filament which normally operates around 100°C above ambient
temperature. The temperature of the filament can be substantially higher under fault conditions.
1
2
3
4
5
6
7
8
9
10
1E-4 1E-3 1E-2 1E-1 1E+0 1E+1 1E+2 1E+3 1E+4 1E+5
Indicated Pressure
Gauge output (volts)
mbar
 Loading...