D135-10-880C - Operation
Page 82
During the calibration procedure the mass spectrometer is tuned to the maximum helium or
hydrogen signal and this signal is referred to the known leak rate of the internal or external
test leak. Although the ELD500 is a very stable instrument a calibration is recommended
every day with heavy use, or before using the ELD500 from time to time, to make sure that
ambient temperature changes or dirt or other impacts don’t adulterate the measurements.
To get an optimized calibration the machine has to warm up at least 20 minutes before use,
otherwise a warning will come up which might be ignored.
The calibration routines
The calibration routines can be started by pressing button CAL (Softkey 5) via 3 different
locations:
main menu (Figure 23)
standby mode (Figure 12)
measurement mode (Figure 10)
The access via standby mode or measurement mode can possibly be blocked (see Access to
CAL function). In this case the Softkey is not labelled. Default: Access on.
Once the calibration mode is activated the user must choose between an internal and an
external calibration. Press the corresponding Softkey (Figure 29).
A calibration may be terminated at any time by pressing the Stop button or using the Softkey
no. 1 (Cancel) Figure 34.
Internal calibration
Mass 4 must be selected (Default setting)
Press Softkey no 4 Figure 29 to start the calibration. Once this procedure is started the entire
procedure is performed automatically. At the end (after about 25 seconds) a visual and audio
signal is released. Thereafter the unit is ready for further use.
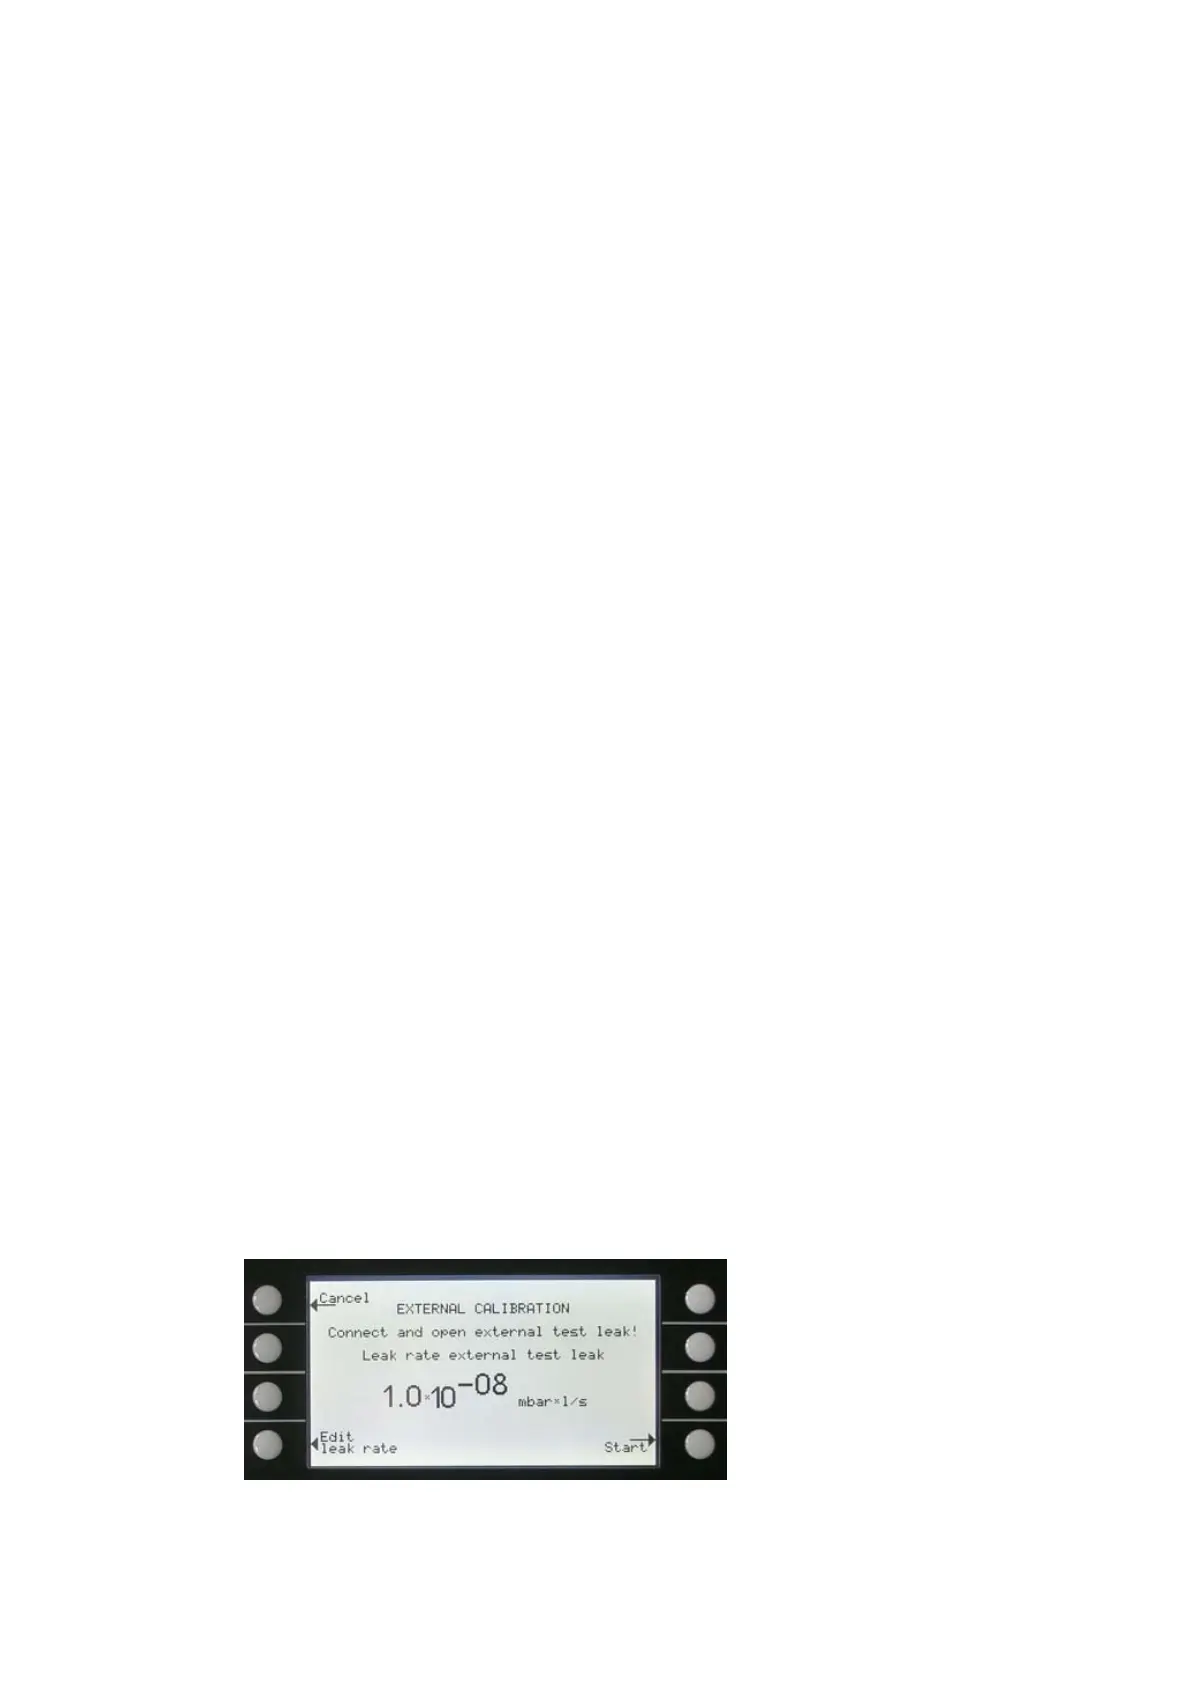
External calibration
For an external calibration a test leak has to be attached to the part under test or the inlet
port directly depending on the application.
After External calibration (Figure 29, Softkey no. 8) has been chosen the following messages
are displayed and the described actions are required:
Figure 33 Display: external calibration, Step 1
 Loading...