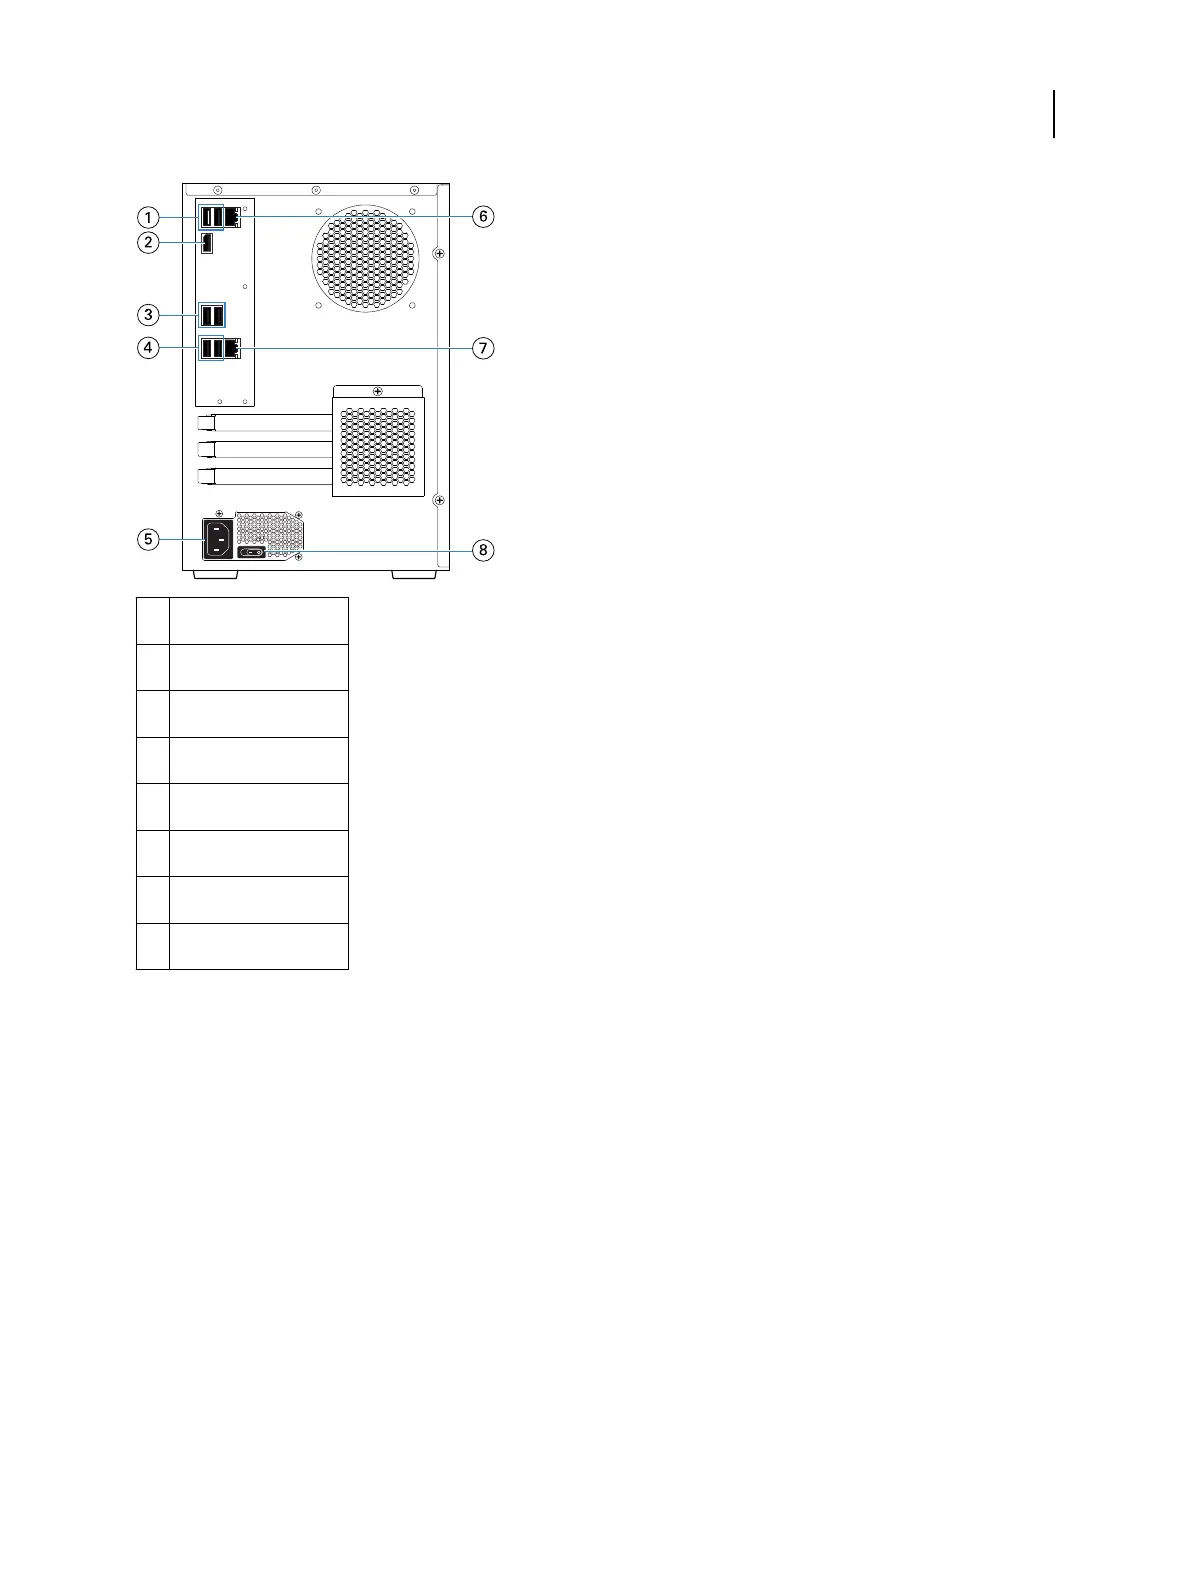
1 USB 2.0 ports
2 Monitor port
3 USB 2.0 ports
4 USB 3.0 ports
5 Power port
6 Network connection
7 Printer connection
8 Power switch
You can now turn on your Fiery proServer.
Connect the network and the printer to the Fiery proServer Premium
The Fiery proServer Premium has two network connectors on the back panel. The upper network connector is used
to connect the Fiery proServer Premium to your network. The lower network connector is used to connect the Fiery
proServer Premium to the printer.
The connectors on the back of the Fiery proServer Premium may look different, depending on the system.
1
Insert the network cable into the upper Ethernet connector on the back panel of the Fiery proServer Premium.
2
Insert the printer cable into the lower Ethernet connector on the back panel of the Fiery proServer Premium.
Installation Guide
Fiery proServer, version 7.1
4