EasyManua.ls Logo

Ego Power+ STA1500 - User Manual

Ego Power+ STA1500
16 pages
Print Icon
To Next Page IconTo Next Page
Loading...
LINE TRIMMER ATTACHMENT
FOR USE ONLY WITH THE 56V LITHIUM-ION POWER HEAD PH1400E
OPERATOR'S MANUAL
LINE TRIMMER
ATTACHMENT
MODEL NUMBER STA1500
WARNING: To reduce the risk of injury, the user must read and understand the
Operator’s Manual before using this product. Save these instructions for future reference.
MNL_EGO_STA1500_AV02.01_220216

Questions and Answers

  • P
    Patricia WrightAug 19, 2025
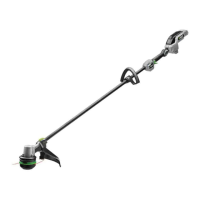
    Why won't the trimmer head advance line on my Ego Power+ STA1500?
    • M
      Melissa FowlerAug 19, 2025
      If the trimmer head on your Ego Power+ Trimmer won't advance the line, there could be several reasons. First, stop the trimmer, remove the battery, and clean the motor shaft and trimmer head of any grass. If there's not enough line on the spool, remove the battery and replace the cutting line, following the 'LINE REPLACEMENT' section in this manual. A dirty trimmer head can also cause issues; remove the battery and clean the spool, lower cover assembly, and upper cover. If the line is tangled, remove the battery, take the line off the spool, and rewind it, referring to the 'RELOAD THE CUTTING LINE' section in this manual. Lastly, if the line is too short, remove the battery and manually pull the lines while alternately pressing down and releasing the trimmer head.
  • L
    Lisa RamirezAug 20, 2025
    How do I load the line into the trimmer head properly on my Ego Power+ STA1500?
    • M
      meyersrickeyAug 20, 2025
      If you are unable to load the line into the trimmer head of your Ego Power+ Trimmer properly during line replacement, make sure that you align the LOAD lines with the eyelets first. Then, insert the line into the mounting hole, which is located inside the eyelet.
  • K
    Karen GomezAug 23, 2025
    Why won't the line advance on my Ego Power+ STA1500 Trimmer head?
    • J
      jimmy75Aug 23, 2025
      If the line won't advance on your Ego Power+ Trimmer head, possible causes include: * The motor shaft or trimmer head is bound with grass. Solution: Stop the trimmer, remove the battery, and clean the motor shaft and trimmer head. * There is not enough line on the spool. Solution: Remove the battery and replace the cutting line. * The trimmer head is dirty. Solution: Remove the battery and clean the spool, lower cover assembly, and upper cover. * The line is tangled in the trimmer head assembly. Solution: Remove the battery, remove the line from the spool, and rewind it. * The line is too short. Solution: Remove the battery and pull the lines manually while alternately pressing down and releasing the trimmer head.
  • J
    Jennifer JacksonAug 27, 2025
    How to troubleshoot an Ego Power+ Trimmer that fails to start?
    • D
      David WhiteAug 28, 2025
      If your Ego Power+ Trimmer fails to start, make sure the battery pack is correctly attached to the power head. If it is, remove the battery and check the contacts, then reinstall the battery pack until it snaps into place to ensure proper electrical contact. A depleted battery can also prevent starting; charge it using the EGO chargers listed in this manual. Finally, ensure you are pressing down the lock-off lever and holding it while simultaneously depressing the trigger to turn on the line trimmer.
  • T
    Timothy MillsAug 30, 2025
    How to prevent grass from wrapping around my Ego Power+ STA1500 Trimmer head?
    • A
      Adam Mcguire MDAug 30, 2025
      To prevent grass from wrapping around the trimmer head and motor housing of your Ego Power+ Trimmer, avoid cutting tall grass at ground level. Instead, cut tall grass from the top down, removing no more than 20 cm in each pass.
  • K
    Kathy MitchellSep 1, 2025
    What to do if the blade is not cutting the line on my Ego Power+ STA1500 Trimmer?
    • M
      Mrs. Elizabeth WalterSep 1, 2025
      If the blade on your Ego Power+ Trimmer isn't cutting the line, it's likely that the line-cutting blade on the edge of the guard has become dull. Sharpen the blade with a file or replace it with a new one.
  • R
    robert39Sep 4, 2025
    What causes cracks on the trimmer head of my Ego Power+ STA1500?
    • W
      William BarkerSep 4, 2025
      If you notice cracks on the trimmer head or the lower cover assembly comes loose with the spool base on your Ego Power+ Trimmer, it indicates that the trimmer head is worn out. Replace the trimmer head immediately, following the 'TRIMMER HEAD REPLACEMENT' section in this manual.
  • T
    Tiffany GarciaSep 8, 2025
    How to fix Ego Power+ Trimmer that fails to start?
    • A
      Aaron StarkSep 8, 2025
      If your Ego Power+ Trimmer fails to start, it could be due to several reasons: * The battery pack might not be properly attached. Solution: Attach the battery pack to the power head. * There might be poor electrical contact. Solution: Remove the battery, check the contacts, and reinstall the battery pack until it clicks into place. * The battery pack could be depleted. Solution: Charge the battery pack using compatible EGO chargers. * The lock-off lever and trigger aren't being used correctly. Solution: Press down the lock-off lever and hold it, then depress the trigger.
  • K
    Kyle SharpSep 12, 2025
    What to do if grass wraps around the Ego Power+ Trimmer head and motor housing?
    • J
      James WiseSep 12, 2025
      If grass wraps around the trimmer head and motor housing of your Ego Power+ Trimmer, it's likely because you're cutting tall grass at ground level. To prevent this, cut tall grass from the top down, removing no more than 20 cm in each pass.
  • F
    franklinstevenSep 13, 2025
    What to do if the blade on my Ego Power+ Trimmer is not cutting the line?
    • R
      Ryan BakerSep 13, 2025
      If the blade on your Ego Power+ Trimmer isn't cutting the line, the line-cutting blade on the edge of the guard may have become dull. Sharpen it with a file or replace it with a new blade.

Summary

Safety Instructions and Symbols

Safety Symbols Explained

Explains the meaning and importance of various safety symbols used in the manual.

General Safety Warnings

Provides crucial safety warnings to prevent injury, electric shock, or fire.

Safety and Usage Guidelines

Work Area and Personal Safety

Covers safety practices for the work environment and personal protection.

Power Tool and Battery Use

Guidelines for proper operation, maintenance, and care of power and battery tools.

Service, Training, and Preparation

Details on tool servicing, user training, and preparation for operation.

Operation and Assembly Instructions

Operation Guidelines

Key instructions for operating the line trimmer safely and effectively.

Maintenance, Storage, and Specifications

Guidance on maintenance, storage, and product specifications.

Product Description and Assembly

Overview of the attachment, its parts, and assembly steps.

Operational Procedures and Maintenance

Pre-Use Checks and Trimmer Usage

Steps for checking the tool before use and general operating practices.

Cutting Line Management

Guidance on adjusting and replacing the trimmer's cutting line.

Blade Replacement and Unit Cleaning

Procedures for replacing blades and cleaning the trimmer unit.

Gear Lubrication and Storage

Instructions for lubricating transmission gears and storing the unit.

Troubleshooting and Problem Solving

Common Starting and Stopping Issues

Diagnoses and solves common problems like failure to start or stopping during use.

Line Advancement and Cutting Issues

Resolves problems with line feed, cutting performance, and grass wrapping.

Assembly and Loading Problems

Solutions for loose components and difficulties loading the cutting line.

Warranty Policy and Service Information

EGO Warranty Policy Details

Outlines the terms and conditions of the EGO product warranty.

Obtaining Service and Limitations

Explains how to get service and details additional warranty limitations.

Overview

The EGO STA1500 is a line trimmer attachment designed for use with the EGO 56V Lithium-Ion Power Head PH1400E. This attachment is intended for trimming grass and weeds around porches, fences, and decks.

Function Description:

The line trimmer attachment utilizes a bump head cutting mechanism with a 2.4 mm nylon twist line to cut grass and weeds. The design allows for the release of additional cutting line without stopping the motor by lightly tapping the trimmer head on the ground during operation. The attachment is designed for efficient and safe operation when connected to a compatible EGO power head.

Important Technical Specifications:

  • Cutting Mechanism: Bump Head
  • Line Diameter: 2.4 mm nylon twist line
  • Cutting Width: 38 cm
  • No-Load Speed: 5000/6000 min⁻¹
  • Weight (Without battery pack): 1.59 kg
  • Recommended Operating Temperature: 0°C–40°C
  • Recommended Storage Temperature: -20°C–70°C
  • Sound Pressure Level: 70 dB(A)
  • Compatibility: For use only with the 56V Lithium-Ion Power Head PH1400E.

Usage Features:

  • Assembly: The guard is mounted onto the shaft base using two screws and spring washers. The line trimmer attachment connects to the power head as described in the PH1400E operator's manual.
  • Starting/Stopping: Refer to the "STARTING/STOPPING THE POWER HEAD" section in the PH1400E operator's manual for instructions.
  • Adjusting Cutting Line Length: Line can be released by lightly tapping the trimmer head on the ground while operating. If the line becomes too short or breaks, it can be reloaded by following the "LINE REPLACEMENT" instructions.
  • Line Replacement:
    1. Remove the battery pack.
    2. Remove any remaining cutting line.
    3. Cut 5m of new cutting line (about 5 times the length of the trimmer aluminum shaft).
    4. Insert the line into the mounting hole inside the eyelet. Push and pull until equal amounts of line appear on both sides.
    5. Press and rotate the lower cover assembly in the arrow direction to wind the line onto the spool until approximately 14cm of line is showing on each side.
    6. Push the lower cover assembly down while pulling on the lines to manually advance the line and check for proper assembly.
    • If the cutting line breaks from the line outlet or doesn't release, remove the battery pack, press the release tabs on the upper cover, and remove the lower cover assembly. Then, re-insert the line and reassemble.
  • 3-Teeth Blade Replacement (if applicable):
    1. Remove the lower cover assembly.
    2. Insert the stabilizer and use an impact socket wrench to loosen the nut.
    3. Remove all parts except the inner flange and nut.
    4. Mount the blade onto the motor shaft.
    5. Tighten the blade.
  • Safety Precautions:
    • Always wear eye protection, hearing protection, heavy long pants, boots, and gloves.
    • Clear the work area of children, bystanders, and pets (at least 15m away).
    • Do not operate the machine while tired, ill, or under the influence of drugs or alcohol.
    • Ensure the guard is firmly in place.
    • Do not use metal-reinforced line, wire, or rope.
    • Maintain proper footing and balance.
    • Do not overreach.
    • Stop the motor and cutting unit if approached.
    • The shoulder strap acts as a quick-release mechanism in hazardous situations.
  • Environmental Protection: Do not dispose of electrical appliances as unsorted municipal waste. Use separate collection facilities.

Maintenance Features:

  • General Maintenance:
    • Before inspecting, cleaning, or servicing, stop the motor, wait for all moving parts to stop, and remove the battery pack.
    • Clear any grass wrapped around the motor shaft or trimmer head.
    • Use a small brush or vacuum cleaner to clean air vents.
    • Clean the unit with a damp cloth and mild detergent.
    • Avoid strong detergents or solvents on plastic parts.
    • Periodically sharpen or replace the line-cutting blade on the guard.
  • Transmission Gears Lubrication:
    • Check the gear case grease level approximately every 50 hours of operation by removing the sealing screw.
    • If no grease is visible, hold the line trimmer on its side with the sealing screw facing upwards.
    • Use the multi-function wrench to loosen and remove the sealing screw.
    • Inject grease (up to 3/4 capacity) into the screw hole using a grease syringe (not included).
    • Tighten the sealing screw.
  • Storage:
    • Remove the battery pack.
    • Clean the tool thoroughly.
    • If stored separately from the power head, fit the end cap on the attachment shaft to prevent dirt from entering the coupler.
    • Store in a dry, well-ventilated, locked-up area, out of reach of children.
    • Do not store near fertilizers, petrol, or other chemicals.
  • Troubleshooting: The manual provides solutions for common issues such as the line trimmer failing to start, stopping while cutting, not advancing line, grass wrapping, the blade not cutting, cracks on the trimmer head, and issues with line loading. Solutions often involve checking the battery pack, cleaning components, replacing line, or allowing the unit to cool.

Ego Power+ STA1500 Specifications

General IconGeneral
BrandEgo Power+
ModelSTA1500
CategoryTrimmer
LanguageEnglish

Related product manuals