3.
MANUAL MODE
3. Tighten the oat switch adjustor
lock to secure the adjustor in
place.
1. Loosen the oat switch adjustor
lock.
The pump oat switch can also function in manual mode which allows the
pump to continually operate regardless of the water level.
2. Place the oat switch into the
oat switch adjustor so that it is
positioned vertically.
IMPORTANT: THE PUMP MUST ALWAYS BE SUPERVISED WHEN IN
MANUAL MODE TO AVOID THE RISK OF RUNNING DRY.
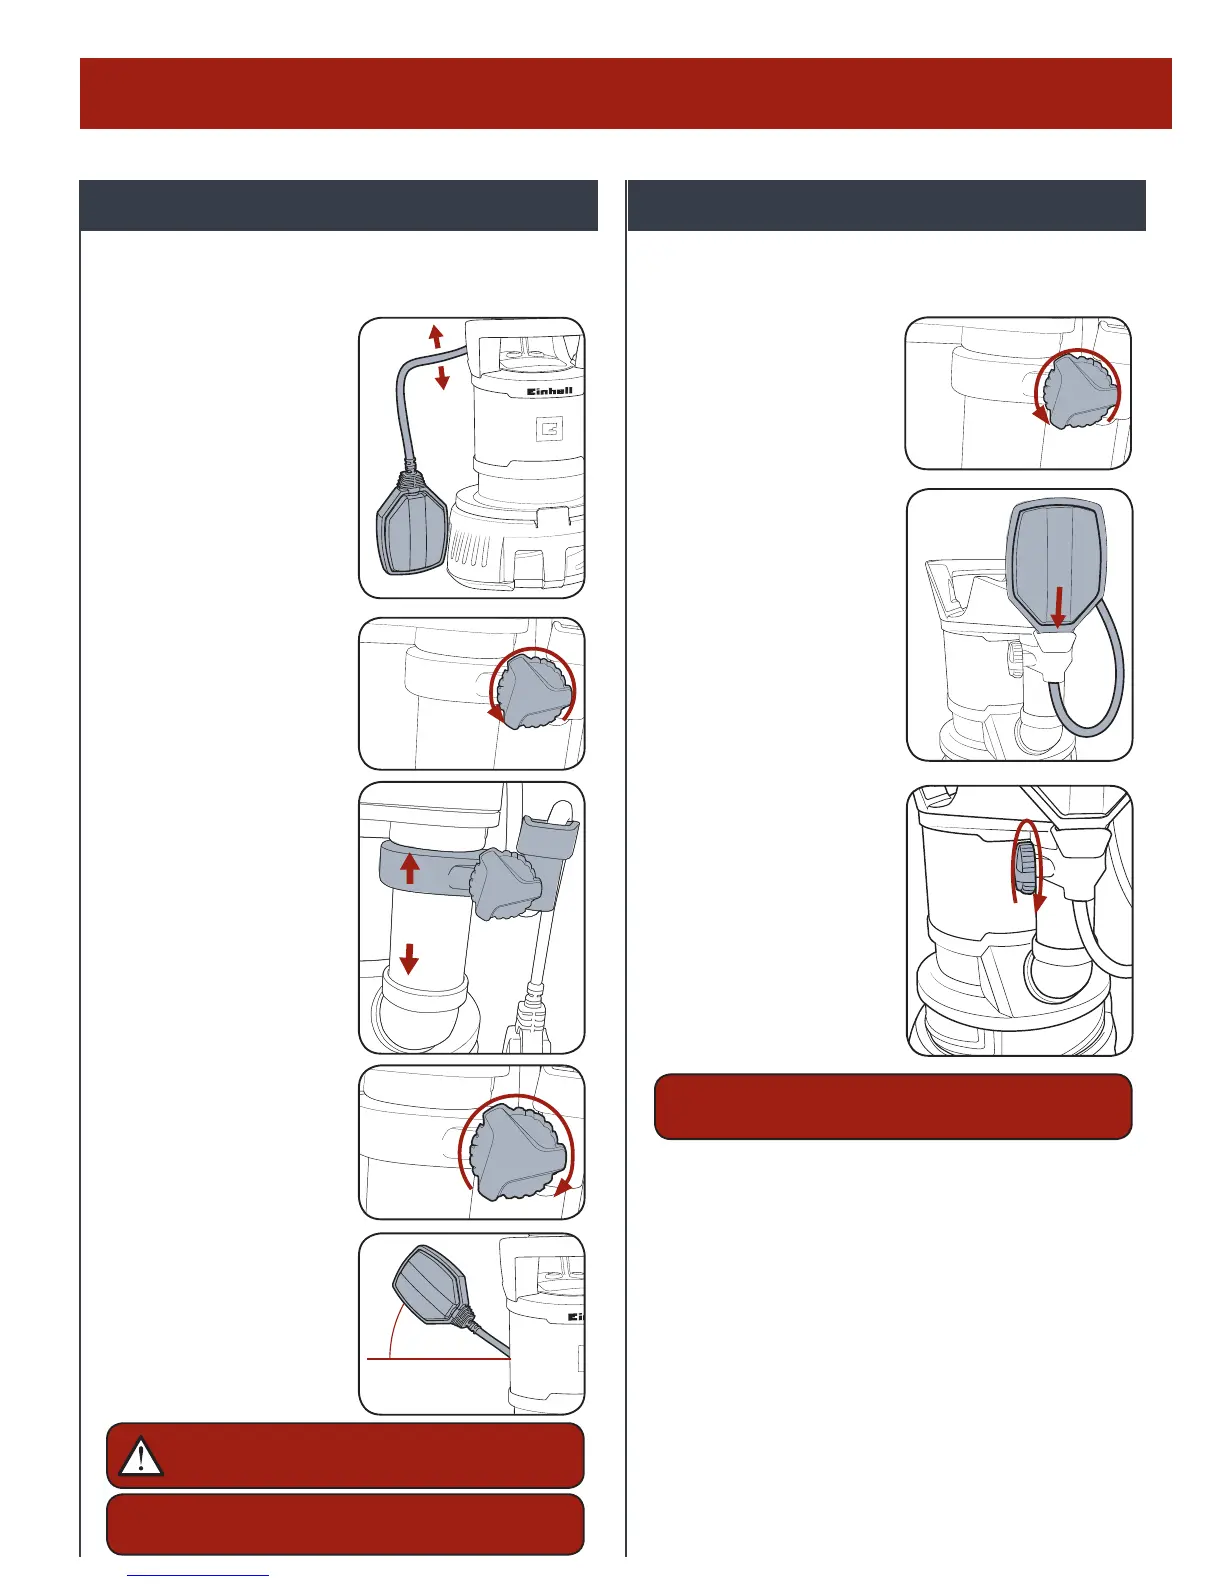
2.
FLOAT SWITCH
PREPARATION
5. When the oat switch is about
30° higher than horizontal, the
pump will turn ‘on’ and operate.
When the oat switch is lower
than horizontal it will turn o.
4. Tighten the oat switch adjustor
lock to secure the adjustor in
place.
1. When the oat switch cable
is able to move freely the
pump will function down to
a water depth of 50mm and
automatically shut o.
The pump is tted with a oat switch, which controls how the pump
switches on and switches o.
2. To set the pump to switch o at
a higher water level, loosen the
oat switch adjustor lock.
3. Raise or lower the height of the
oat switch adjuster to set the
desired on / o heights.
NOTE: A higher adjustor setting
will allow the pump to turn on
and o at a higher water level.
IMPORTANT: MAKE SURE THAT THE FLOAT SWITCH DOES
NOT TOUCH THE BOTTOM BEFORE SWITCHING OFF TO
AVOID THE RISK OF RUNNING DRY.
NOTE: THERE MUST BE A MINIMUM OF 100MM OF CABLE FROM THE
ADJUSTOR TO THE FLOAT SWITCH.

 Loading...