- 4 -
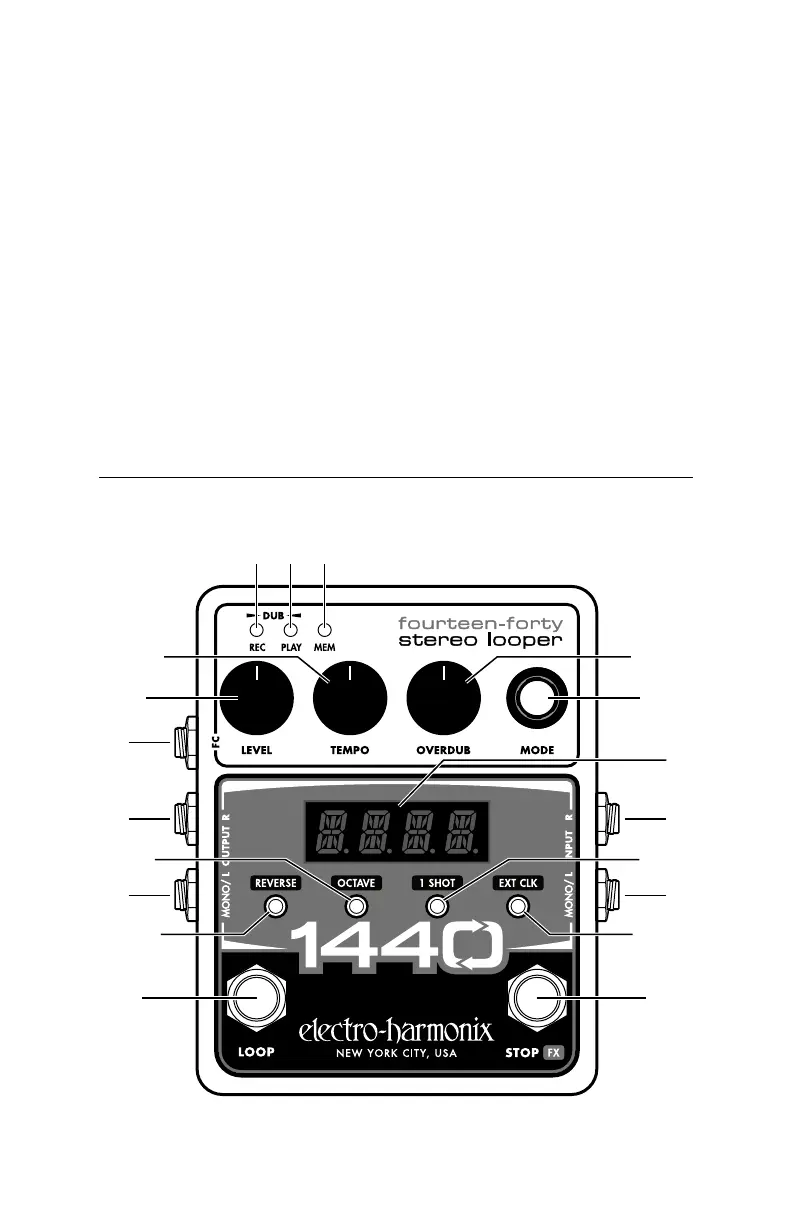
Controls, Connections and Indicators
4. RECORD: When you’re ready to record a loop, press the LOOP footswitch.
next beat 1.
5. CLOSE THE LOOP: When you’re ready to close the loop, press the LOOP foot-
switch. Recording will stop on the next beat 1.
Note: When making loops while the 1440 is synchronized to MIDI Clock, the
loop lengths are quantized to the next bar. The bars can be either 3 or 4
beats in length.
More on EXT CLK: See page 10 for more information on using MIDI Clock and
External Clock mode including setting the number of beats per bar and how
the 1440 reacts to receiving the MIDI Start command.
Note: We recommend you make all necessary MIDI connections and enable
EXT CLK on the 1440 before starting playback on the MIDI Clock master.
6 7 8
1 9
4
12 13
32
1411
10
5
19
18
17
16
15
Front Panel Controls