Do you have a question about the Electrolux Compact and is the answer not in the manual?
Provides key technical data like power supply, heater element, fuse, dimensions, and water pressures.
Explains how to correctly install the discharge hose for proper water drainage.
Covers the capacitor for the circulation pump and the pressure switch for water level.
Details the power output and resistance of the heating element.
Details the rating, resistance, and performance of the circulation and drain pumps.
Explains the function of thermostats and identifies the programmer unit.
Covers detergent/rinse aid dispensers and the inlet valve with their specifications.
Explains the function of the anti-flood switch that powers off components.
Explains the operation, regeneration process, and water hardness considerations.
Shows the location of the door opener and seal.
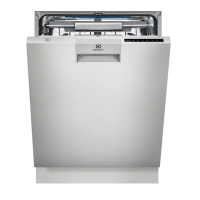
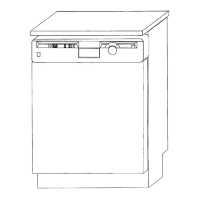
Identifies switches, programmer, and signal lamps on the control panel.
Illustrates the housing, dispenser coils, door switch, base rails, and filters.
Shows the location of the interference filter, thermostats, base plate, and heating element.
Shows the placement of inlet/drain hoses, softener, and valves.
Illustrates the float switch, pressure switch, drain pump, air chamber, and circulation pump.
Shows the spray arm, sealing ring, and pump housing.
Illustrates the cutlery basket, cup support, dish rack, and basket roller.
Provides a schematic showing the water flow path through various components.
Details how water enters the machine and the function of the level control system.
Explains the function of the circulation pump, its motor, and the spray tube rotation.
Describes the two-part strainer system for trapping food particles and ensuring clean dishes.
Explains how the level control container and pressure switch manage water filling.
Describes the inlet hose connection and the inlet valve's function.
Details the mechanisms for preventing flooding and water damage.
Explains the system to prevent contaminated water from entering the mains.
Describes the drain pump, inner/outer hoses, and their function.
Explains the anti-siphon valve's role in preventing siphoning effects.
Details the process of regeneration in the water softener, including brine formation.
Explains how thermostats measure temperature, their tolerances, and breaking values.
Lists the colour coding for different thermostat temperature ratings.
Describes the heater element and thermostat system for water heating.
Explains the safety system to prevent overheating and its trip conditions.
Presents the primary wiring diagram for the DSC 14 model.
Lists wire colours, numbers, and their corresponding component connections.
Shows the sequence of component activation across program steps.
Details program times, water level, and temperature settings for different programs.
Presents the primary wiring diagram for the DSC 382 model.
Lists wire colours, numbers, and their corresponding component connections for DSC 382.
Shows the sequence of component activation across program steps for DSC 382.
Details program times, water level, and temperature settings for DSC 382.
Explains the cleaning procedure for the coarse and fine filters.
Details how to remove the spray arm and sealing ring.
Describes how to remove the machine's housing for access.
Illustrates the positions of various components after housing removal.
Details the procedure for replacing the front panel and its components.
Explains how to remove the base plate to access functional components.
Shows and labels thermostats, air chamber, switches, programmer, and pumps.
Identifies interference filter, circulation pump, float switch, regeneration valve, and softener.
Explains how the outer and inner doors snap together and can be separated.
Details replacing the door handle, dispenser flap, and seal.
Describes the steps to remove the inner door by releasing hinge pins.
Explains how to access and remove the door switch.
Details removing the rinse aid dispenser unit.
Shows how the detergent dispenser coil is secured.
Shows how the pressure monitor and motor capacitor are mounted.
Explains the air entry for the anti-siphon valve and cleaning procedures.
Describes how thermostats are mounted and removed from the air chamber.
Details the procedure for removing the heater element from the sump.
Explains how to remove the programmer unit from the chassis.
Covers the removal of the switch unit and float switch.
Details how to remove the inlet valve from the chassis.
Describes how to remove the circulation pump from its holder.
Explains the procedure for removing the drain pump and hose clamps.
Details the steps to dismount the water softener unit.
Explains how to remove the regeneration valve after undoing screws.
Provides service solutions for leakages, focusing on container assembly and pressure switch adjustment.
Explains how to address low water levels by cleaning the container or adjusting the pressure switch.
Addresses issues where the drain pump runs continuously due to water protection activation.
Instructs to check the tightness of the locknut under the salt cap.
Highlights additional areas to check for leaks.
Lists checks for symptoms like machine not starting, including door, switch, and fuse.
Provides checks for issues with water intake, like tap open and drain connection.
Lists checks for drainage problems, including strainers, hoses, and pump.
Offers checks for issues like clogged spray tubes, incorrect detergent, or poor loading.
Provides checks for stains on the chassis and patchy dishes, related to water hardness and rinse agent.
Lists checks for drying performance, including programme settings and dish placement.
Suggests checks for excessive foam, related to rinse agent and detergent type.
Provides checks for heating issues, focusing on thermostat and heater element faults.
| Brand | Electrolux |
|---|---|
| Model | Compact |
| Category | Dishwasher |
| Language | English |